

BLOG
The Freelance Handbook

The second in our six-part series of practical manuals, The Freelance Handbook is your definitive guide to being your own boss.
New year, new start – right? If you’ve made it your new year's resolution to go freelance then you're in luck: there's never been a better time to be your own boss. With more and more employers outsourcing their work, and social media connecting you better than ever before, it's a great time to take the plunge into freelance waters.
But the road to solo success isn't always easy. So whether you're thinking about making the leap or are a seasoned freelance pro, pick up a copy of The Freelance Handbook – 116 pages of practical tips and essential advice for making it alone.
From setting your rates and managing your time to getting noticed, winning work and more, The
Chapters include:
- Go it alone
- Win more clients
- Work smarter
- Manage your money
- Be more business savvy
- Promote yourself
- Well-being
- Essential resources
The Freelance Handbook has sold out in print, but you can still buy an ebook edition using the free Computer Arts app on Apple Newsstand.
Did you enjoy this article? I would love to hear your thoughts, so don’t be shy and comment below! Please don’t forget to subscribe to my RSS-feed or follow my feed on Twitter, Google+ and Facebook! If you enjoyed the following article we humbly ask you to comment, and help us spread the word! Or, if you would like, drop me an email.
Manufactured Home Rendering
Recently, I was asked to help explain the design intent for a semi-custom manufactured house manufacturer. The designer had some great ideas to give the manufactured home some curb appeal, but was lacking the ability to visually show the owners her design. Initially, the designer contracted some architecture students, but the illustrations were not successful.


“This is absolutely amazing and so incredibly realistic! I am so excited!!!”
Also, along with the exterior, the designer had some ideas for the bedroom. See, most manufactured homes have the bedroom in the back, and the back isn't seen by most, so lacks character. In this manufactured home community, which is in Florida, the homes are located on a beautiful lake. The back of the home is on the road, and is seen by most, and needed some curb appeal. The challenge was, they wanted windows on the back, but they wanted to make sure that the bedroom has little natural light.

Manufactured Home Interior Bedroom Rendering
This was a fun project and I was extremely satisfied in helping someone convey their design ideas; that's what I do!
Did you enjoy this article? I would love to hear your thoughts, so don’t be shy and comment below! Please don’t forget to subscribe to my RSS-feed or follow my feed on Twitter, Google+ and Facebook! If you enjoyed the following article we humbly ask you to comment, and help us spread the word! Or, if you would like, drop me an email.
Should you go freelance?

Have you ever considered going freelance?
Perhaps it’s something you’d like to try but you’re concerned about the financial risks. Or maybe you’re already taking freelance work ‘on the side’ and are wondering whether to take the plunge into full time freelancing.
In this video I share some points to consider, when deciding whether or not to go freelance. This advice is based on my own experience of moving from permanent employment, to freelance copywriting.
Visit my website:
http://gilbhub.com
Follow me on Twitter:
https://twitter.com/hannagilb
My LinkedIn:
http://linkd.in/1vizL8F
@WorkHubs:
http://www.atworkhubs.co.uk
Got questions about the freelancing life? Or are you a freelancer who can offer some top tips? Leave me a comment or connect with me on Twitter @hannagilb
For more tips on copywriting and the freelance life, visit me at Gilbhub.com
Did you enjoy this article? I would love to hear your thoughts, so don’t be shy and comment below! Please don’t forget to subscribe to my RSS-feed or follow my feed on Twitter, Google+ and Facebook! If you enjoyed the following article we humbly ask you to comment, and help us spread the word! Or, if you would like, drop me an email.
Watch The Designer's Pricing Class Trailer:

This class is a step-by-step guide to help you get paid what you're worth:
50 videos in five entertaining lessons that take you through understanding the market, learning how to price projects, acquiring the negotiating skills you need, and learning how to write a sexy proposal.
Five documents and templates such as a checklist for your first call with your client, a proposal template, a step-by-step guide on how to price like a pro and exercises you can do by yourself or with a friend.
Online tools to help you calculate your break-even rate and write a great proposal in just a few steps
Lifetime access to the class (including any updates) from any device, anywhere in the world
Your questions answered by the mentors
Bonus: 30% discount for Happy Socks
Bonus: Free 3 months of Studio account on Qwilr
The class will launch on January 13th, 2015 with 15% off for the first 72 hours.
We're giving away a free ticket!
If you want to win a free ticket to our awesome class, all you have to do is share our trailer (with the following link) on your Twitter/Facebook account:
http://youtu.be/Rx9uSYP-zL0?ref=info@bobby-parker.com
The winner will be announced tomorrow night on our Twitter and FB page.
Good luck!
- Lior Frenkel
Did you enjoy this article? I would love to hear your thoughts, so don’t be shy and comment below! Please don’t forget to subscribe to my RSS-feed or follow my feed on Twitter, Google+ and Facebook! If you enjoyed the following article we humbly ask you to comment, and help us spread the word! Or, if you would like, drop me an email.
The Real Cost of Architectural Rendering

No matter what professional field you are in, inevitably you will be asked to provide or even justify the cost of your services. It can be difficult to give pricing while trying to make sure that what you are providing pricing for is what any competition is providing pricing for. In addition giving some context for your price and demonstrating that it is reasonable is often times necessary. If you are an architect practicing in Washington State you may show clients the published price surveys that would indicate where you where within the reported percentile and is a good litmus test of your fee structure compared to the rest of the market. In the architectural visualization profession there isn't any "defacto" standard and many studios are good at the old "Bait and Switch" to lure you in. One resource is the 2009 CG architect survey and the information could be interpreted as follows:
In a 2009 worldwide survey, performed by CGarchitect (most influential and reputable online magazine/community focusing on architectural visualization), the average price charged for a high-quality 3D architectural still image is between $1000.00 USD and $2000.00 USD. This is an average price you could expect that paying in this range as being fair for small to medium projects, large projects range from $3,000.00 USD onward depending on the project. While standard 3D animation costs anywhere between US$5000.00 USD and $10000.00 USD , you could expect to pay a fair bit more depending on duration and complexity of video. Obviously, every studio is different and prices vary, but usually the studios that are producing higher quality work, are charging more. If you have worked with rendering studios you probably know you can get cheaper renderings from countries like China and India, downside can be the quality control and all the time spent managing the process to get the results you want. The comprehensive survey on the profession of architectural visualization can be found here:
http://www.cgarchitect.com/2009/11/cgarchitect-2009-industry-survey-results---spotlight-on-the-future-of-the-architectural-visualization-industry
There are some firm hard figures on the monetary level of what are going rates by regions and it gives you a good idea how much you may pay in currency, but I would argue that the cost of renderings is also measured in your time and quality of the end result.
It's All Subjective:
I can say a rendering is bad and the average person off the street might say they see nothing wrong with it, so why should anyone care? This is the dilemma many potential clients face, bottom line is the all mighty dollar and if a cheap $500.00 rendering conveys the idea to the average person, why not just go with the cheapest artist/studio you can find? If it serves your purpose, it is hard to argue against it, and probably a waste of time to even try. So rather than argue the subjective, lets discuss the objective.
$500.00 vs. $1,500.00 Rendering:
The little guy in a foreign country using pirated software and hardware supplemented by their government doesn't have the overhead of a big professional studio. Obviously you can reverse the scenario and the little guy in our country using pirated software working from home has less overhead than a big studio in a foreign country, this isn't about foreign vs. domestic, just pointing out the more typical scenario based from my experience. So pricing doesn't necessarily denote quality so that $500.00 rendering is looking pretty good right about now.
In any case the little guy typically can whip out a rendering that is probably acceptable and you are dealing with an individual which a lot of people like. That $500.00 rendering can also come from a large studio that is basically a render mill pumping out renderings at a very fast pace by the use of hundreds of artist working for cheap, producing renderings via assembly line fashion. Down side is usually that you get different people of varying skill levels each time that studio provides services. What it can come down to is the big studio has back up artist to complete your project if initial artist gets sick or has an emergency comes up, but you aren't guaranteed the same artist working for you from project to project. So at this point there really isn't much mentioned here that helps a potential client make better decision.
For an American company seeking artist specializing in AEC, choosing an American artist/studio who has a strong foundation in our construction industry is a huge bonus in the long run. If you go with someone who doesn't have a strong architectural background you will probably need to assign someone in your office to coordinate with them and this cost you money and adds up real fast. There is also the whole English as a second language which can sometimes make communication less than accurate. Now that $500.00 rendering starts costing a lot more.
Having someone who knows National materials, construction techniques and building codes is very beneficial, saves lots of time for the Client who doesn't have to hold their hand every step of the way. Little things like handrail balusters spaces greater than 4" apart or curbs greater than 6" high can make a rendering appear incorrectly and steal the viewers attention trying to figure out what doesn't look quite right. So a trained professional who charges more can actually save money for the client and more importantly can save a lot of heart ache and revisions.
Selecting an artist/studio by their online portfolio can be difficult for multiple reasons, so if in doubt ask for a reference. There have been plenty of situations where online artist/studios have been called out on stealing others work and showing it as their own. Another item that isn't illegal but questionable is that there are companies out there that sell readymade scenes for people to render and put in their portfolios. The scenes are sold for this purpose, so nothing illegal, but artist/studios are using content not created in-house to pad/build their portfolio, the work doesn't represent what they can do and is misleading. There are also plenty of cases where an artist was a small part of a team and they go off on their own and show the work as their own. So be careful if the work seems world class, but the price is ridiculously low and they can't provide a referral or two.
What it comes down to is finding the artist/studio that is knowledgeable in your industry sector and who has a body of work that you respect and a point of contact that you feel comfortable with at a price point that is in your realistic budget. No simple answers just some things to think about, we have found that there are some fantastic artist/studios in China and the old Soviet Union countries like Serbia or the Ukraine, so it doesn't mean you can't go outside the country to find great reliable talent, just do a bit of homework and make sure you aren't going to do a lot of hand holding for a final product that isn't acceptable.
In conclusion the real cost of architectural renderings may not be the bottom dollar but the end result and your "hassle free" time. And after all on a multimillion dollar project, is a few thousand dollars too high of a price to pay to represent you and your project?
Did you enjoy this article? I would love to hear your thoughts, so don’t be shy and comment below! Please don’t forget to subscribe to my RSS-feed or follow my feed on Twitter, Google+ and Facebook! If you enjoyed the following article we humbly ask you to comment, and help us spread the word! Or, if you would like, drop me an email.
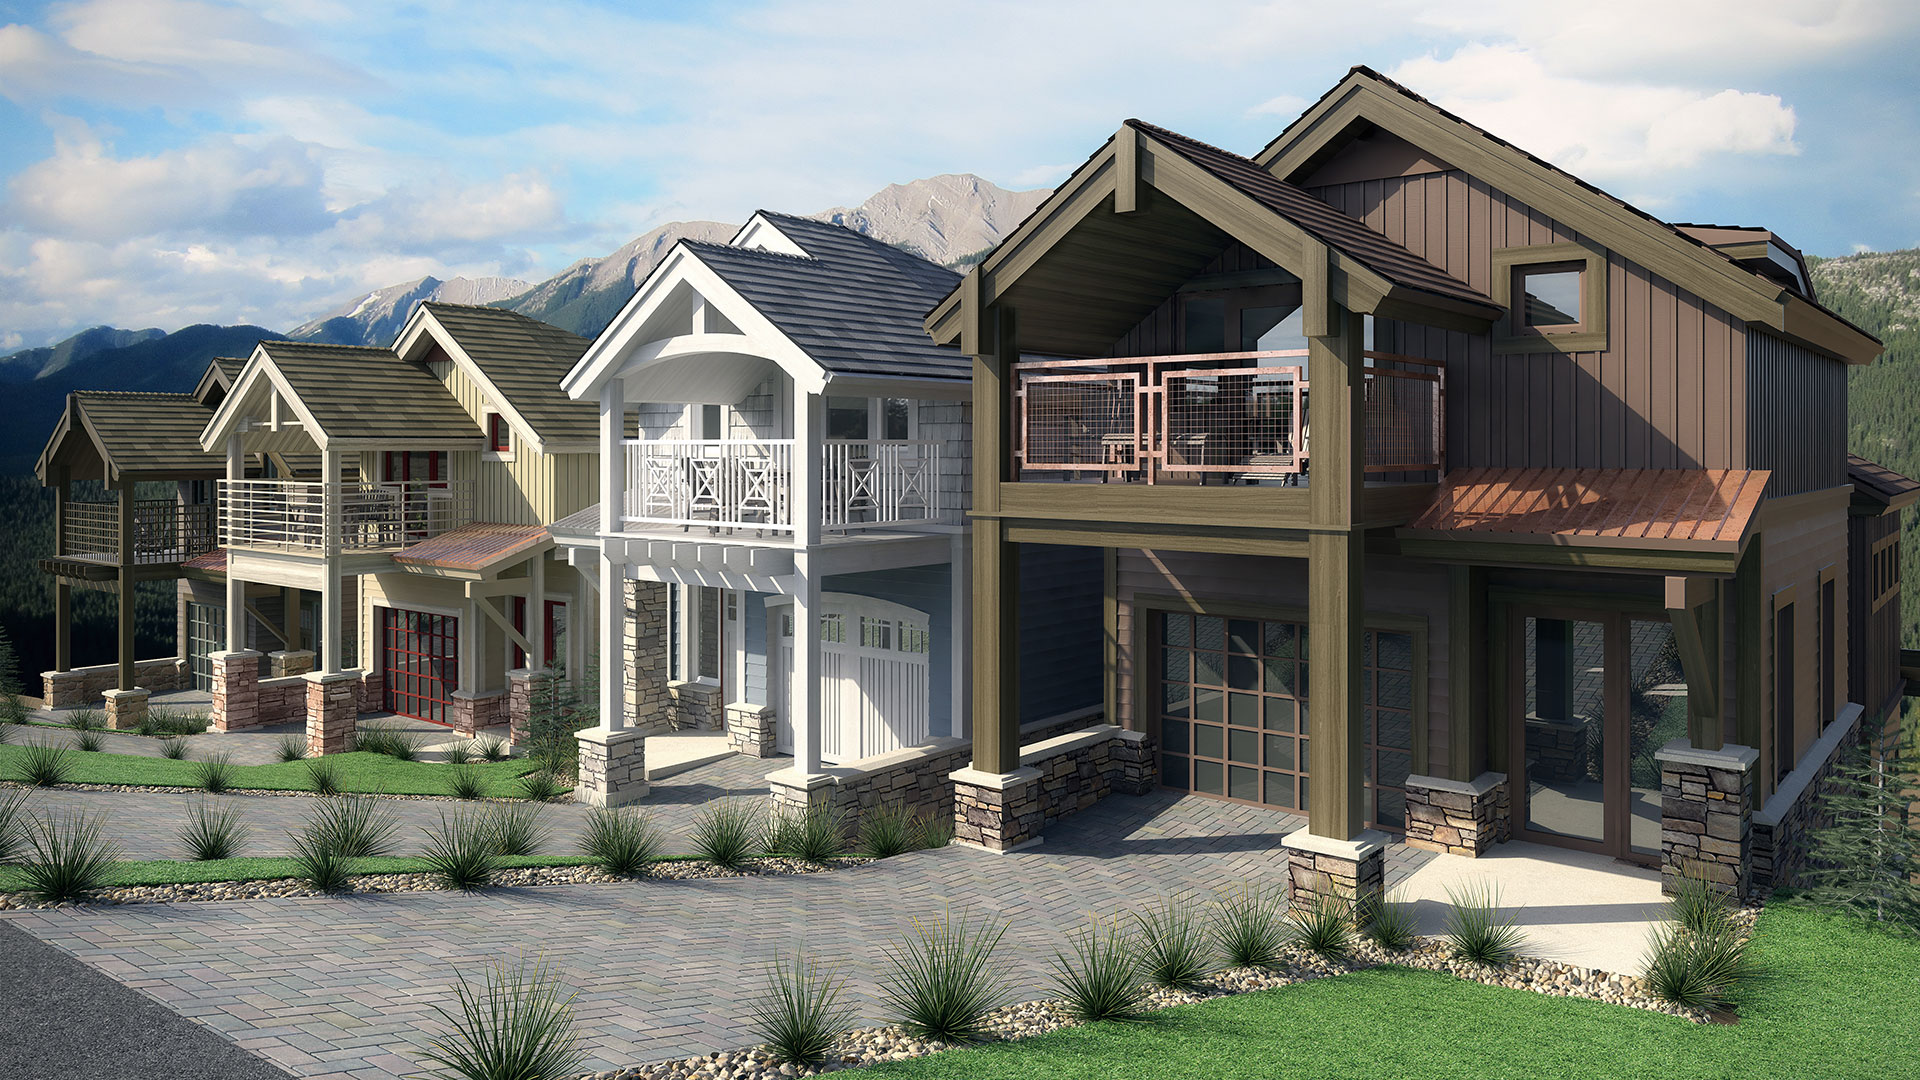
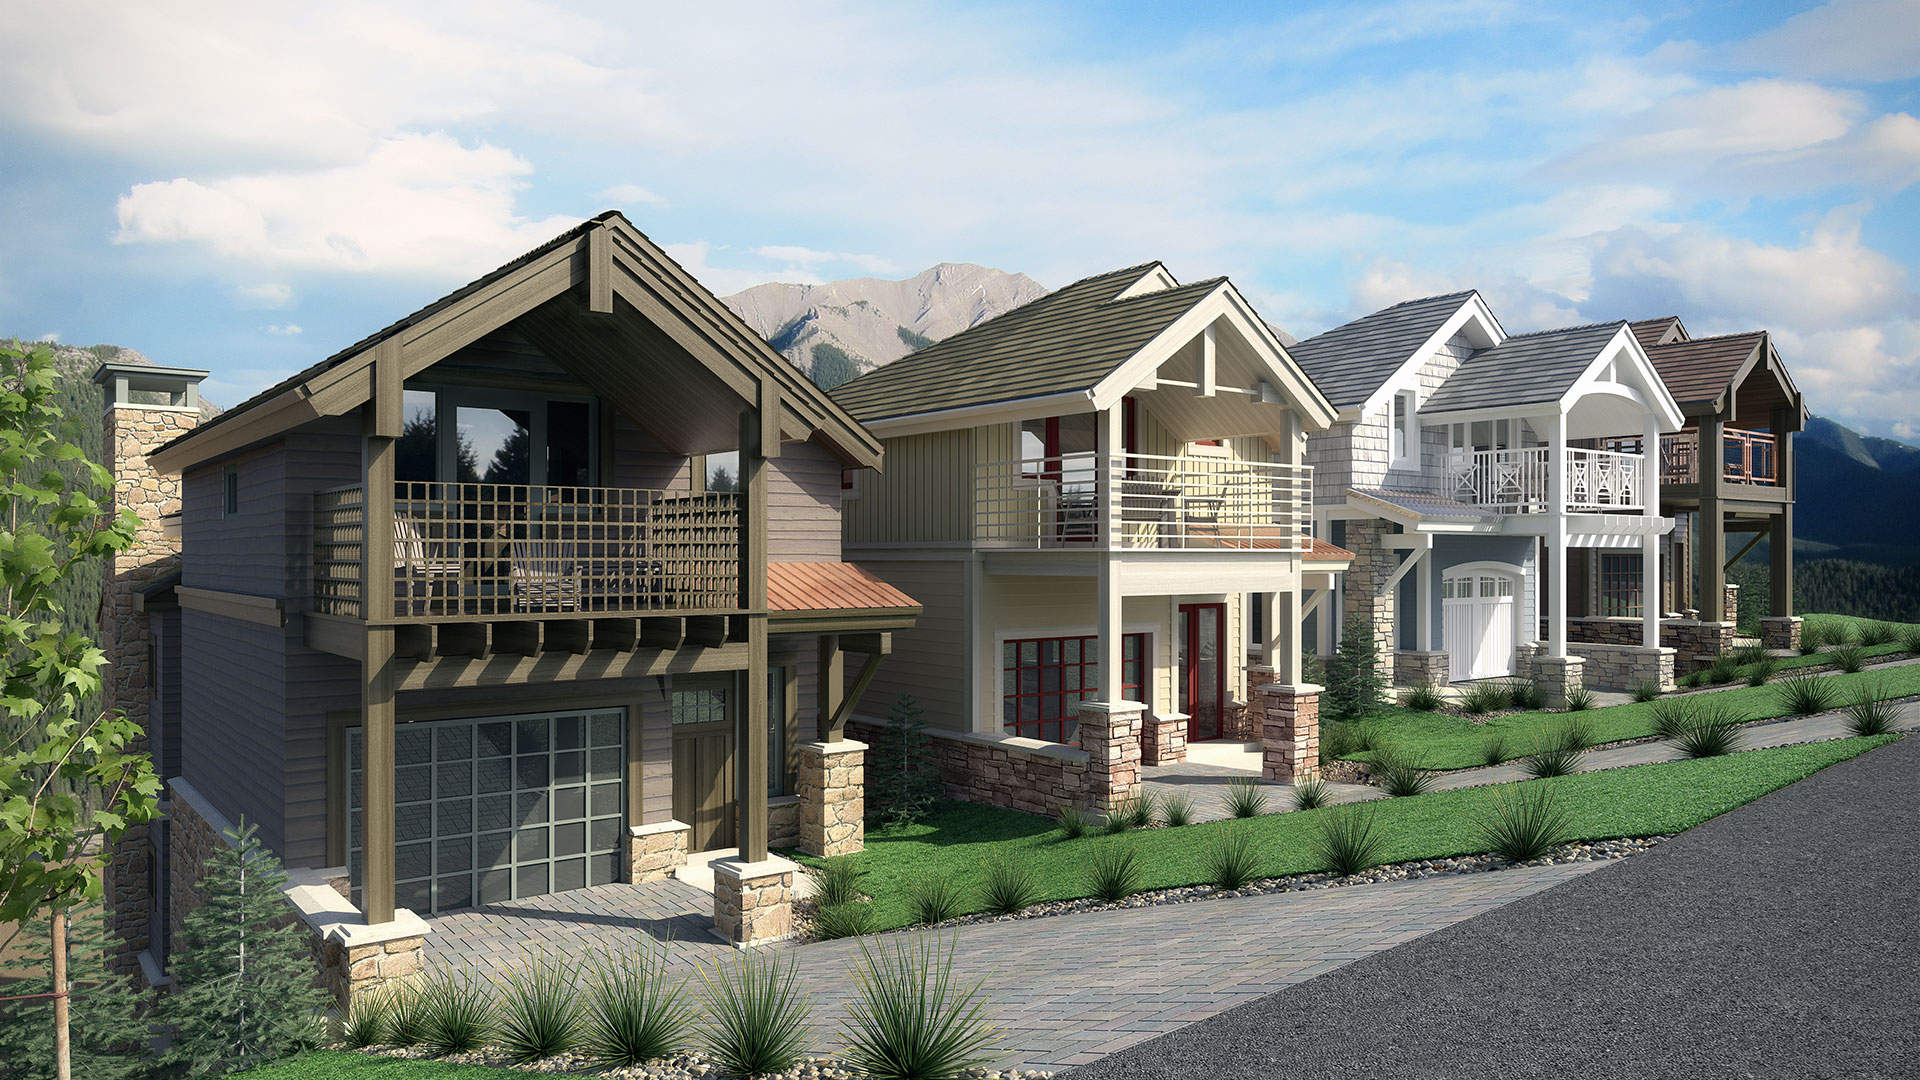
Scenic Mountain Architectural Rendering

Park City, Utah is a scenic mountain community with three world-class resorts and a town filled with activities. Lane Myers, in the construction industry for over 25 years, asked me to create several photo realistic architectural renderings for their homes located in Park City.
Like the majority of my work, I received an email for a quote. The email was from Freedom Design, which isn't the architect on file, but has a relationship with Lane Myers. Lane Myers had seen some of my work done for Freedom Design and asked if I can create a rendering with the same level of realism as they had seen on renderings I did for Freedom. Of coarse, was exited to get started and after they excepted my quote, I dove right in.
First, I received the AutoCAD 2D Drawings, which were very nicely drawn, and I created the 3D model based on the 2D CAD file. Like the majority of 2D CAD files, there were things to work through, but nothing too difficult.
Once the model was completed, I sent some gray-scale proofs, so the builder can verify the accuracy of my 3D model. The gray scales were approved and I started the texture mapping (colors and materials). Once again, I emailed some color proofs. Once the color proofs were approved, I fine tuned materials, worked on lighting and shadow, and delivered some high resolution finals.
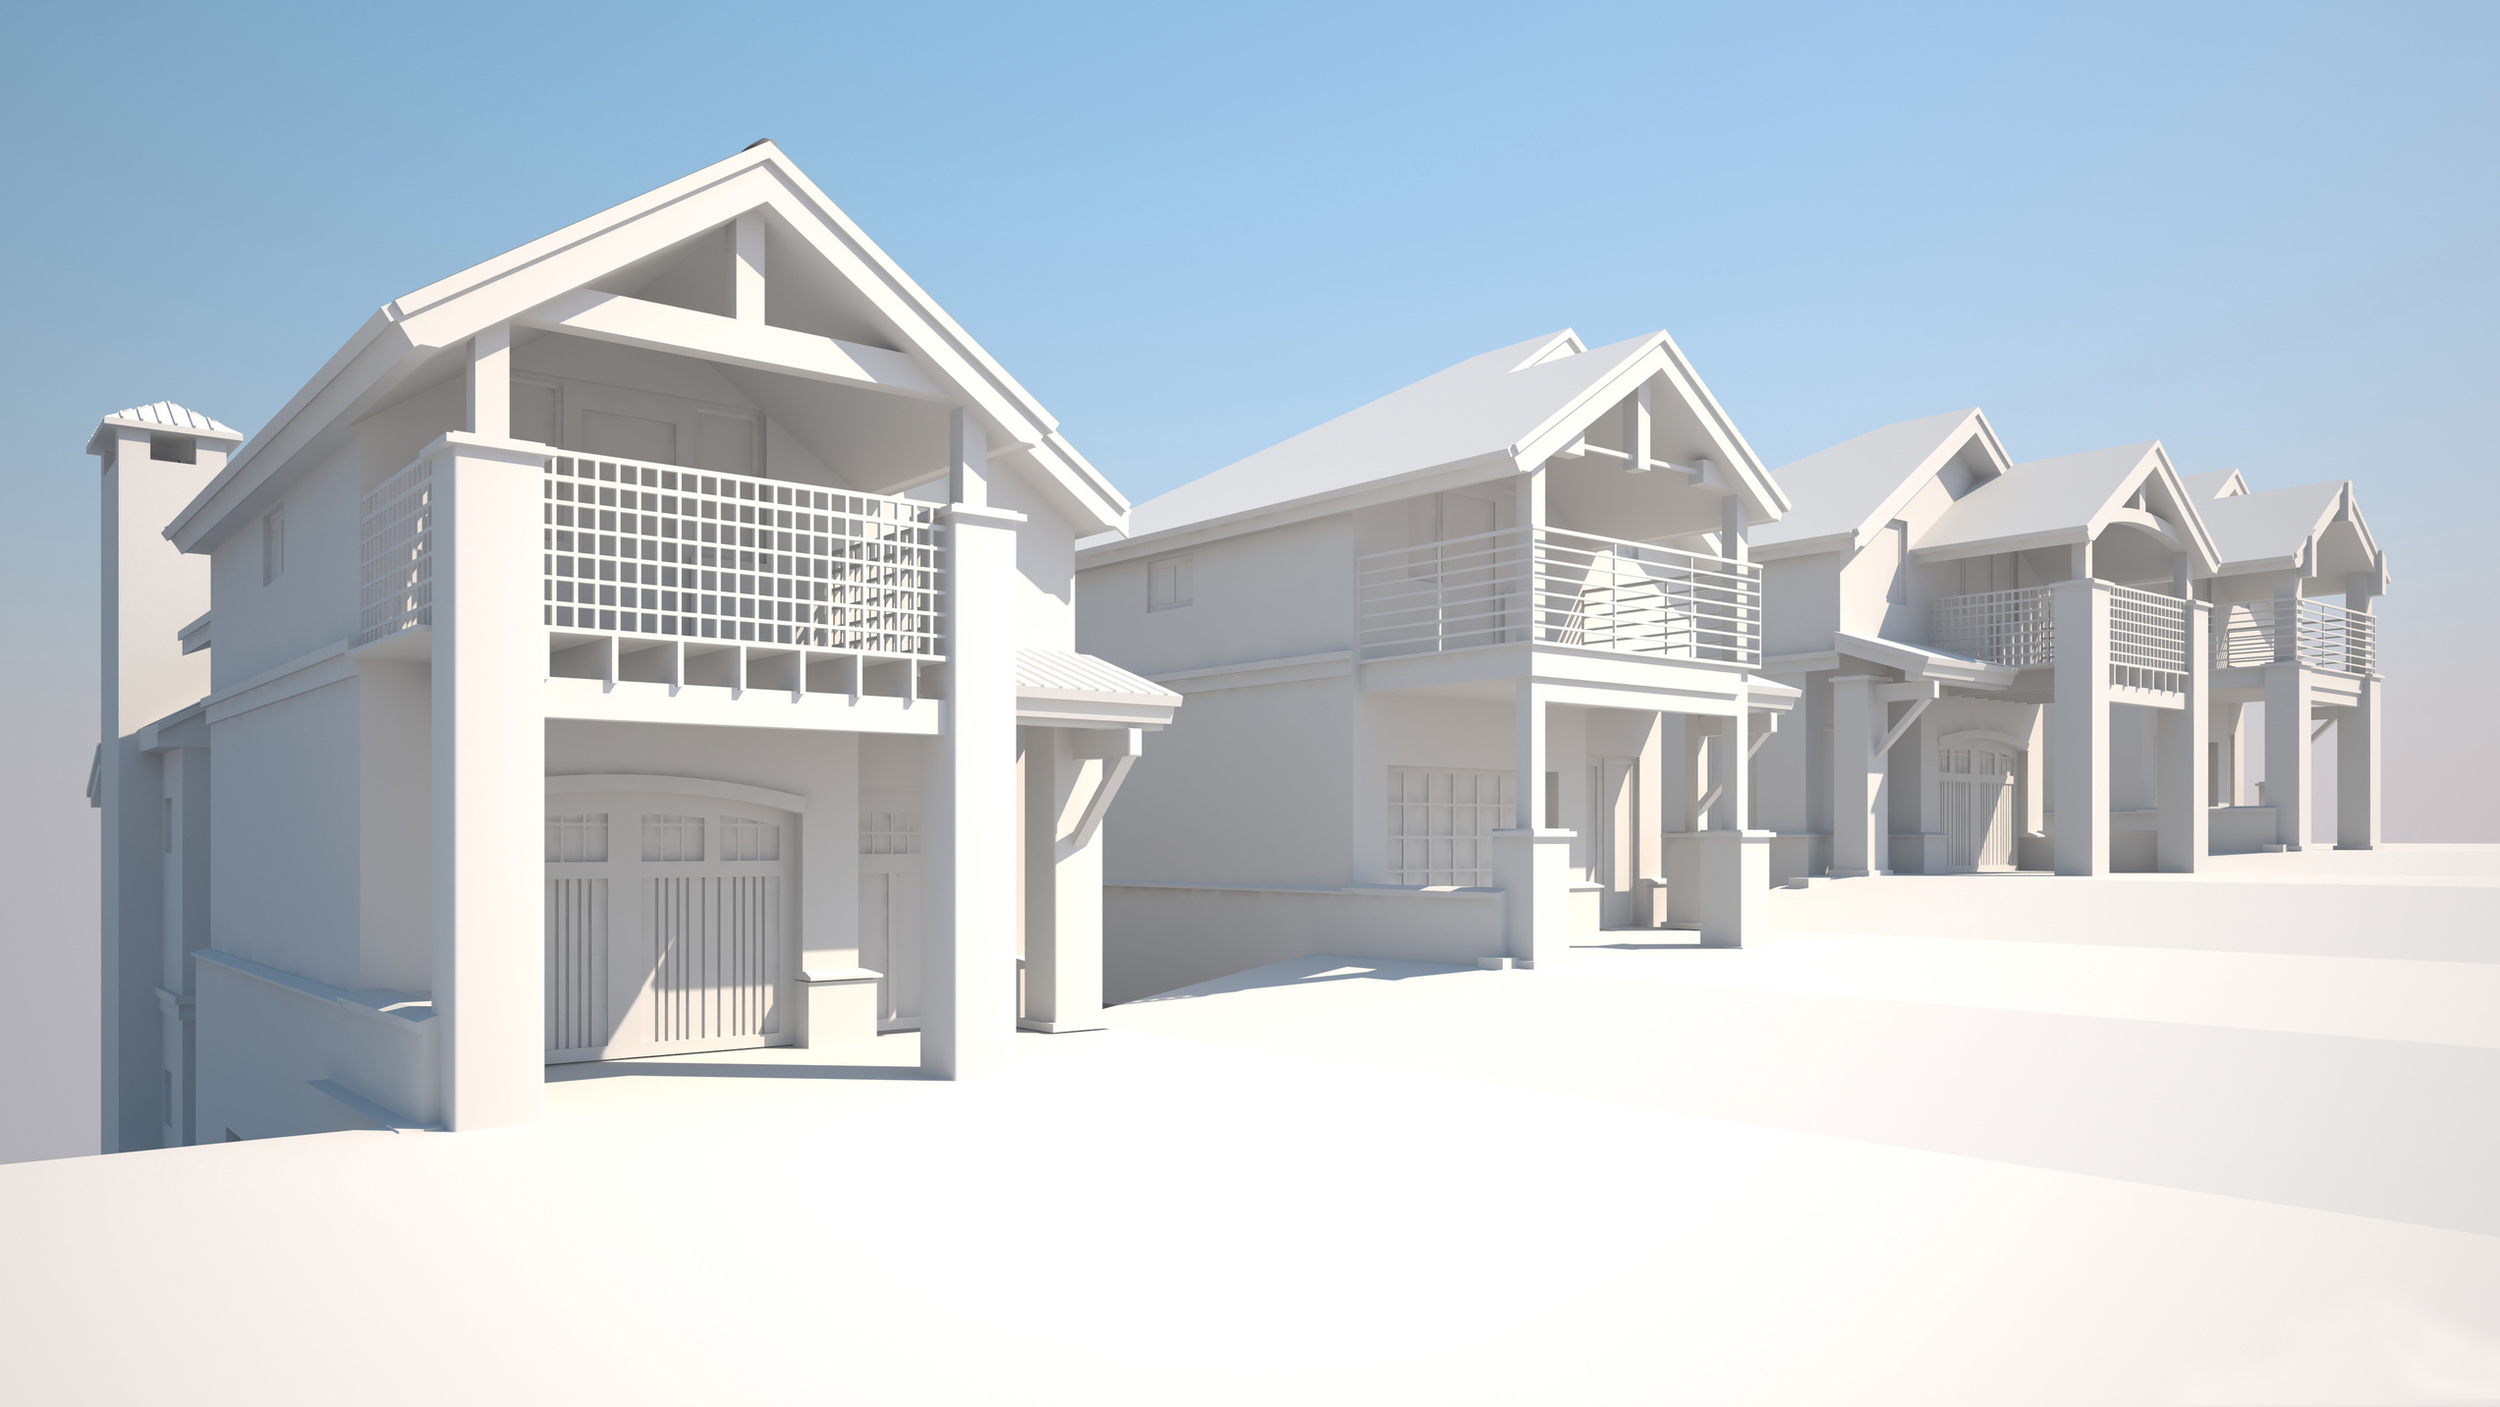
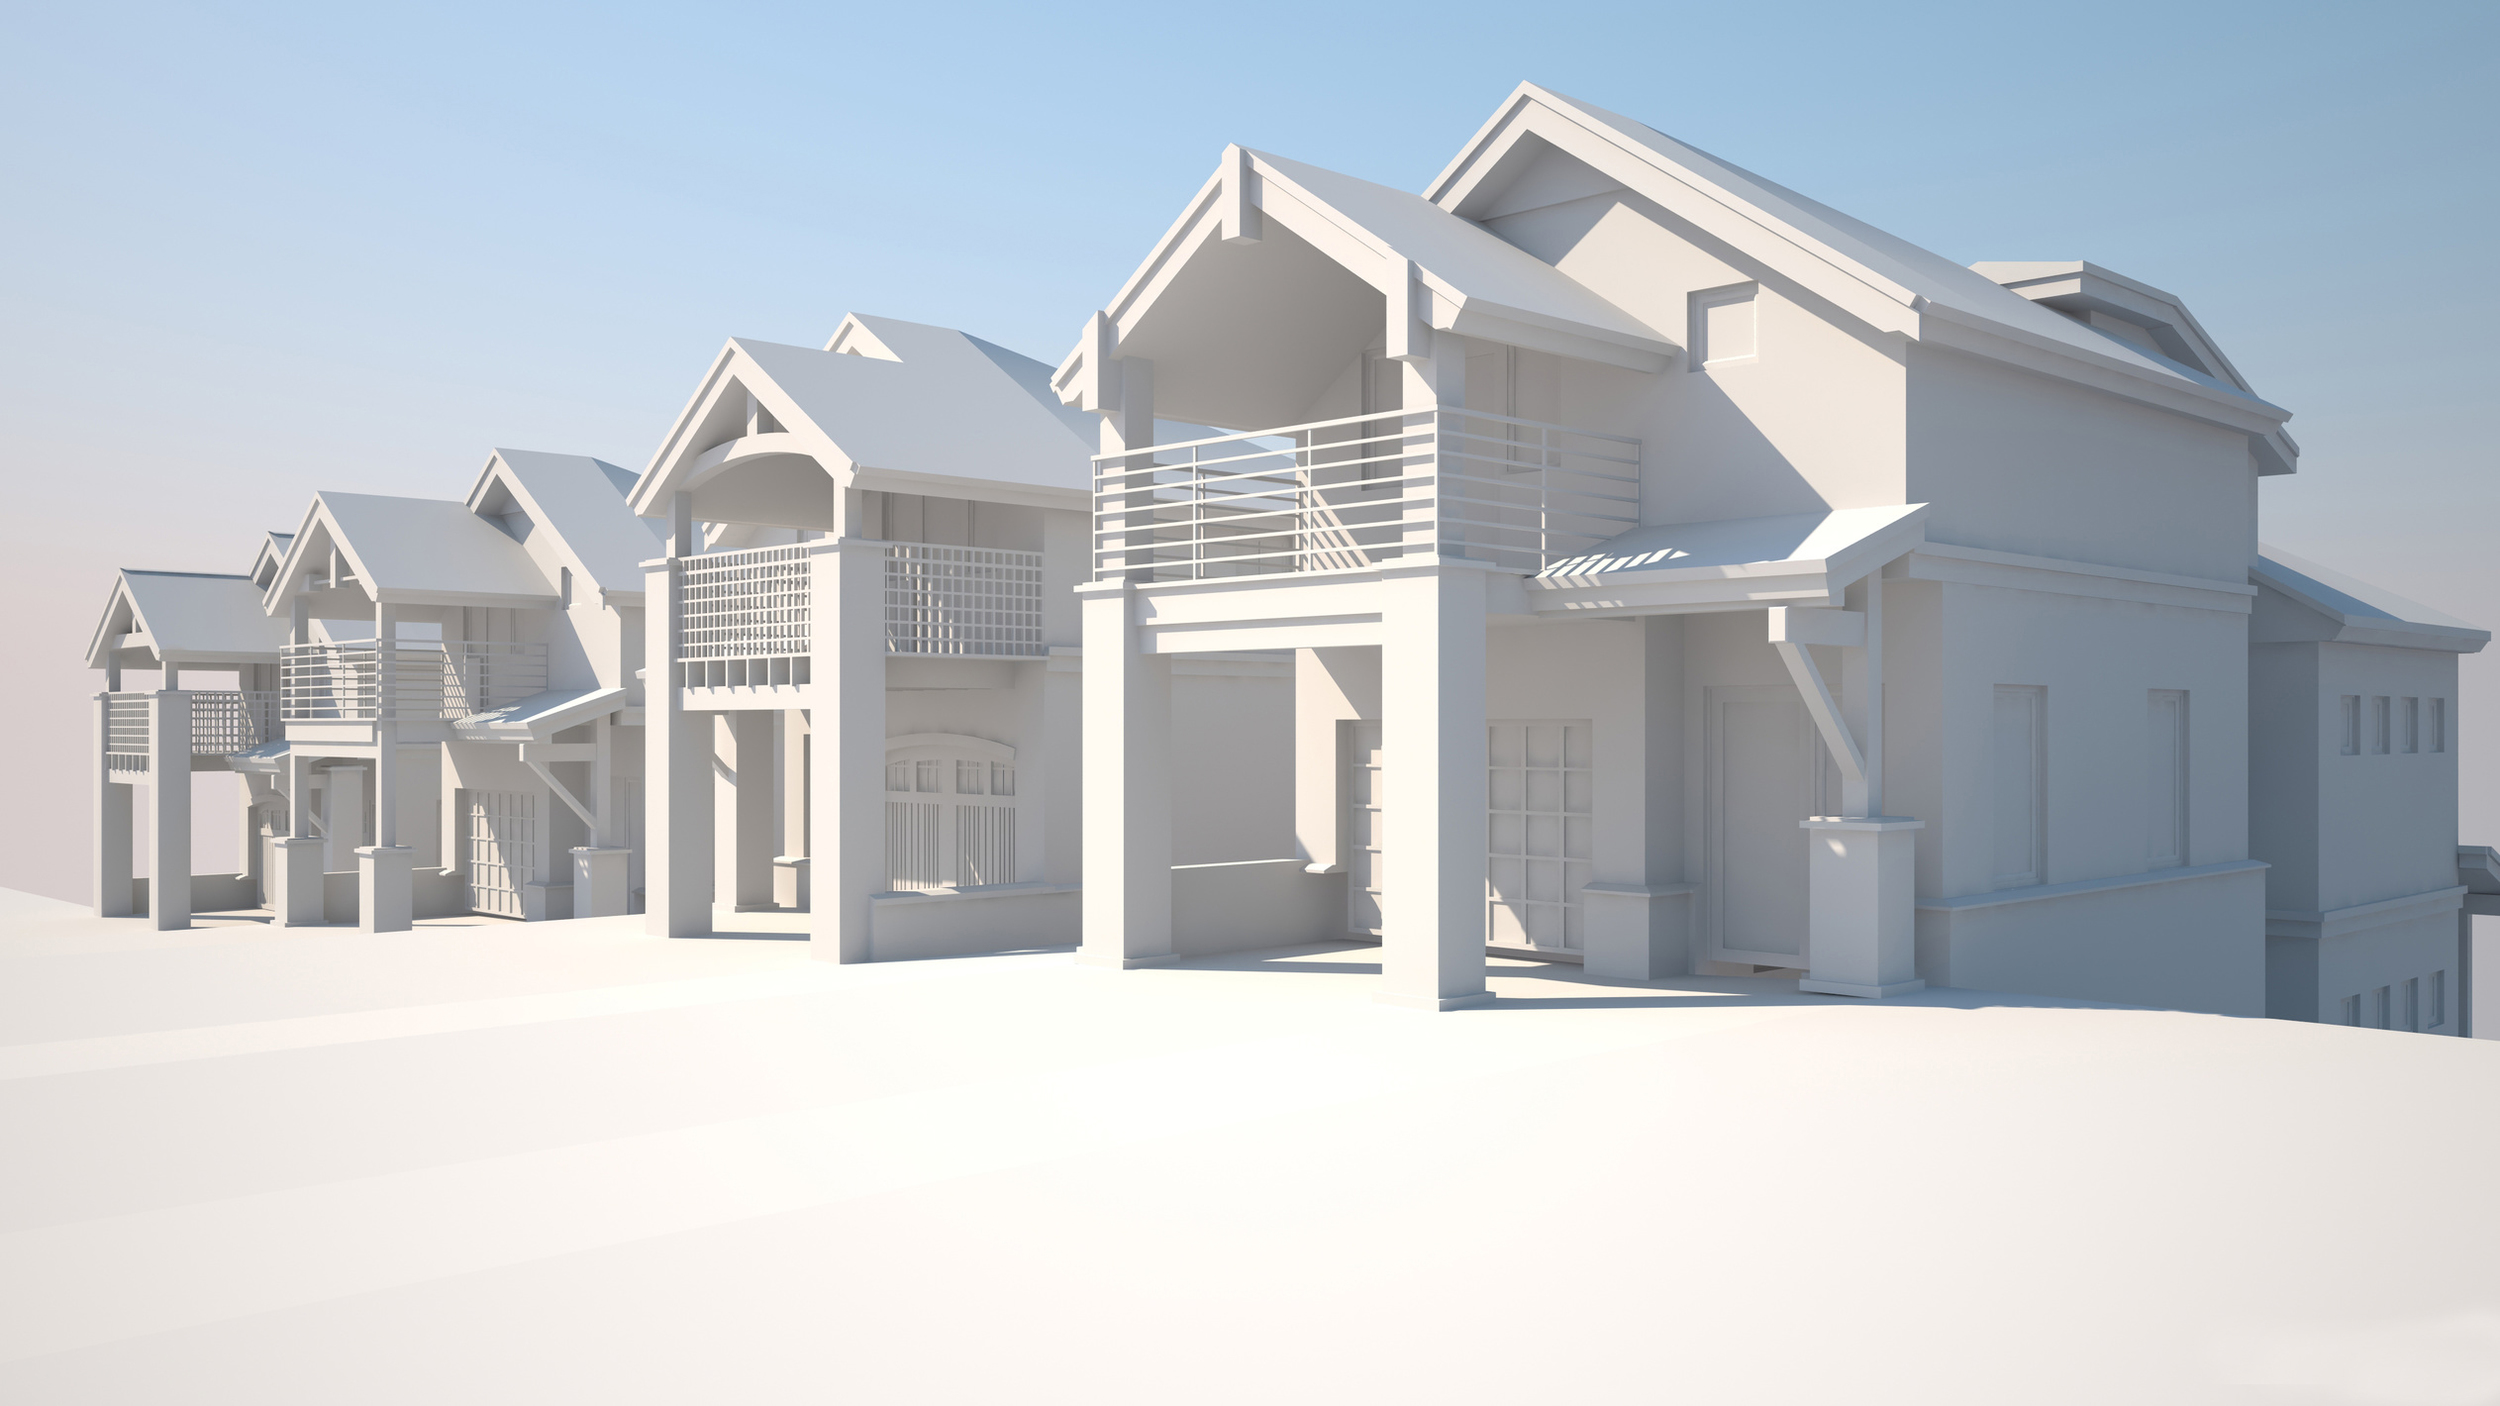
During the project, there were some changes to design, but I was happy to make the changes. A lot of the time my renderings bring up design changes, which is an important part of the design process and I am glad to help. One thing I didn't have was a nice photo of the mountain, which would be seen behind the houses. The architectural renderings will be used for sales and marketing, and a construction site billboard.
From start to finish, this project took me a little over a week. The client was happy, which makes me happy.
Did you enjoy this article? I would love to hear your thoughts, so don’t be shy and comment below! Please don’t forget to subscribe to my RSS-feed or follow my feed on Twitter, Google+ and Facebook! If you enjoyed the following article we humbly ask you to comment, and help us spread the word! Or, if you would like, drop me an email.
Forest Pack 4.3 Pro & Lite Released
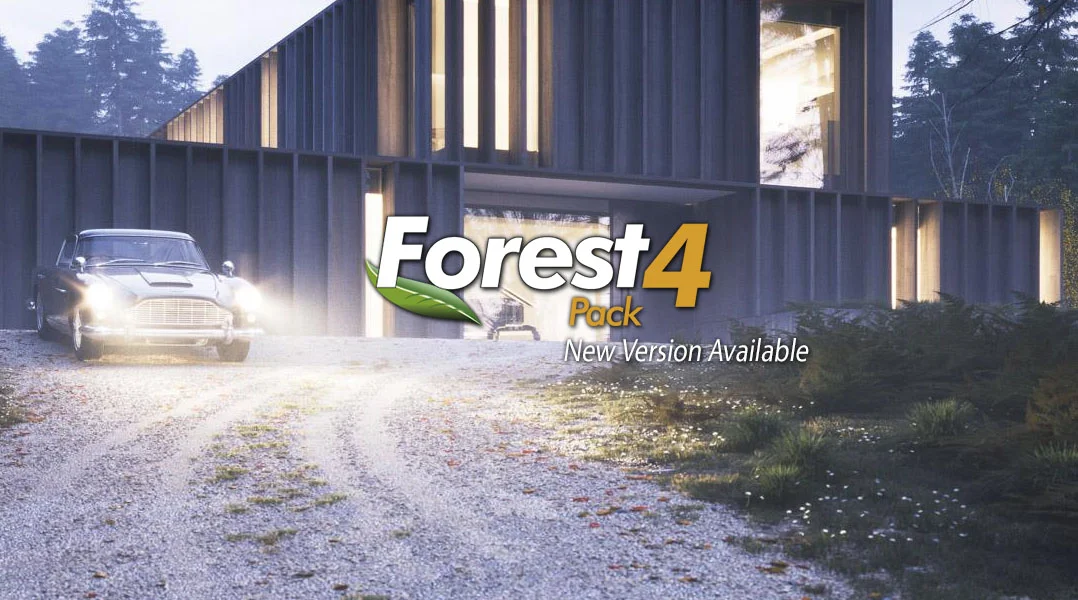
iToo Software announced today the release of Forest Pack 4.3 Lite and Pro versions. This update adds powerful new features suggested by users, including tools to create level-of-detail models, a new boundary-checking mode to simplify the creation of clearly defined edges for large scatter areas, and the ability to limit distribution using material ID’s.
Forest Pack 4.3 Demo Reel from iToo Software on Vimeo.
Forest Pack 4.3 brings Corona Renderer materials to the existing libraries, adds 16 new ready-to-use gravel presets – each in two versions for small or large-scale areas – plus many more features and fixes.
Key Features :
- A new Forest LOD object that allows you to switch billboard, models or materials based on distance from the camera, a custom target, or as a percentage of the screen size.
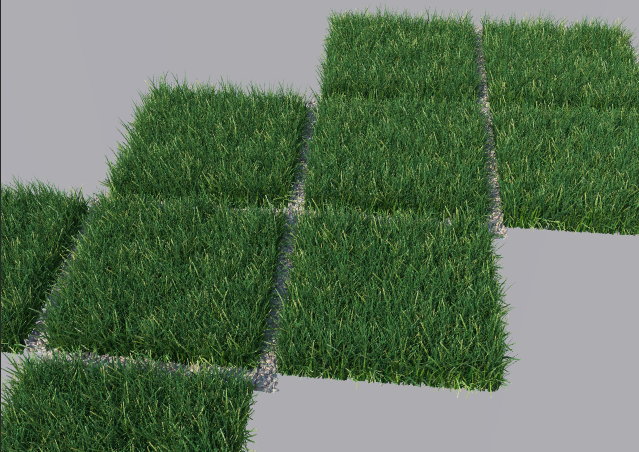
- Edge boundary checking mode to automate the creation of clean edges, especially when creating grass. Works by removing element sub-objects that fall outside the scatter area’s perimeter. (V-Ray only)
- The ability to limit a scatter to specific polygons using Material IDs when using surfaces.
- Introduced separate controls for Density and Scale Falloff Affect parameters.
- A new XML Data exporter to aid interoperability and integration of Forest Pack into large pipelines.
- 16 new Gravel presets, including detail and large-scale models.
- Materials for Corona Renderer added to existing free libraries.
To help you get up and running with these new features, iToosoft is also releasing two short tutorials :

2. Boundary Checking Using Edge Mode to show a simplified technique for creating clean edges around large scatters.
The Lite version of this release, freely available to download and use commercially, and full release notes are available now on the iToo Software website.
Did you enjoy this article? I would love to hear your thoughts, so don’t be shy and comment below! Please don’t forget to subscribe to my RSS-feed or follow my feed on Twitter, Google+ and Facebook! If you enjoyed the following article we humbly ask you to comment, and help us spread the word! Or, if you would like, drop me an email.
V-Ray 3.0 for 3ds Max SP1

V-Ray 3.10.01 is now available for download from our website. Before you get too excited, let me say that we will have a patch next week with some minor fixes, so it may be best to wait until then. Nevertheless, if you find any issues, please let us know.
We had a build yesterday that didn't work correctly; if you downloaded that, please get an updated installation from our website. We apologize for this inconvenience.
There is a short video demonstrating some of the new features here:
https://www.youtube.com/watch?v=Hy-tRHExWgU
The full changelog from the previous release is as follows:
Build 3.10.01 (official) (November 2014)
==============
New features:
(*) V-Ray: Further optimizations for render speed;
(*) Updated to OpenEXR 2.2.0 and added new DWA compression options to VRayOptionsRe;
(*) Support for point cloud rendering in 3ds Max 2015;
(*) Built-in DMC samples calculator for VRayLight, VRayMtl and brute force GI;
(*) .vrmesh viewer: Added a .vrmesh viewer tool for previewing .vrmesh and Alembic files in a standalone OpenGL application;
(*) Embree: Update to Embree 2.3;
(*) Embree: Proxies and instances can now be accelerated by Embree;
(*) Embree: Can now accelerate hair rendering for Ornatrix and HairFarm;
(*) V-Ray: Added "GI filter multiplier" option to the Global switches rollout to control texture filtering for GI rays for VRayHDRI;
(*) V-Ray: Secondary matte environment background slot to control the appearance of matte objects in reflections/refractions;
(*) V-Ray: When created, V-Ray will automatically load a preset named "default" if there is one (allows for customized default values);
(*) V-Ray RT: Support for Carbon Scatter;
(*) V-Ray RT: Support for the V-Ray VFB for ActiveShade session;
(*) V-Ray RT CPU: Support for the VRayClipper object;
(*) V-Ray RT CPU: Support for Ornatrix and HairFarm rendering;
(*) V-Ray RT GPU: Support for using the light cache for GPU rendering;
(*) V-Ray RT GPU: Support for coherent tracing (may improve rendering performance);
(*) V-Ray RT GPU CUDA: Support for the nVidia Maxwell GPU architecture;
(*) V-Ray RT GPU CUDA: Support for the VRayFastSSS2 material;
(*) V-Ray RT GPU CUDA: Initial support for hair rendering for Ornatrix and HairFarm;
(*) V-Ray RT GPU CUDA: On-the-fly recompilation of the GPU kernel to include only features used by the particular scene;
(*) VFB: Ability to dock/undock History window and Color Corrections window to the main VFB window;
(*) VFB: Added highlight burn color correction to the VFB;
(*) VFB: Added "background image" color correction to the VFB;
(*) VFB: Added white balance color correction;
(*) VFB: Added the ability to save multi-channel .vrimg and OpenEXR files from the VFB UI;
(*) VFB: Added the ability to load arbitrary file formats in the V-Ray VFB for post-processing;
(*) VRayInstancer: Implement a new geometric plugin for instancing objects on a ParticleFlow and other particle systems;
(*) VRayHDRI: Added image preview in the file open dialog;
(*) VRayHDRI: Added controls to specify UDIM/UVTILE tiles for the preview in material editor;
(*) VRayScatterVolumeMtl: Greatly improved calculations; ability to use the light cache;
(*) VRayScannedMtl: Support rendering of scanned real-world BRDF materials;
(*) VRayProxy: Support for hair and particle instances;
(*) VRayProxy: Support for subdivision objects in Alembic files using OpenSubdiv;
(*) VRayLight: Disc light shape;
(*) VRayLight, VRayIES, VRaySun: Added parameters to control the diffuse and specular contributions separately;
(*) VRayLightSelect render element: Added "mode" parameter to allow extracting the full/raw/diffuse/specular contribution of specific lights;
(*) VRayMtl: Added GGX BRDF model;
(*) VRayMtl: Added clip opacity mode option for faster rendering of trees etc;
(*) VRayMultiSubTex: Extended with new randomized modes for choosing colors;
(*) VRayVelocity render element: Added include/exclude list;
(*) ply2vrmesh: Added export options to export specified frames to separate files;
(*) ply2vrmesh: Added Alembic frame offset output to the files;
(*) ply2vrmesh: Added option to merge two or more .vrmesh files into one;
(*) vrimg2exr: Added -multiPart option to vrimg2exr that produces an OpenEXR 2 file with each render element in its own "part";
Modified features:
(*) V-Ray: Added an option to open the V-Ray messages window on error or warning only;
(*) V-Ray: Added by Object IDs selection method for Render mask;
(*) V-Ray: Added MaxScript access to the Trace sets include/exclude flag;
(*) V-Ray: Added %numPasses and %numSubdivs stamp keywords;
(*) V-Ray: "Camera Motion Blur" is controlled independently on "Motion Blur" setting;
(*) V-Ray: Embree enabled by default;
(*) V-Ray: Improved render speed when not using any render elements;
(*) V-Ray: Light cache "Use for glossy rays" option is enabled by default;
(*) V-Ray: Optimized hair rendering in general;
(*) V-Ray: Reduced memory usage for hair and particles;
(*) V-Ray: Renamed the "Time independent" option to "Lock noise pattern" in the DMC sampler rollout;
(*) V-Ray: The default GI methods are set to Brute force/Light cache;
(*) V-Ray: The default image sampler set to Progressive;
(*) V-Ray: The image sampler parameters rollout is unfolded by default;
(*) V-Ray: VFB is cleared always when doing network rendering with render mask;
(*) V-Ray RT: Improved refresh speed;
(*) V-Ray RT: Removed the Show Mask option from the user interface, the mask is written in VRaySampleRate render element for the progressive sampler;
(*) VFB: Improved anaglyph stereoscopic preview to reduce retinal rivalry;
(*) VFB: Improved initialization speed of the History window when there are a lot of images in the history;
(*) VFB: The vfbControl MaxScript function returns values for the commands that have states;
(*) VFB: Made the History window compliant with the 3ds Max color theme;
(*) .vrscene exporter: Added combo box to select between Scene Animation/Frame range, the latter remembers the start/end values;
(*) VRay2SidedMtl: Added ability to filter the translucency effect through the diffuse color of the front-facing side;
(*) VRayClipper: More robust and faster algorithm is used;
(*) VRayDirt: Added "double sided" option;
(*) VRayDirt: The distribution parameter can now take negative values for more defined edges;
(*) VRayFastSSS2: Added opacity texture slot;
(*) VRayHairFarmMod and VRayOrnatrixMod: Faster rendering of hair;
(*) VRayHDRI: Added MaxScript access to "coords" parameters;
(*) VRayLight: Added the ability to display the light name in the viewport;
(*) VRayLight: Somewhat faster sampling of rectangle lights;
(*) VRayMtl: Multiple layers of glass rendered with noise;
(*) VRayOSLMtl/VRayOSLTex: Improved shader cache logic, now the compiled shaders reside entirely in a memory buffer;
(*) VRayOSLMtl/VRayOSLTex: Removed dependency of shader name on the shader file name;
(*) VRayProxy: Export texture coordinates for .vrmesh preview, if preview mesh is specified;
(*) VRayProxy: Same proxies are automatically instantiated;
(*) VRayProxy: Show proxy color set names in Vertex Color texture "Channel Name" list;
(*) VRayProxy: Show the extra color channels from Alembic files in the "Channel Name" drop-down of Vertex Color maps applied to the proxy object;
(*) VRayProxy: Support for Material ID channel when rendering with point clouds;
(*) VRayShadow: Made the U, V, W Area shadow sizes animatable in the VRayShadows params rollout;
Did you enjoy this article? I would love to hear your thoughts, so don’t be shy and comment below! Please don’t forget to subscribe to my RSS-feed or follow my feed on Twitter, Google+ and Facebook! If you enjoyed the following article we humbly ask you to comment, and help us spread the word! Or, if you would like, drop me an email.
Managing Multiple 3DS MAX projects
If you are like me, you have several projects going on at any given time. Each project in a different stage and most awaiting on client comments. And, if you are like me, you hate loosing work and backups are very important. As you might know, 3DS MAX has an Autoback, which keeps 3 backup copies.

“How often should I back up? It depends, how much data are you willing to lose?”
Without spending a fortune, I sought out for a solution, and found a solution that works great.
Project Switcher
ProjectSwitcher is a Macroscript utility for quickly switching between multiple project folders. It keeps track of the previously opened projects, saves them to an .ini file and presents them in a dropdown list.

Installation: For automatic startup, just copy this script into your scripts\startup folder and restart 3ds Max.
Use the 'X' key to remove an entry from the list (this will not do anything to your actual project folder!); the 'Set' key works just like the 'File > Set Project Folder function: it allows you to select another existing project folder or create a new one. Both will be added to the list. Note: projectSwitcher does not currently track any project folder actions that were performed directly in 3ds Max.
New in v0.31:
- Due to a bug in 3ds Max 2014, I have made an alternative version for 3ds Max 2014
- The alternative version 0.31 no longer works as a dockable toolbar but inside a floating dialog instead
- Dialog now remembers position and size
New in v0.3:
- Automatic Project Switching when opening .max files: When opening the file c:\projects\myproject\scenes\file.max, this function will automatically set c:\projects\myproject\ as the new project folder. Thanks to Tollef Roe Steen for the suggestion.
- No longer a macroscript; can be automatically run when 3ds Max starts
Bug in 3ds Max 2008: A bug in the latest release of 3ds Max causes projectSwitcher to always show a Browse-Folder-Dialog. This can be fixed by manually editing the file Macro_SetProjectFolder.mcr in the <3dsmax_root>\ui\macroscripts directory and changing
local _SetProjectFolder_macro_option_promptUser
local _SetProjectFolder_macro_option_newFolder
in line 25 and 26 to
global _SetProjectFolder_macro_option_promptUser
global _SetProjectFolder_macro_option_newFolder
Save the .mcr file and restart 3ds Max. This should return normal functionality for projectSwitcher
Did you enjoy this article? I would love to hear your thoughts, so don’t be shy and comment below! Please don’t forget to subscribe to my RSS-feed or follow my feed on Twitter, Google+ and Facebook! If you enjoyed the following article we humbly ask you to comment, and help us spread the word! Or, if you would like, drop me an email.
Architectural Rendering with Rhino and V-Ray with Dave Schultze

Watch the Online Video Course Architectural Rendering with Rhino and V-Ray
A detailed rendering job can make your building models look more realistic and professional—and help sell clients on your ideas. This course teaches everything you need to know about rendering interior and exterior architectural scenes with Rhino and V-Ray. Using a pavilion of his own design, author Dave Schultze shows how to set up Sun, Sky, and V-Ray lighting systems; apply glass, metal, stone, and wood materials; and insert trees, grass, and people for additional scale and interest. Plus, learn how to use cameras and compositing techniques to add a sense of depth and realism to your designs.
Topics include:
- Setting up your system
- Understanding the settings, software, and process
- Lighting the scene
- Tweaking exposure
- Rendering with architectural glass, masonry, and concrete
- Making realistic grass and trees
- Creating depth of field
- Compositing from 3D to 2D
Did you enjoy this article? I would love to hear your thoughts, so don’t be shy and comment below! Please don’t forget to subscribe to my RSS-feed or follow my feed on Twitter, Google+ and Facebook! If you enjoyed the following article we humbly ask you to comment, and help us spread the word! Or, if you would like, drop me an email.
Excellent Service

Z Feng Architect recommends Whitebirch Studio.
Interested in working with Whitebirch Studios?
Did you enjoy this article? I would love to hear your thoughts, so don’t be shy and comment below! Please don’t forget to subscribe to my RSS-feed or follow my feed on Twitter, Google+ and Facebook! If you enjoyed the following article we humbly ask you to comment, and help us spread the word! Or, if you would like, drop me an email.
TRICKS OF THE TRADE

The ability to create realistic depth in a photograph (rendering), a 2-dimensional plane, is the sign of a good photographer (rendering) When shooting stills or video, it’s an important detail to make sure your shots have depth. Sometimes, however, that is sometimes easier said than done. In the quick, 3-minute video clip below, cinematographer Matthew Rosen, covers his top 5 favorite ways to ensure his image aren’t falling flat. The video is geared towards cinematography and moving pictures, but many of the techniques can be transferred into still photography as well. Well worth a watch even if you never shoot video.
TRICKS OF THE TRADE
In the beginning of the clip, Rosen explains why it’s important to have depth in an image, “It’s always my goal when I shoot to give this 2D image as much depth as I possibly can. The more tricks you have up your sleeve to conjure up depth, the more you will immerse your audience.” In order to achieve it, he suggests using these old tricks of the trade:
- Lighting And Shadow – Use a higher contrast between light and shadow to create a deeper feel.
- Focus – Use a shallow depth of field to create a visual of distance between subjects.
- Perspective – Use a perspective that creates a convergence of parallel lines (think leading lines) to simulate a deep depth of field.
- Parallax – Objects closest to the camera will appear to move quicker than those in the background.
- Occlusion – A type of transition in which a foreground subject completely covers a subject in the background as the camera pans behind the foreground subject.
Let’s listen to Rosen break it down in the video clip:
Did you enjoy this article? I would love to hear your thoughts, so don’t be shy and comment below! Please don’t forget to subscribe to my RSS-feed or follow my feed on Twitter, Google+ and Facebook! If you enjoyed the following article we humbly ask you to comment, and help us spread the word! Or, if you would like, drop me an email.
aXYZ HUB THE 3D ASSET BROWSER
As 3D Human Characters & 3D Assets become ever more important in visualizations, animations and illustrations,
we decided to develop a simple tool to improve your workflow!
ORGANIZE AND MANAGE!

With aXYZHUB® you now have a unique and simple way to navigate, choose, catalog and keep clean and organized your 3D Assets in order to optimize your workflow.
ADD 3D ASSETS TO YOUR SCENES!

Forget about opening individual files and merge one by one! With aXYZHUB® you can populate your 3D scene within a click. You don't need to remember where your model files are located in your drive. All your 3D Assets are organized and accessible from aXYZHUB®.
RESIZE!

Ohh no! My 3D Assets are in centimeters and my project is in inches! With aXYZHUB® you can forget about scaling issues. All your 3D Rigged Characters and 3D Assets are scaled and ready-to-be-used in your project.
CREATE PRESETS!

Save hours of your precious time! You can create ready-to-use
presets of 3D Characters and Assets to simply merge in your scene each time you need them.

RENDERING READY!
If you work with V-Ray, Mental Ray or Thea, you are able to set up your converted model's versions to be directly accessible from aXYZHUB® and ready to be rendered!

KEEP YOUR CATALOG UPDATED!
Each time AXYZ publishes a new character, aXYZHUB® will inform you. This way, each time you start a new Arch Viz project you will have the ability to evaluate if the new product additions are suitable for your project!
FEATURES HIGHLIGHTS
ORGANIZE AND MANAGE
With aXYZHUB® you can have a unique and simple way to navigate, choose, catalog and keep clean and organized your 3D Assets in order to optimize your workflow.
ADD 3D ASSETS TO YOUR SCENES
Forget about opening individual files and merge one by one! With aXYZHUB® you will be able to populate your 3D scene within a click. You will not need to remember where your model files are located in your drive. All your assets will be organized and accessible from aXYZHUB®.
RESIZE
Ohh no! My 3D Assets are in centimeters and my project is in inches! With aXYZHUB® you can forget about scaling issues. All your 3D Rigged Characters and 3D Assets will be scaled and ready-to-be-used in your project.
CREATE PRESETS
Save hours of your precious time! You can create ready-to-use presets of 3D Characters and Assets to simply merge in your scene each time you need them.
RENDERING READY
If you work with V-Ray, Mental Ray or Thea, you will be able to set up your converted models versions to be directly accessible from aXYZHUB® and ready to be rendered!
Did you enjoy this article? I would love to hear your thoughts, so don’t be shy and comment below! Please don’t forget to subscribe to my RSS-feed or follow my feed on Twitter, Google+ and Facebook! If you enjoyed the following article we humbly ask you to comment, and help us spread the word! Or, if you would like, drop me an email.
Forest Pack Pro v4.3.0 beta
New level of detail and visibility triggers. See the feature list.
New features and changes:
- Forest LOD (Level of Detail).
- A new type of object, "ForestLOD", is used to define levels of detail. Once created, assign it as Custom Object in Forest.
- Visibility triggers by Distance to camera or Screen size.
- Support for billboards and geometry.
- Custom materials.
- LOD properties can be adjusted in Camera rollout.
- Added Areas->Limit by Surface Material ID.
- Areas->Falloff Affect is splitted in Density and Scale values.
- Forest Tools->Data exporter to XML files.
- Added General->Disable Pop-ups: turns off all suggestions and warning messages, except critical errors (this option is global and persistent).
- Geometry->Get Size from Library is removed and enabled by default.
- Geometry->Global Size parameters are removed, although they are accessible by Maxscript ("globs¡ze", "width", "height")
- Geometry->Use Object Dimensions is replaced by local Scale parameter.
- New Display->Proxy model: Arrow (non-symmetrical)
- Added Display->Disable Object.
- Forest Tools->Instantiate copies User Properties, Object ID and wireframe color from the source object.
Library:
- 16 new presets: Gravel, including detail and large scale models.
- Added materials for Corona Renderer.
Fixes:
- Fixed problem of Exclude areas with Inverted Falloff Curves.
- Fixed issues with Distribution->Diversity Map and UV Surfaces.
- Fixed rare problem related to missing Surfaces on load.
- Fixed minor issues in Maxscript functions.
- Fixed potential crashing bug on Forest cloning.
- Forest Color ignores status of Override checkbox when using Tint by Element.
- Added Undo support to Geometry->Copy/Paste operations.
Registered customers of Forest Pack Pro can download the upgrade from User Panel->Beta versions
Image by State of Art Academy
Did you enjoy this article? I would love to hear your thoughts, so don’t be shy and comment below! Please don’t forget to subscribe to my RSS-feed or follow my feed on Twitter, Google+ and Facebook! If you enjoyed the following article we humbly ask you to comment, and help us spread the word! Or, if you would like, drop me an email.
Autodesk's Featured 3D Artist
There are a million stories. Tell us yours.
Share your best work with the AREA community and tell us the story behind your creations.
I am proud to share with you an Autodesk Artist blog that I was featured in. Several months ago I received a call from Autodesk, requesting an interview for a featured story on a new "Tell Us Your Story" blog, over on the Autodesk Area website. Of course, I was excited to speak with them, and the featured post has now gone live.

Did you enjoy this article? I would love to hear your thoughts, so don’t be shy and comment below! Please don’t forget to subscribe to my RSS-feed or follow my feed on Twitter, Google+ and Facebook! If you enjoyed the following article we humbly ask you to comment, and help us spread the word! Or, if you would like, drop me an email.
My Freelance Tools
There are a lot of resources for freelancers and believe me, I have tried them all. After many years in the business, these are the tools that have floated to the top of my freelance tools.

Save Time Billing
FreshBooks customers spend less time on paperwork, freeing up 2 days per month to focus on the work they love. What would you do with that extra time?
Grow Your Business
FreshBooks is built to support the needs of growing businesses. On average, FreshBooks customers double their revenue in the first 24 months. Woot!
Get Paid Faster
With FreshBooks, you can easily invoice clients from your desk or on the go. In fact, FreshBooks customers are paid an average of 5 days faster.

EVERNOTE BUSINESS
Where great ideas converge
- Secure, flexible sharing
- Room for projects to grow
- Access to everyone's knowledge

Powerful CRM
Manage contacts, organizations, partners, vendors and suppliers. See everything from background, email history, events, projects or opportunities. More
Project Management
Make sure you’re on top of your project at every stage – track project activity and performance against milestones. More
Powerful Integration
Integration with email, Box, Dropbox, Evernote, Google Apps, MailChimp, QuickBooks Online, QuoteRoller, Torpio, Zapier, and more. More
Macro or Micro View
Look at your business any way you want with task dashboard, activity sets, reports and more. More
Go Mobile
Supporting iPhone and Android phones and popular tablets, the Insightly mobile app has you covered. More
Social CRM
We’ll detect virtually every social media profile related to a contact’s email address. More
Did you enjoy this article? I would love to hear your thoughts, so don’t be shy and comment below! Please don’t forget to subscribe to my RSS-feed or follow my feed on Twitter, Google+ and Facebook! If you enjoyed the following article we humbly ask you to comment, and help us spread the word! Or, if you would like, drop me an email.
Photoshop on a Chromebook

In partnership with Google, Adobe is proud to introduce Project Photoshop Streaming, a new technology beta. Initially, this beta will be available exclusively to select North America based Adobe education customers with a paid Creative Cloud membership.
Project Photoshop Streaming enables selected participants to access Photoshop on Chromebooks. Applications delivered via streaming are easy to access and easy to manage. Even better, streaming apps work directly with files in Google Drive, so no need to download and re-upload files - just edit directly in the cloud.
Project Photoshop Streaming includes:
- Creative tools: Streaming access to Photoshop with other products coming soon
- Access from any Windows device with a Chrome browser or from a Chromebook
- Learning tools: Access to Adobe Education Exchange learning content and an in-app Learning panel called 'Learn Now'
- Project Photoshop Streaming Feedback and Forum support
Project Photoshop Streaming is an exclusive program. If you are interested in applying, please review the eligibility requirements and application process and submit your application here.
Did you enjoy this article? I would love to hear your thoughts, so don’t be shy and comment below! Please don’t forget to subscribe to my RSS-feed or follow my feed on Twitter, Google+ and Facebook! If you enjoyed the following article we humbly ask you to comment, and help us spread the word! Or, if you would like, drop me an email.
THE PSYCHOLOGY OF REQUIRING A DEPOSIT

Two important things happen when you say to your client: “I’ll need 50%, up front, to start the work and the balance is due when the work is completed.”
- You are viewed as professional: Your client now sees you as a person who has payment policies in place. They respect you, and they are clear on what you expect and how it’s going to go.
- A commitment is formed: Your client is fully committed when they pay a deposit. When some one pays a deposit towards something, they are making a commitment to the project. It’s a psychological thing. Without a deposit, there is no real commitment from your client. It’s like buying plane tickets. My trip to Chicago last year was just talk until I plunked down the $500 for plane tickets. Once that money was paid, it was a reality. We were fully committed.
Don’t begin the work without a commitment from your client in the form of a deposit
Did you enjoy this article? I would love to hear your thoughts, so don’t be shy and comment below! Please don’t forget to subscribe to my RSS-feed or follow my feed on Twitter, Google+ and Facebook! If you enjoyed the following article we humbly ask you to comment, and help us spread the word! Or, if you would like, drop me an email.
The best one-minute animation you'll see all year
This brilliant short shows just how little time you need to entertain and make a point.
It takes real skill to entertain an audience for over an hour with a CG animation. But in a way, doing so in little over a minute is even more challenging. And here's an example of an animated short that does just that – combining brilliant 3D craft, a clever script and an unexpected ending with fabulous results.
It's the creation of House Special, a spin-off company fromLaika, the Portland animation studio behind such quirky feature films as The Boxtrolls. And it's already won a ton of awards, including Best Minute Movie at Animation Block Party in Brooklyn, Short Film Silver at The Australian Effects and Animation Festival, and Audience Favorite (3D Animation) at the California International Animation Festival.
Did you enjoy this article? I would love to hear your thoughts, so don’t be shy and comment below! Please don’t forget to subscribe to my RSS-feed or follow my feed on Twitter, Google+ and Facebook! If you enjoyed the following article we humbly ask you to comment, and help us spread the word! Or, if you would like, drop me an email.
Procedural UVW layout and texture baking tool for 3dsMax.

The Lazy UVW editor is a way to procedurally create seamless textures without having to unwrap uvs. It accomplishes this by using multiple uvw channels to cover pinching, stretching, or seams of the basic uvw mapping options, and the resulting map may be baked down to one channel if desired.
Did you enjoy this article? I would love to hear your thoughts, so don’t be shy and comment below! Please don’t forget to subscribe to my RSS-feed or follow my feed on Twitter, Google+ and Facebook! If you enjoyed the following article we humbly ask you to comment, and help us spread the word! Or, if you would like, drop me an email.