Scenic Mountain Architectural Rendering
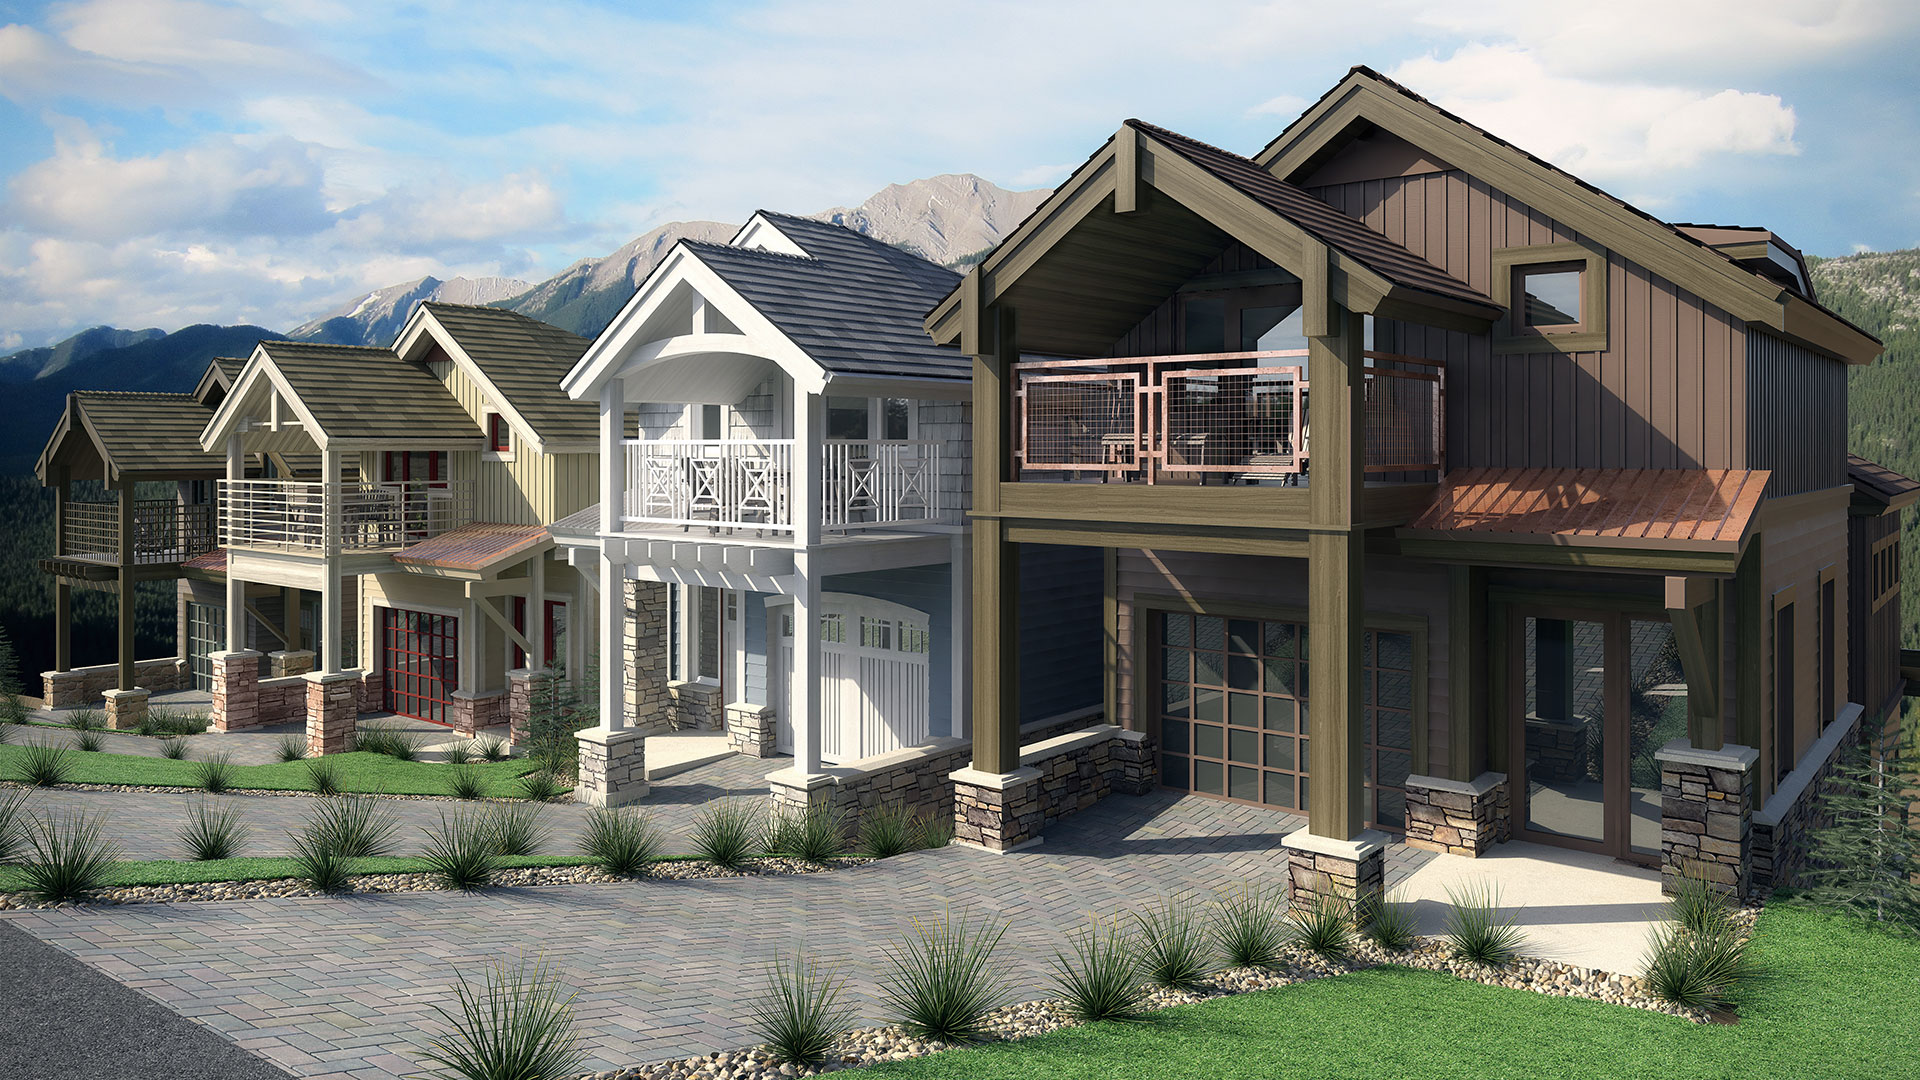
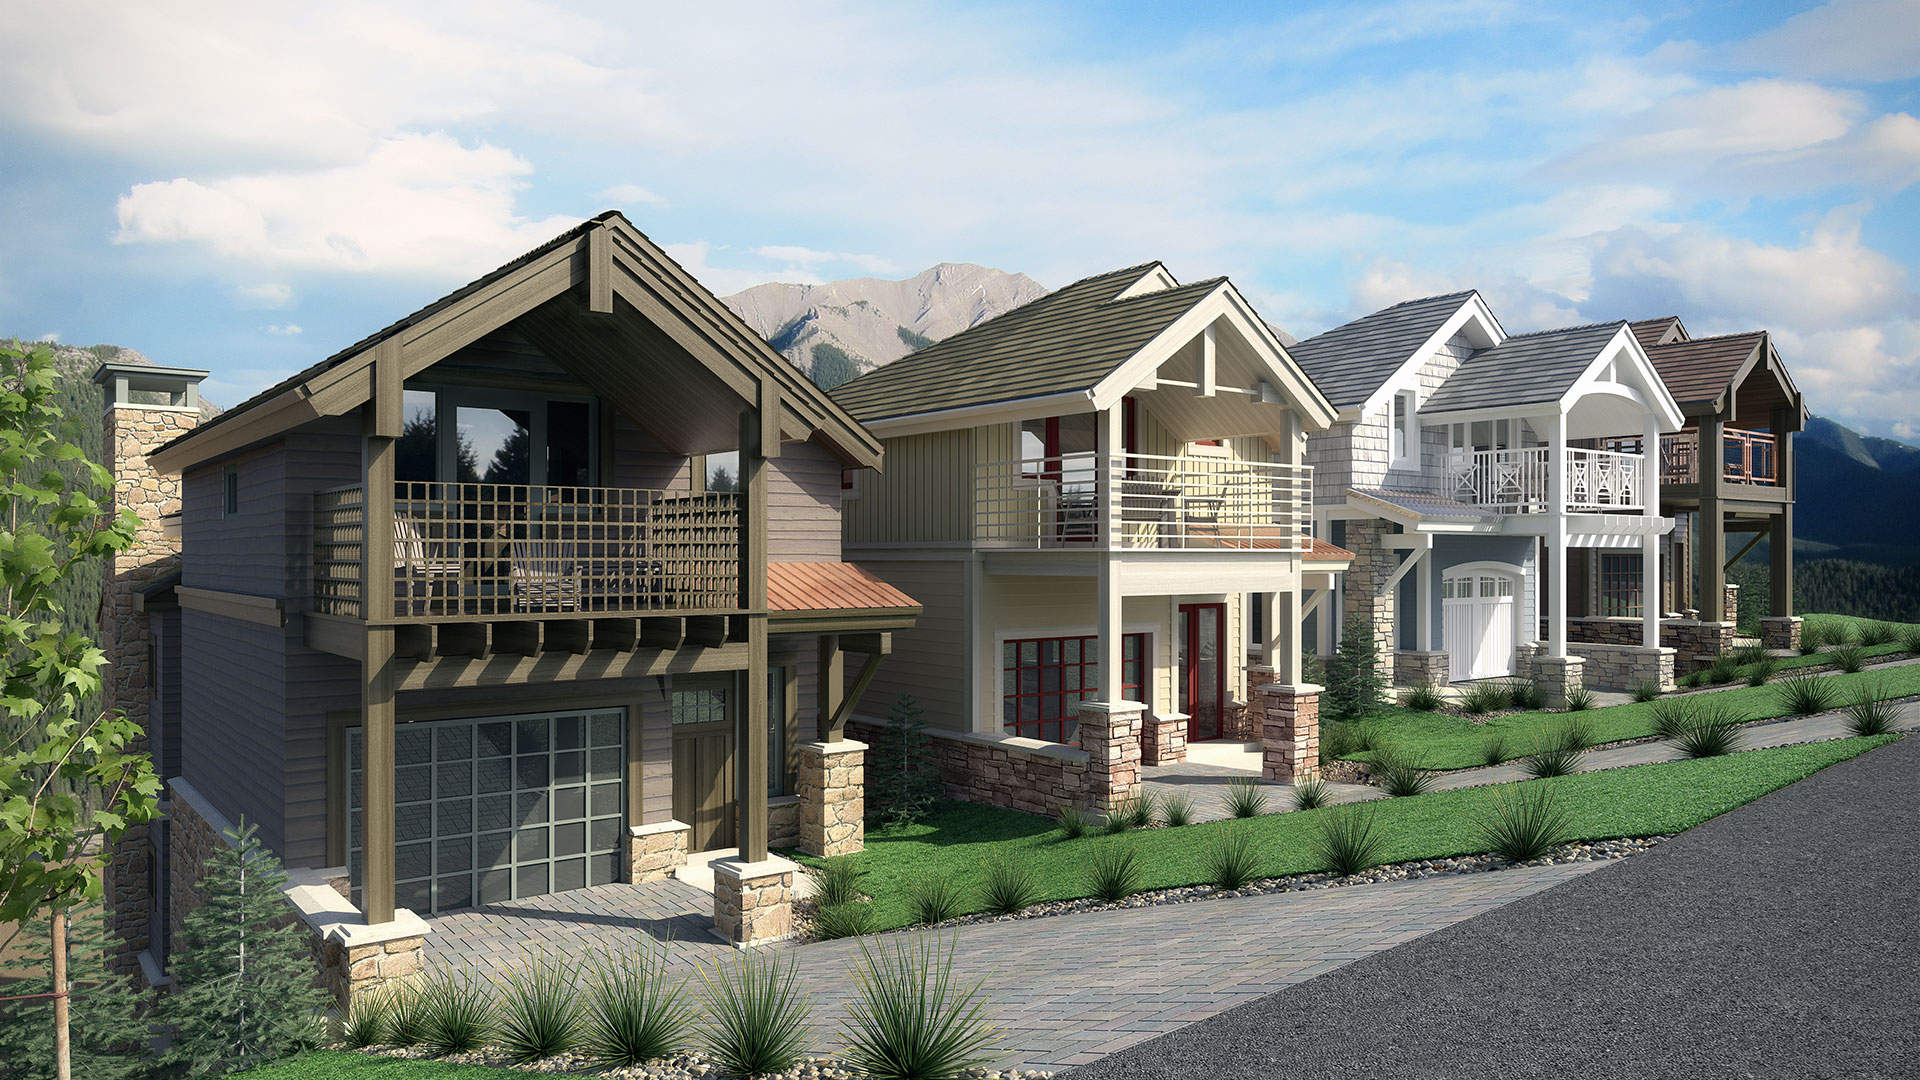
Park City, Utah is a scenic mountain community with three world-class resorts and a town filled with activities. Lane Myers, in the construction industry for over 25 years, asked me to create several photo realistic architectural renderings for their homes located in Park City.
Like the majority of my work, I received an email for a quote. The email was from Freedom Design, which isn't the architect on file, but has a relationship with Lane Myers. Lane Myers had seen some of my work done for Freedom Design and asked if I can create a rendering with the same level of realism as they had seen on renderings I did for Freedom. Of coarse, was exited to get started and after they excepted my quote, I dove right in.
First, I received the AutoCAD 2D Drawings, which were very nicely drawn, and I created the 3D model based on the 2D CAD file. Like the majority of 2D CAD files, there were things to work through, but nothing too difficult.
Once the model was completed, I sent some gray-scale proofs, so the builder can verify the accuracy of my 3D model. The gray scales were approved and I started the texture mapping (colors and materials). Once again, I emailed some color proofs. Once the color proofs were approved, I fine tuned materials, worked on lighting and shadow, and delivered some high resolution finals.
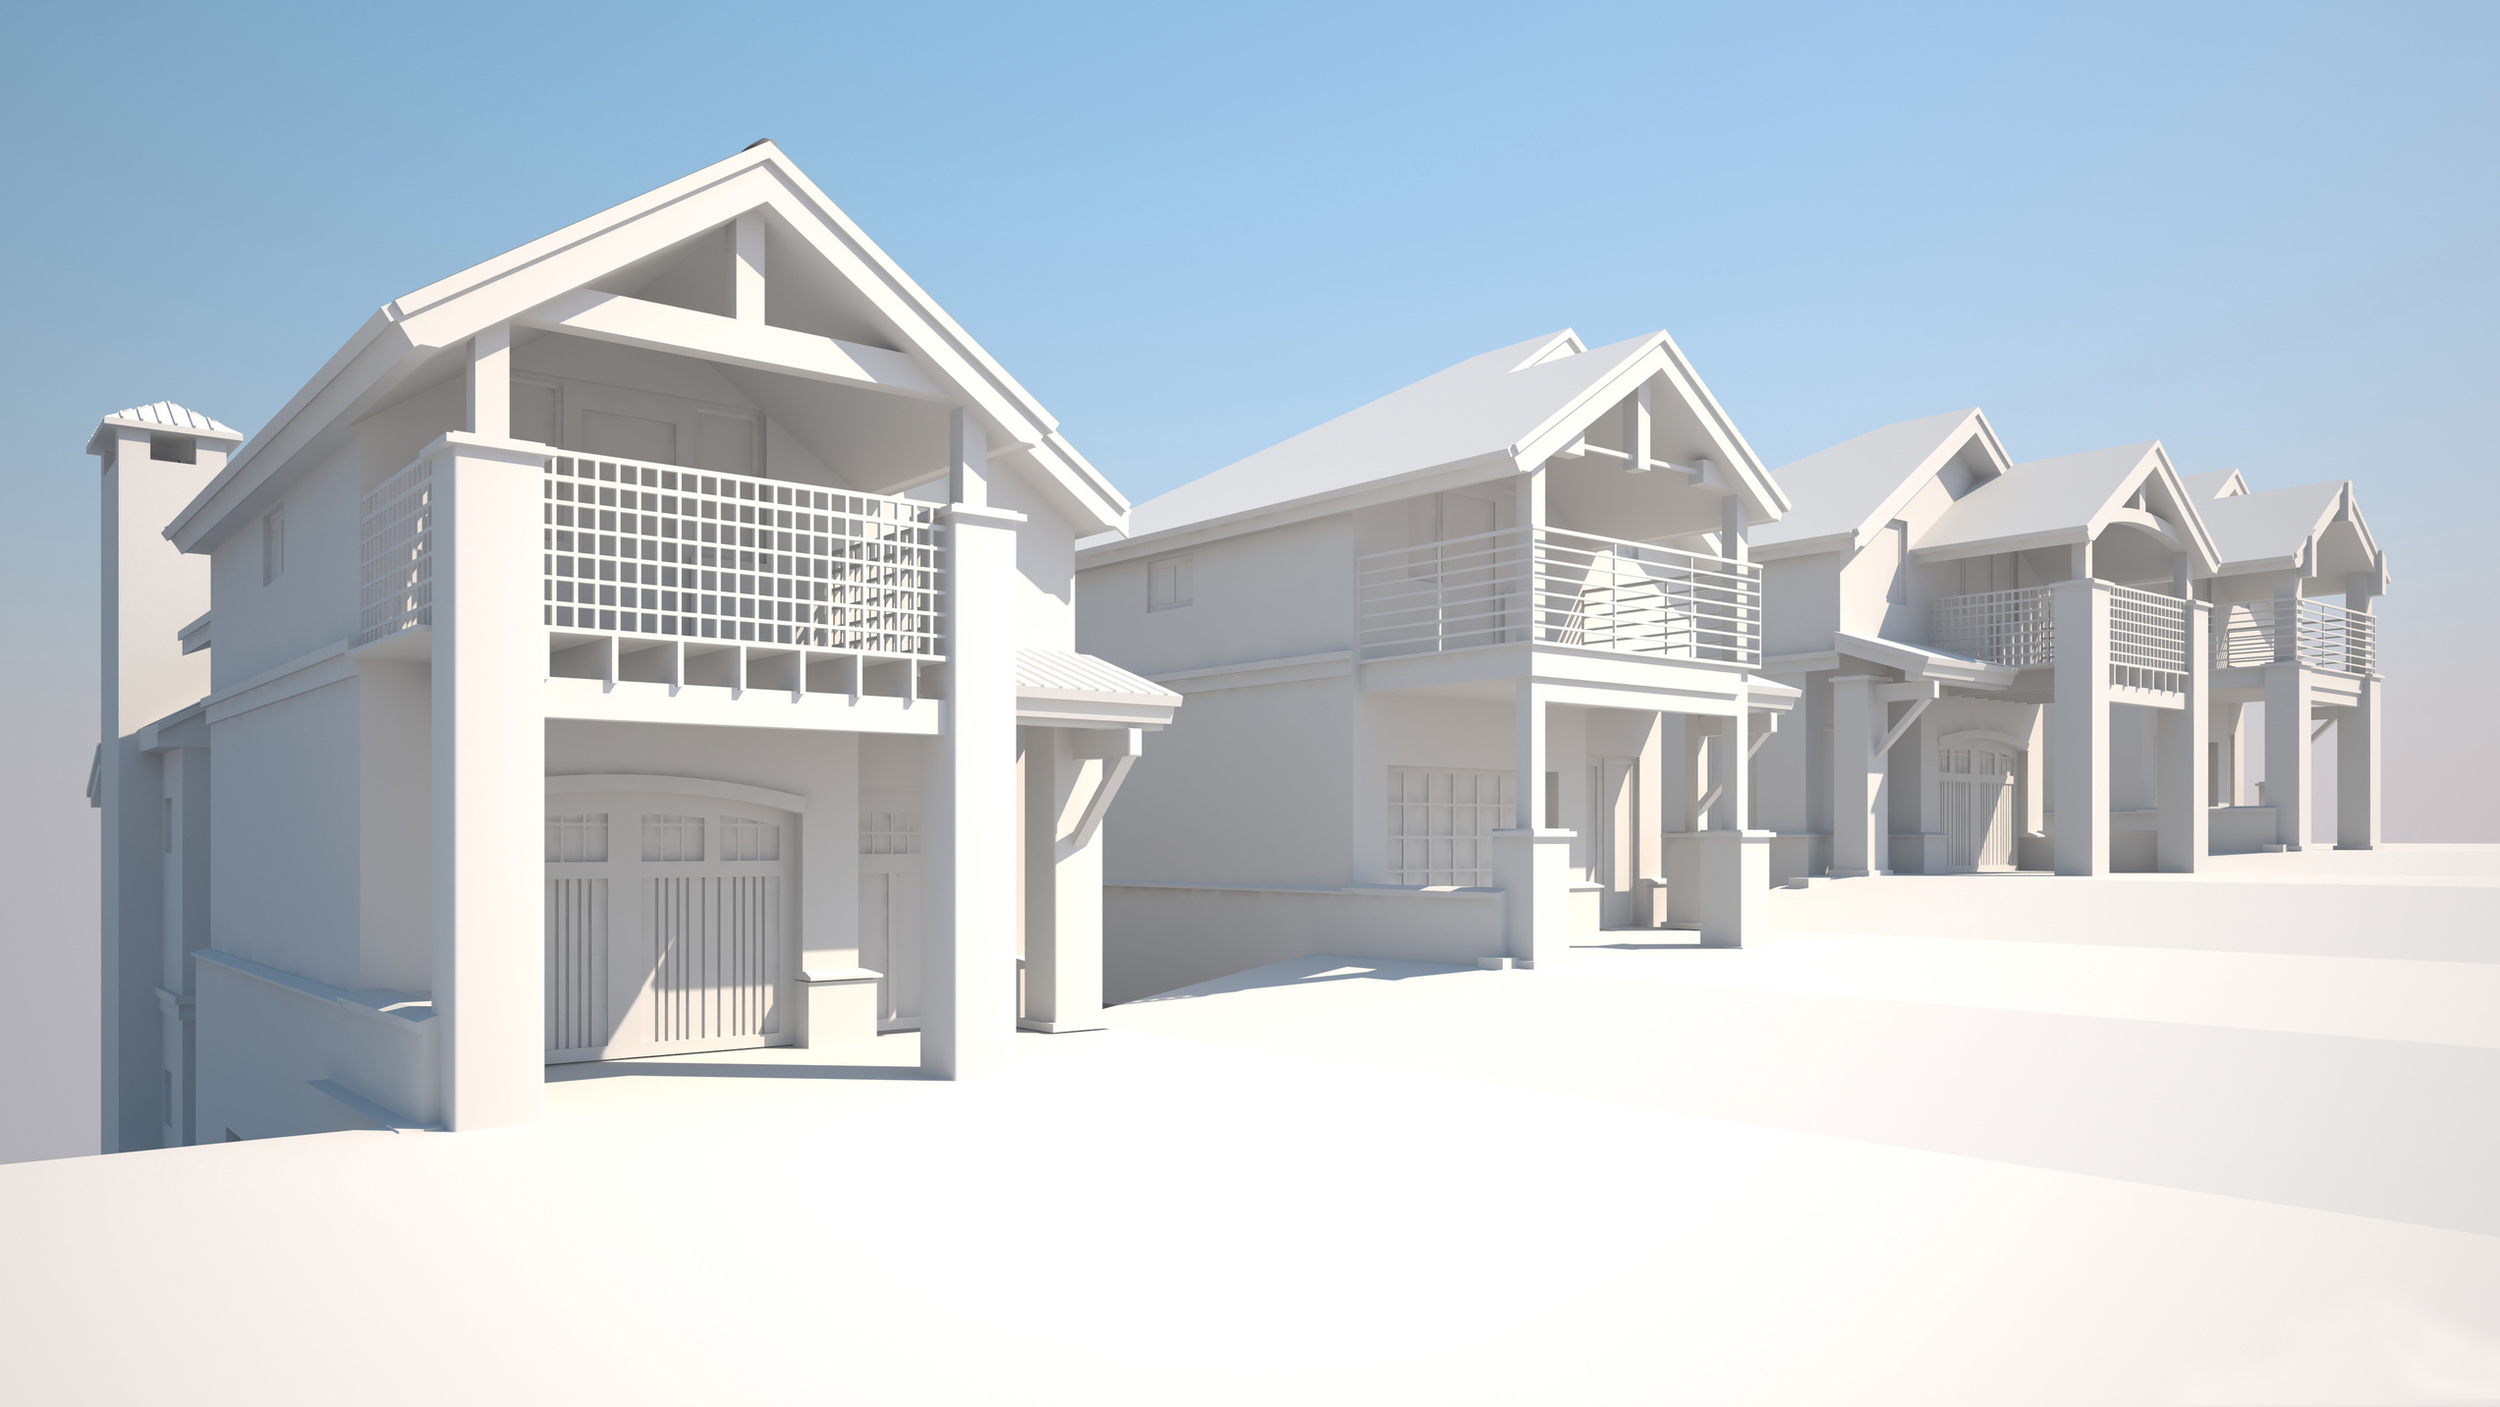
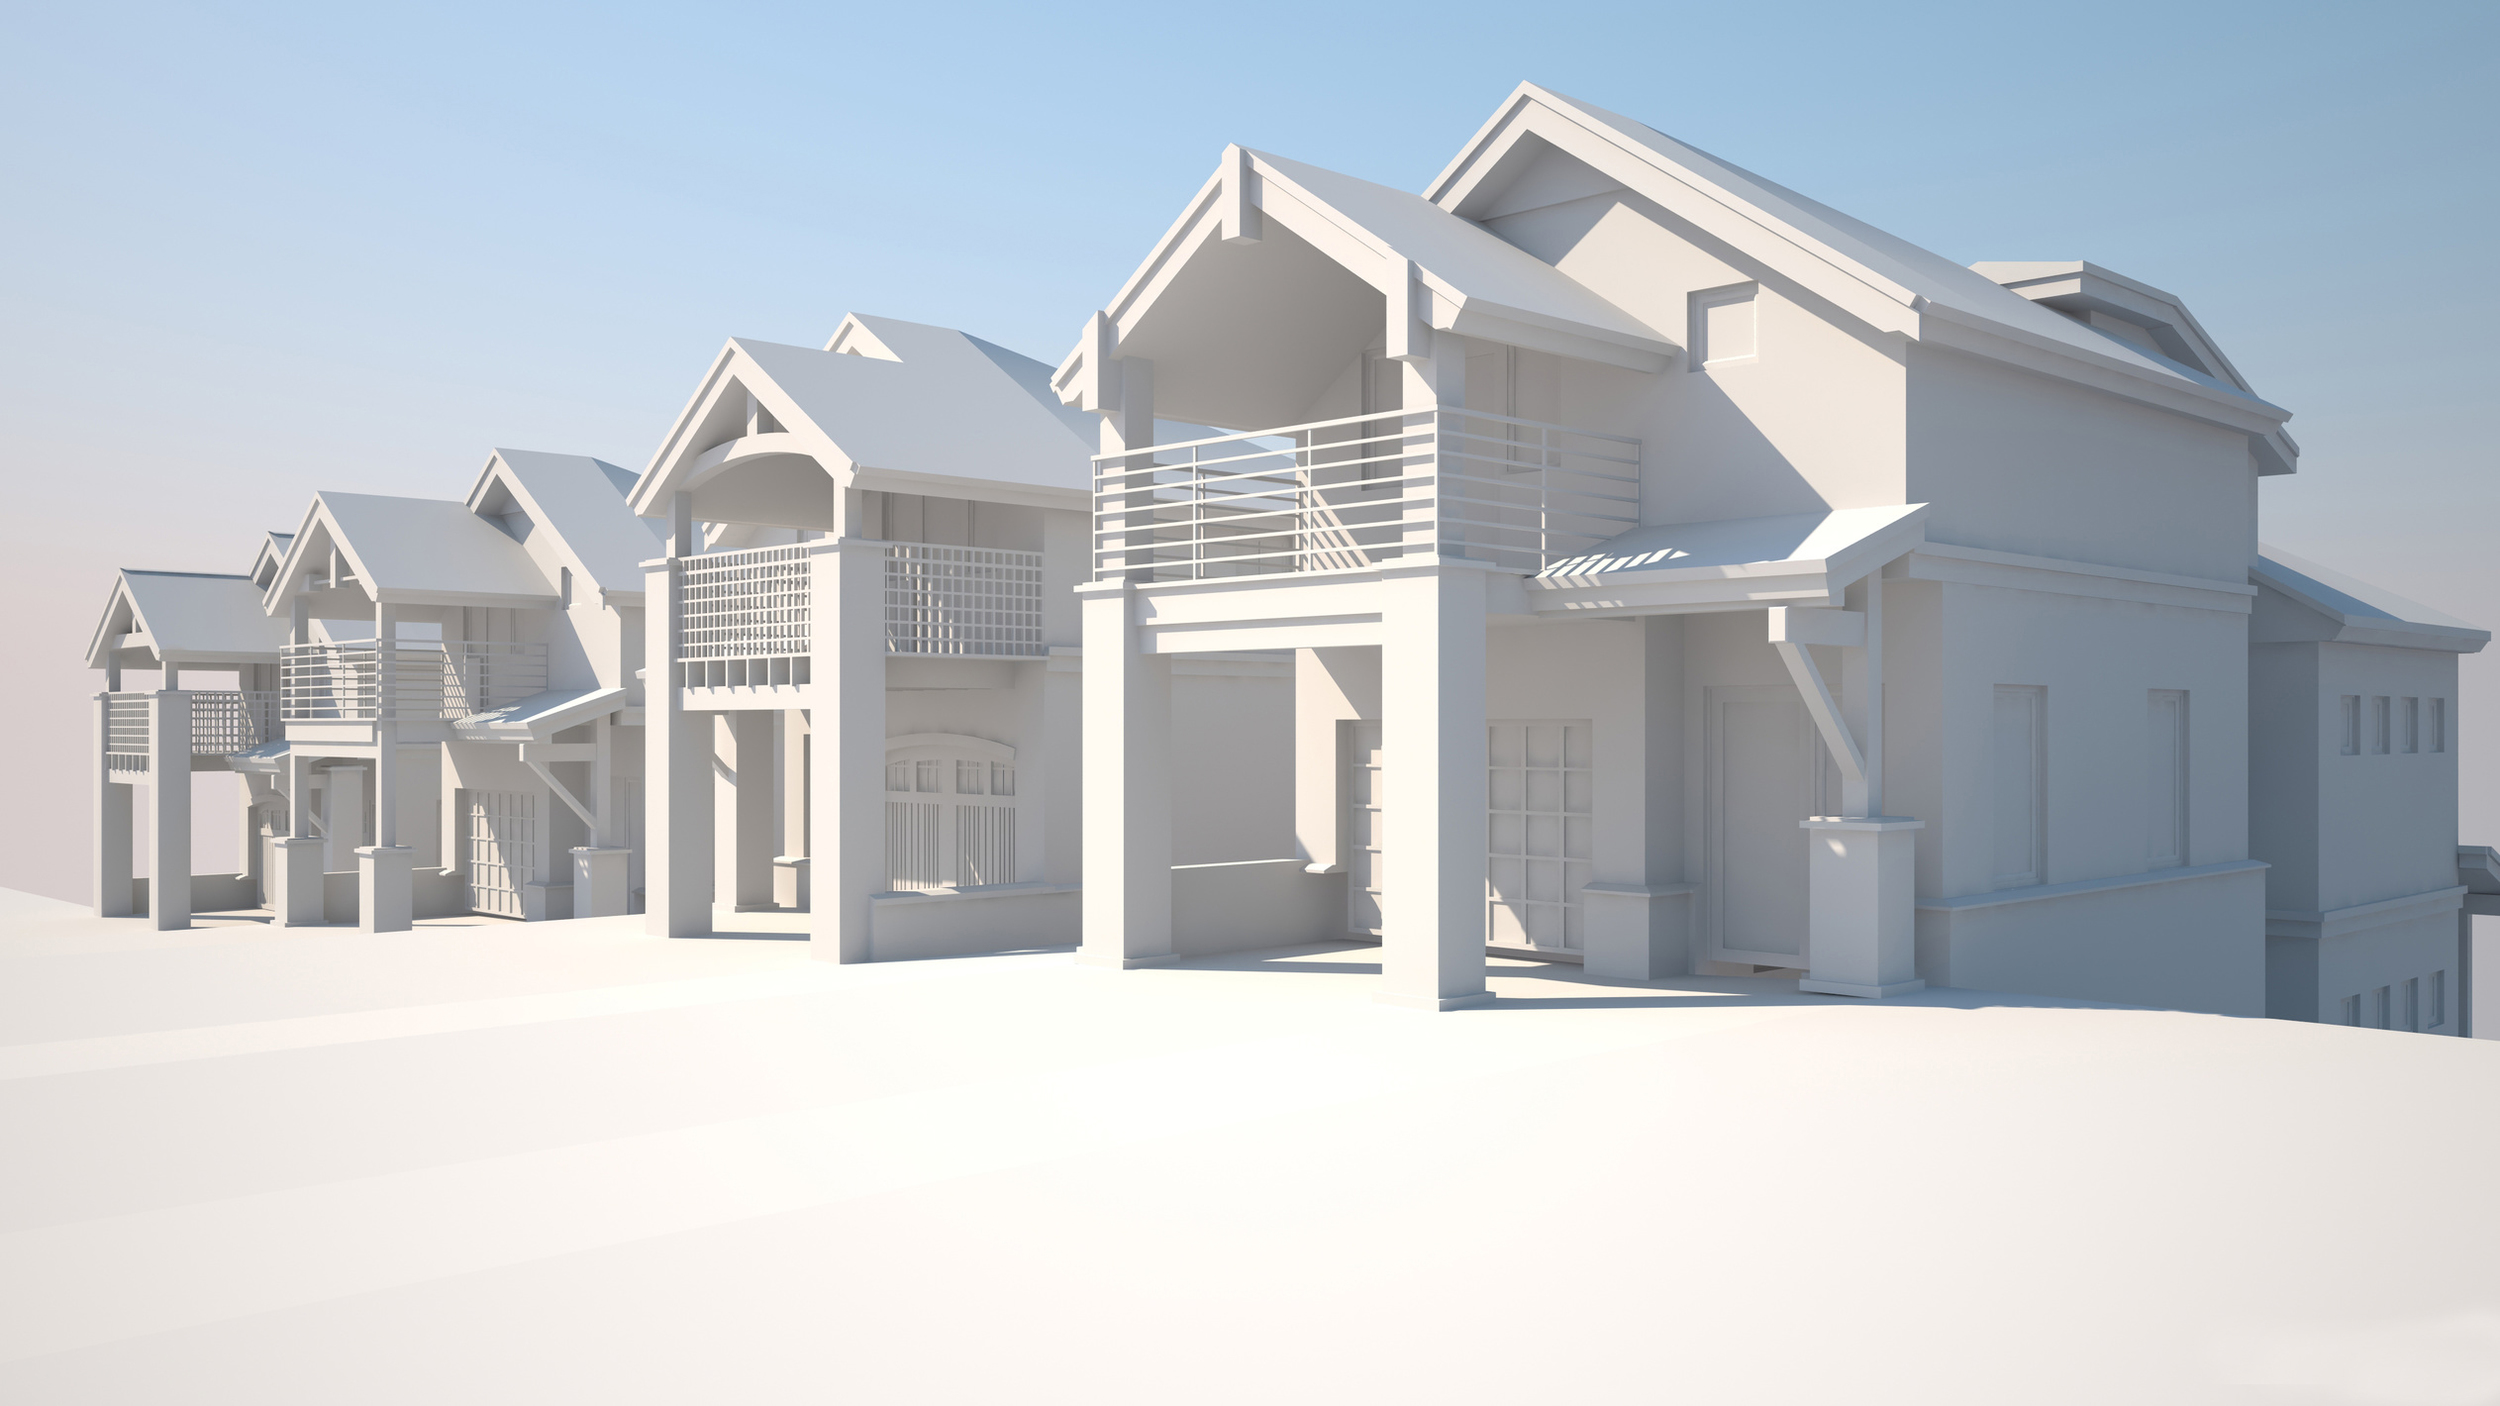
During the project, there were some changes to design, but I was happy to make the changes. A lot of the time my renderings bring up design changes, which is an important part of the design process and I am glad to help. One thing I didn't have was a nice photo of the mountain, which would be seen behind the houses. The architectural renderings will be used for sales and marketing, and a construction site billboard.
From start to finish, this project took me a little over a week. The client was happy, which makes me happy.
Did you enjoy this article? I would love to hear your thoughts, so don’t be shy and comment below! Please don’t forget to subscribe to my RSS-feed or follow my feed on Twitter, Google+ and Facebook! If you enjoyed the following article we humbly ask you to comment, and help us spread the word! Or, if you would like, drop me an email.
Forest Pack 4.3 Pro & Lite Released
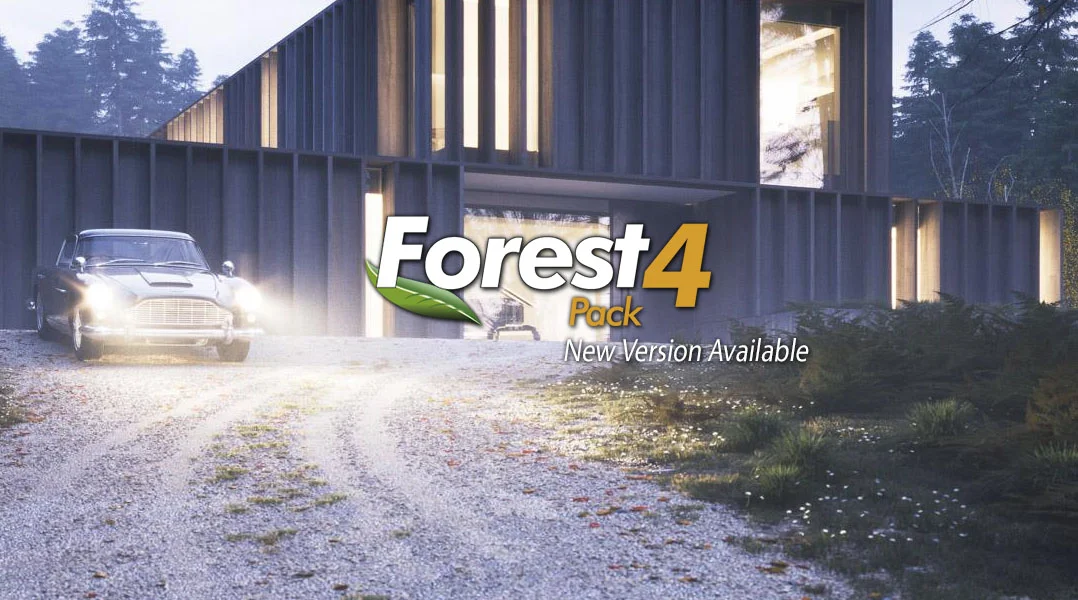
iToo Software announced today the release of Forest Pack 4.3 Lite and Pro versions. This update adds powerful new features suggested by users, including tools to create level-of-detail models, a new boundary-checking mode to simplify the creation of clearly defined edges for large scatter areas, and the ability to limit distribution using material ID’s.
Forest Pack 4.3 Demo Reel from iToo Software on Vimeo.
Forest Pack 4.3 brings Corona Renderer materials to the existing libraries, adds 16 new ready-to-use gravel presets – each in two versions for small or large-scale areas – plus many more features and fixes.
Key Features :
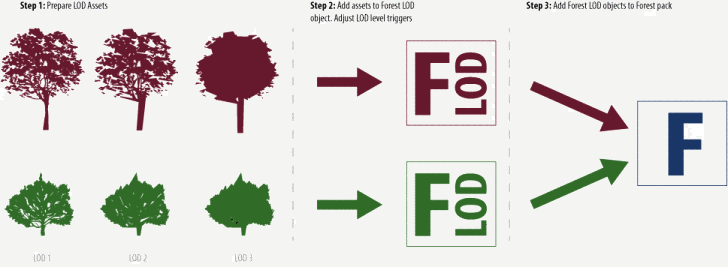
- A new Forest LOD object that allows you to switch billboard, models or materials based on distance from the camera, a custom target, or as a percentage of the screen size.
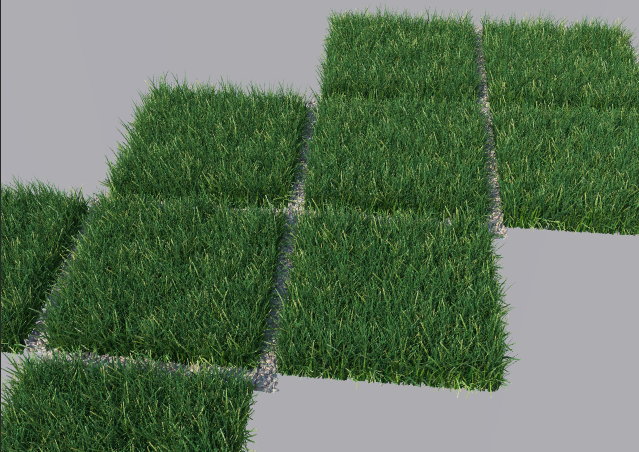
- Edge boundary checking mode to automate the creation of clean edges, especially when creating grass. Works by removing element sub-objects that fall outside the scatter area’s perimeter. (V-Ray only)
- The ability to limit a scatter to specific polygons using Material IDs when using surfaces.
- Introduced separate controls for Density and Scale Falloff Affect parameters.
- A new XML Data exporter to aid interoperability and integration of Forest Pack into large pipelines.
- 16 new Gravel presets, including detail and large-scale models.
- Materials for Corona Renderer added to existing free libraries.
To help you get up and running with these new features, iToosoft is also releasing two short tutorials :
2. Boundary Checking Using Edge Mode to show a simplified technique for creating clean edges around large scatters.
The Lite version of this release, freely available to download and use commercially, and full release notes are available now on the iToo Software website.
Did you enjoy this article? I would love to hear your thoughts, so don’t be shy and comment below! Please don’t forget to subscribe to my RSS-feed or follow my feed on Twitter, Google+ and Facebook! If you enjoyed the following article we humbly ask you to comment, and help us spread the word! Or, if you would like, drop me an email.
V-Ray 3.0 for 3ds Max SP1
V-Ray 3.10.01 is now available for download from our website. Before you get too excited, let me say that we will have a patch next week with some minor fixes, so it may be best to wait until then. Nevertheless, if you find any issues, please let us know.
We had a build yesterday that didn't work correctly; if you downloaded that, please get an updated installation from our website. We apologize for this inconvenience.
There is a short video demonstrating some of the new features here:
https://www.youtube.com/watch?v=Hy-tRHExWgU
The full changelog from the previous release is as follows:
Build 3.10.01 (official) (November 2014)
==============
New features:
(*) V-Ray: Further optimizations for render speed;
(*) Updated to OpenEXR 2.2.0 and added new DWA compression options to VRayOptionsRe;
(*) Support for point cloud rendering in 3ds Max 2015;
(*) Built-in DMC samples calculator for VRayLight, VRayMtl and brute force GI;
(*) .vrmesh viewer: Added a .vrmesh viewer tool for previewing .vrmesh and Alembic files in a standalone OpenGL application;
(*) Embree: Update to Embree 2.3;
(*) Embree: Proxies and instances can now be accelerated by Embree;
(*) Embree: Can now accelerate hair rendering for Ornatrix and HairFarm;
(*) V-Ray: Added "GI filter multiplier" option to the Global switches rollout to control texture filtering for GI rays for VRayHDRI;
(*) V-Ray: Secondary matte environment background slot to control the appearance of matte objects in reflections/refractions;
(*) V-Ray: When created, V-Ray will automatically load a preset named "default" if there is one (allows for customized default values);
(*) V-Ray RT: Support for Carbon Scatter;
(*) V-Ray RT: Support for the V-Ray VFB for ActiveShade session;
(*) V-Ray RT CPU: Support for the VRayClipper object;
(*) V-Ray RT CPU: Support for Ornatrix and HairFarm rendering;
(*) V-Ray RT GPU: Support for using the light cache for GPU rendering;
(*) V-Ray RT GPU: Support for coherent tracing (may improve rendering performance);
(*) V-Ray RT GPU CUDA: Support for the nVidia Maxwell GPU architecture;
(*) V-Ray RT GPU CUDA: Support for the VRayFastSSS2 material;
(*) V-Ray RT GPU CUDA: Initial support for hair rendering for Ornatrix and HairFarm;
(*) V-Ray RT GPU CUDA: On-the-fly recompilation of the GPU kernel to include only features used by the particular scene;
(*) VFB: Ability to dock/undock History window and Color Corrections window to the main VFB window;
(*) VFB: Added highlight burn color correction to the VFB;
(*) VFB: Added "background image" color correction to the VFB;
(*) VFB: Added white balance color correction;
(*) VFB: Added the ability to save multi-channel .vrimg and OpenEXR files from the VFB UI;
(*) VFB: Added the ability to load arbitrary file formats in the V-Ray VFB for post-processing;
(*) VRayInstancer: Implement a new geometric plugin for instancing objects on a ParticleFlow and other particle systems;
(*) VRayHDRI: Added image preview in the file open dialog;
(*) VRayHDRI: Added controls to specify UDIM/UVTILE tiles for the preview in material editor;
(*) VRayScatterVolumeMtl: Greatly improved calculations; ability to use the light cache;
(*) VRayScannedMtl: Support rendering of scanned real-world BRDF materials;
(*) VRayProxy: Support for hair and particle instances;
(*) VRayProxy: Support for subdivision objects in Alembic files using OpenSubdiv;
(*) VRayLight: Disc light shape;
(*) VRayLight, VRayIES, VRaySun: Added parameters to control the diffuse and specular contributions separately;
(*) VRayLightSelect render element: Added "mode" parameter to allow extracting the full/raw/diffuse/specular contribution of specific lights;
(*) VRayMtl: Added GGX BRDF model;
(*) VRayMtl: Added clip opacity mode option for faster rendering of trees etc;
(*) VRayMultiSubTex: Extended with new randomized modes for choosing colors;
(*) VRayVelocity render element: Added include/exclude list;
(*) ply2vrmesh: Added export options to export specified frames to separate files;
(*) ply2vrmesh: Added Alembic frame offset output to the files;
(*) ply2vrmesh: Added option to merge two or more .vrmesh files into one;
(*) vrimg2exr: Added -multiPart option to vrimg2exr that produces an OpenEXR 2 file with each render element in its own "part";
Modified features:
(*) V-Ray: Added an option to open the V-Ray messages window on error or warning only;
(*) V-Ray: Added by Object IDs selection method for Render mask;
(*) V-Ray: Added MaxScript access to the Trace sets include/exclude flag;
(*) V-Ray: Added %numPasses and %numSubdivs stamp keywords;
(*) V-Ray: "Camera Motion Blur" is controlled independently on "Motion Blur" setting;
(*) V-Ray: Embree enabled by default;
(*) V-Ray: Improved render speed when not using any render elements;
(*) V-Ray: Light cache "Use for glossy rays" option is enabled by default;
(*) V-Ray: Optimized hair rendering in general;
(*) V-Ray: Reduced memory usage for hair and particles;
(*) V-Ray: Renamed the "Time independent" option to "Lock noise pattern" in the DMC sampler rollout;
(*) V-Ray: The default GI methods are set to Brute force/Light cache;
(*) V-Ray: The default image sampler set to Progressive;
(*) V-Ray: The image sampler parameters rollout is unfolded by default;
(*) V-Ray: VFB is cleared always when doing network rendering with render mask;
(*) V-Ray RT: Improved refresh speed;
(*) V-Ray RT: Removed the Show Mask option from the user interface, the mask is written in VRaySampleRate render element for the progressive sampler;
(*) VFB: Improved anaglyph stereoscopic preview to reduce retinal rivalry;
(*) VFB: Improved initialization speed of the History window when there are a lot of images in the history;
(*) VFB: The vfbControl MaxScript function returns values for the commands that have states;
(*) VFB: Made the History window compliant with the 3ds Max color theme;
(*) .vrscene exporter: Added combo box to select between Scene Animation/Frame range, the latter remembers the start/end values;
(*) VRay2SidedMtl: Added ability to filter the translucency effect through the diffuse color of the front-facing side;
(*) VRayClipper: More robust and faster algorithm is used;
(*) VRayDirt: Added "double sided" option;
(*) VRayDirt: The distribution parameter can now take negative values for more defined edges;
(*) VRayFastSSS2: Added opacity texture slot;
(*) VRayHairFarmMod and VRayOrnatrixMod: Faster rendering of hair;
(*) VRayHDRI: Added MaxScript access to "coords" parameters;
(*) VRayLight: Added the ability to display the light name in the viewport;
(*) VRayLight: Somewhat faster sampling of rectangle lights;
(*) VRayMtl: Multiple layers of glass rendered with noise;
(*) VRayOSLMtl/VRayOSLTex: Improved shader cache logic, now the compiled shaders reside entirely in a memory buffer;
(*) VRayOSLMtl/VRayOSLTex: Removed dependency of shader name on the shader file name;
(*) VRayProxy: Export texture coordinates for .vrmesh preview, if preview mesh is specified;
(*) VRayProxy: Same proxies are automatically instantiated;
(*) VRayProxy: Show proxy color set names in Vertex Color texture "Channel Name" list;
(*) VRayProxy: Show the extra color channels from Alembic files in the "Channel Name" drop-down of Vertex Color maps applied to the proxy object;
(*) VRayProxy: Support for Material ID channel when rendering with point clouds;
(*) VRayShadow: Made the U, V, W Area shadow sizes animatable in the VRayShadows params rollout;
Did you enjoy this article? I would love to hear your thoughts, so don’t be shy and comment below! Please don’t forget to subscribe to my RSS-feed or follow my feed on Twitter, Google+ and Facebook! If you enjoyed the following article we humbly ask you to comment, and help us spread the word! Or, if you would like, drop me an email.
Managing Multiple 3DS MAX projects
If you are like me, you have several projects going on at any given time. Each project in a different stage and most awaiting on client comments. And, if you are like me, you hate loosing work and backups are very important. As you might know, 3DS MAX has an Autoback, which keeps 3 backup copies.
“How often should I back up? It depends, how much data are you willing to lose?”
Without spending a fortune, I sought out for a solution, and found a solution that works great.
Project Switcher
ProjectSwitcher is a Macroscript utility for quickly switching between multiple project folders. It keeps track of the previously opened projects, saves them to an .ini file and presents them in a dropdown list.
Installation: For automatic startup, just copy this script into your scripts\startup folder and restart 3ds Max.
Use the 'X' key to remove an entry from the list (this will not do anything to your actual project folder!); the 'Set' key works just like the 'File > Set Project Folder function: it allows you to select another existing project folder or create a new one. Both will be added to the list. Note: projectSwitcher does not currently track any project folder actions that were performed directly in 3ds Max.
New in v0.31:
- Due to a bug in 3ds Max 2014, I have made an alternative version for 3ds Max 2014
- The alternative version 0.31 no longer works as a dockable toolbar but inside a floating dialog instead
- Dialog now remembers position and size
New in v0.3:
- Automatic Project Switching when opening .max files: When opening the file c:\projects\myproject\scenes\file.max, this function will automatically set c:\projects\myproject\ as the new project folder. Thanks to Tollef Roe Steen for the suggestion.
- No longer a macroscript; can be automatically run when 3ds Max starts
Bug in 3ds Max 2008: A bug in the latest release of 3ds Max causes projectSwitcher to always show a Browse-Folder-Dialog. This can be fixed by manually editing the file Macro_SetProjectFolder.mcr in the <3dsmax_root>\ui\macroscripts directory and changing
local _SetProjectFolder_macro_option_promptUser
local _SetProjectFolder_macro_option_newFolder
in line 25 and 26 to
global _SetProjectFolder_macro_option_promptUser
global _SetProjectFolder_macro_option_newFolder
Save the .mcr file and restart 3ds Max. This should return normal functionality for projectSwitcher
Did you enjoy this article? I would love to hear your thoughts, so don’t be shy and comment below! Please don’t forget to subscribe to my RSS-feed or follow my feed on Twitter, Google+ and Facebook! If you enjoyed the following article we humbly ask you to comment, and help us spread the word! Or, if you would like, drop me an email.
Architectural Rendering with Rhino and V-Ray with Dave Schultze
Watch the Online Video Course Architectural Rendering with Rhino and V-Ray
A detailed rendering job can make your building models look more realistic and professional—and help sell clients on your ideas. This course teaches everything you need to know about rendering interior and exterior architectural scenes with Rhino and V-Ray. Using a pavilion of his own design, author Dave Schultze shows how to set up Sun, Sky, and V-Ray lighting systems; apply glass, metal, stone, and wood materials; and insert trees, grass, and people for additional scale and interest. Plus, learn how to use cameras and compositing techniques to add a sense of depth and realism to your designs.
Topics include:
- Setting up your system
- Understanding the settings, software, and process
- Lighting the scene
- Tweaking exposure
- Rendering with architectural glass, masonry, and concrete
- Making realistic grass and trees
- Creating depth of field
- Compositing from 3D to 2D
Did you enjoy this article? I would love to hear your thoughts, so don’t be shy and comment below! Please don’t forget to subscribe to my RSS-feed or follow my feed on Twitter, Google+ and Facebook! If you enjoyed the following article we humbly ask you to comment, and help us spread the word! Or, if you would like, drop me an email.
Excellent Service
Z Feng Architect recommends Whitebirch Studio.
Interested in working with Whitebirch Studios?
Did you enjoy this article? I would love to hear your thoughts, so don’t be shy and comment below! Please don’t forget to subscribe to my RSS-feed or follow my feed on Twitter, Google+ and Facebook! If you enjoyed the following article we humbly ask you to comment, and help us spread the word! Or, if you would like, drop me an email.
TRICKS OF THE TRADE
The ability to create realistic depth in a photograph (rendering), a 2-dimensional plane, is the sign of a good photographer (rendering) When shooting stills or video, it’s an important detail to make sure your shots have depth. Sometimes, however, that is sometimes easier said than done. In the quick, 3-minute video clip below, cinematographer Matthew Rosen, covers his top 5 favorite ways to ensure his image aren’t falling flat. The video is geared towards cinematography and moving pictures, but many of the techniques can be transferred into still photography as well. Well worth a watch even if you never shoot video.
TRICKS OF THE TRADE
In the beginning of the clip, Rosen explains why it’s important to have depth in an image, “It’s always my goal when I shoot to give this 2D image as much depth as I possibly can. The more tricks you have up your sleeve to conjure up depth, the more you will immerse your audience.” In order to achieve it, he suggests using these old tricks of the trade:
- Lighting And Shadow – Use a higher contrast between light and shadow to create a deeper feel.
- Focus – Use a shallow depth of field to create a visual of distance between subjects.
- Perspective – Use a perspective that creates a convergence of parallel lines (think leading lines) to simulate a deep depth of field.
- Parallax – Objects closest to the camera will appear to move quicker than those in the background.
- Occlusion – A type of transition in which a foreground subject completely covers a subject in the background as the camera pans behind the foreground subject.
Let’s listen to Rosen break it down in the video clip:
Did you enjoy this article? I would love to hear your thoughts, so don’t be shy and comment below! Please don’t forget to subscribe to my RSS-feed or follow my feed on Twitter, Google+ and Facebook! If you enjoyed the following article we humbly ask you to comment, and help us spread the word! Or, if you would like, drop me an email.
aXYZ HUB THE 3D ASSET BROWSER
As 3D Human Characters & 3D Assets become ever more important in visualizations, animations and illustrations,
we decided to develop a simple tool to improve your workflow!
ORGANIZE AND MANAGE!
With aXYZHUB® you now have a unique and simple way to navigate, choose, catalog and keep clean and organized your 3D Assets in order to optimize your workflow.
ADD 3D ASSETS TO YOUR SCENES!
Forget about opening individual files and merge one by one! With aXYZHUB® you can populate your 3D scene within a click. You don't need to remember where your model files are located in your drive. All your 3D Assets are organized and accessible from aXYZHUB®.
RESIZE!
Ohh no! My 3D Assets are in centimeters and my project is in inches! With aXYZHUB® you can forget about scaling issues. All your 3D Rigged Characters and 3D Assets are scaled and ready-to-be-used in your project.
CREATE PRESETS!
Save hours of your precious time! You can create ready-to-use
presets of 3D Characters and Assets to simply merge in your scene each time you need them.
RENDERING READY!
If you work with V-Ray, Mental Ray or Thea, you are able to set up your converted model's versions to be directly accessible from aXYZHUB® and ready to be rendered!
KEEP YOUR CATALOG UPDATED!
Each time AXYZ publishes a new character, aXYZHUB® will inform you. This way, each time you start a new Arch Viz project you will have the ability to evaluate if the new product additions are suitable for your project!
FEATURES HIGHLIGHTS
ORGANIZE AND MANAGE
With aXYZHUB® you can have a unique and simple way to navigate, choose, catalog and keep clean and organized your 3D Assets in order to optimize your workflow.
ADD 3D ASSETS TO YOUR SCENES
Forget about opening individual files and merge one by one! With aXYZHUB® you will be able to populate your 3D scene within a click. You will not need to remember where your model files are located in your drive. All your assets will be organized and accessible from aXYZHUB®.
RESIZE
Ohh no! My 3D Assets are in centimeters and my project is in inches! With aXYZHUB® you can forget about scaling issues. All your 3D Rigged Characters and 3D Assets will be scaled and ready-to-be-used in your project.
CREATE PRESETS
Save hours of your precious time! You can create ready-to-use presets of 3D Characters and Assets to simply merge in your scene each time you need them.
RENDERING READY
If you work with V-Ray, Mental Ray or Thea, you will be able to set up your converted models versions to be directly accessible from aXYZHUB® and ready to be rendered!
Did you enjoy this article? I would love to hear your thoughts, so don’t be shy and comment below! Please don’t forget to subscribe to my RSS-feed or follow my feed on Twitter, Google+ and Facebook! If you enjoyed the following article we humbly ask you to comment, and help us spread the word! Or, if you would like, drop me an email.
Forest Pack Pro v4.3.0 beta
New level of detail and visibility triggers. See the feature list.
New features and changes:
- Forest LOD (Level of Detail).
- A new type of object, "ForestLOD", is used to define levels of detail. Once created, assign it as Custom Object in Forest.
- Visibility triggers by Distance to camera or Screen size.
- Support for billboards and geometry.
- Custom materials.
- LOD properties can be adjusted in Camera rollout.
- Added Areas->Limit by Surface Material ID.
- Areas->Falloff Affect is splitted in Density and Scale values.
- Forest Tools->Data exporter to XML files.
- Added General->Disable Pop-ups: turns off all suggestions and warning messages, except critical errors (this option is global and persistent).
- Geometry->Get Size from Library is removed and enabled by default.
- Geometry->Global Size parameters are removed, although they are accessible by Maxscript ("globs¡ze", "width", "height")
- Geometry->Use Object Dimensions is replaced by local Scale parameter.
- New Display->Proxy model: Arrow (non-symmetrical)
- Added Display->Disable Object.
- Forest Tools->Instantiate copies User Properties, Object ID and wireframe color from the source object.
Library:
- 16 new presets: Gravel, including detail and large scale models.
- Added materials for Corona Renderer.
Fixes:
- Fixed problem of Exclude areas with Inverted Falloff Curves.
- Fixed issues with Distribution->Diversity Map and UV Surfaces.
- Fixed rare problem related to missing Surfaces on load.
- Fixed minor issues in Maxscript functions.
- Fixed potential crashing bug on Forest cloning.
- Forest Color ignores status of Override checkbox when using Tint by Element.
- Added Undo support to Geometry->Copy/Paste operations.
Registered customers of Forest Pack Pro can download the upgrade from User Panel->Beta versions
Image by State of Art Academy
Did you enjoy this article? I would love to hear your thoughts, so don’t be shy and comment below! Please don’t forget to subscribe to my RSS-feed or follow my feed on Twitter, Google+ and Facebook! If you enjoyed the following article we humbly ask you to comment, and help us spread the word! Or, if you would like, drop me an email.
Autodesk's Featured 3D Artist
There are a million stories. Tell us yours.
Share your best work with the AREA community and tell us the story behind your creations.
I am proud to share with you an Autodesk Artist blog that I was featured in. Several months ago I received a call from Autodesk, requesting an interview for a featured story on a new "Tell Us Your Story" blog, over on the Autodesk Area website. Of course, I was excited to speak with them, and the featured post has now gone live.
Did you enjoy this article? I would love to hear your thoughts, so don’t be shy and comment below! Please don’t forget to subscribe to my RSS-feed or follow my feed on Twitter, Google+ and Facebook! If you enjoyed the following article we humbly ask you to comment, and help us spread the word! Or, if you would like, drop me an email.


