

BLOG
Lens Distortion
You’d normally want to avoid any type of lens distortion when rendering architecture, but a virtual fisheye lens can add a creative twist to your renderings. This distorted style of the rendering isn't to everyone’s taste, but used sparingly – and with the right subjects – it can produce very striking renders.
Fisheye lenses come in two main types – those that give completely circular images, and those that produce conventional rectangular ones. But both will cause straight lines in your image to bulge outwards, especially at the edges.
Because the distorted renders from a fisheye break many of the ‘rules’ of rendering architecture, they often lend themselves to unusual framing and viewpoints. Try rendering with the lens pointing directly upwards to shoot ceilings or roofs, for example. The circular nature of fisheye renders is also perfect for symmetrical or even circular subjects.

You Don’t Have to Render the Whole Building
You don’t have to render the whole building for stunning architectural renderings. You can isolate details such as windows or columns to produce renderings with a ton of impact. Glass, metal and concrete structures, are full of graphic details that are perfect for producing this type of renderings, but you can also find them in older buildings.
The key to this style of rendering is simplicity, so look for areas of the building that you can isolate from their surroundings, or repetitive patterns in the structure. Then try rendering them either straight on to make the most of repetitive patterns, or at a deliberate angle for more dynamic images.
The Technically "Correct" Way to Render Architecture
Even though, the technically "correct" way to render architecture is to have all the verticals vertical, you can often conceive more energetic renderings by ignoring these conventions and rendering from a low or high point of view. The key is to avoid looking up or down at a slight angle, as this will look like a blunder, and instead go for a really climactic perspective.
Rendering from low down and looking up at a building really emphasizes its height, so it’s a great technique for rendering office blocks and other tall buildings. Look for point of view that will permit you to render the building at an extreme angle for an energetic composition (again this needs to be extreme enough to look deliberate), or strive for a symmetrical image.
“No great work is ever done in a hurry. …to do anything great requires time, patience, and perseverance.”
W. J. Wilmont Buxton

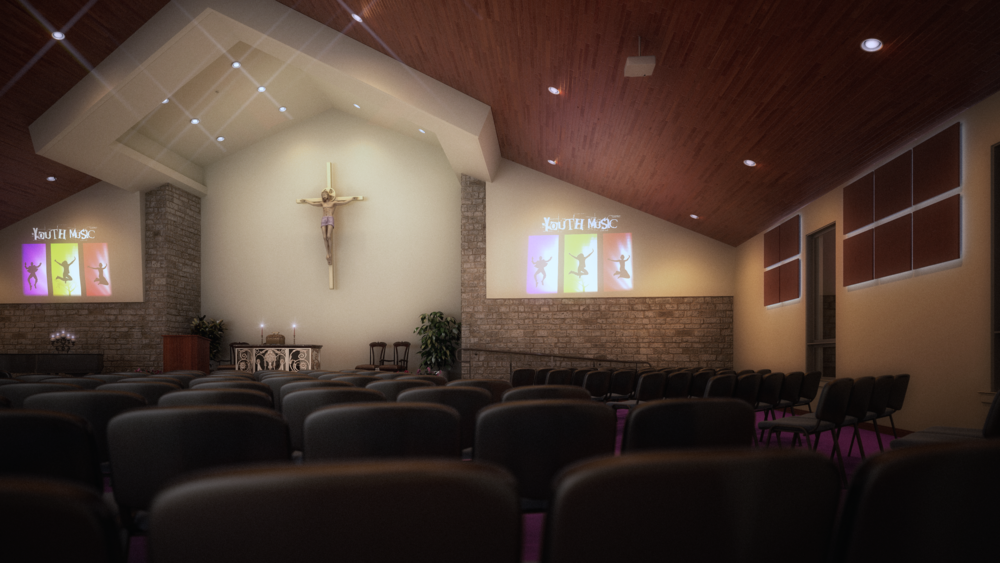
Church Worship Center
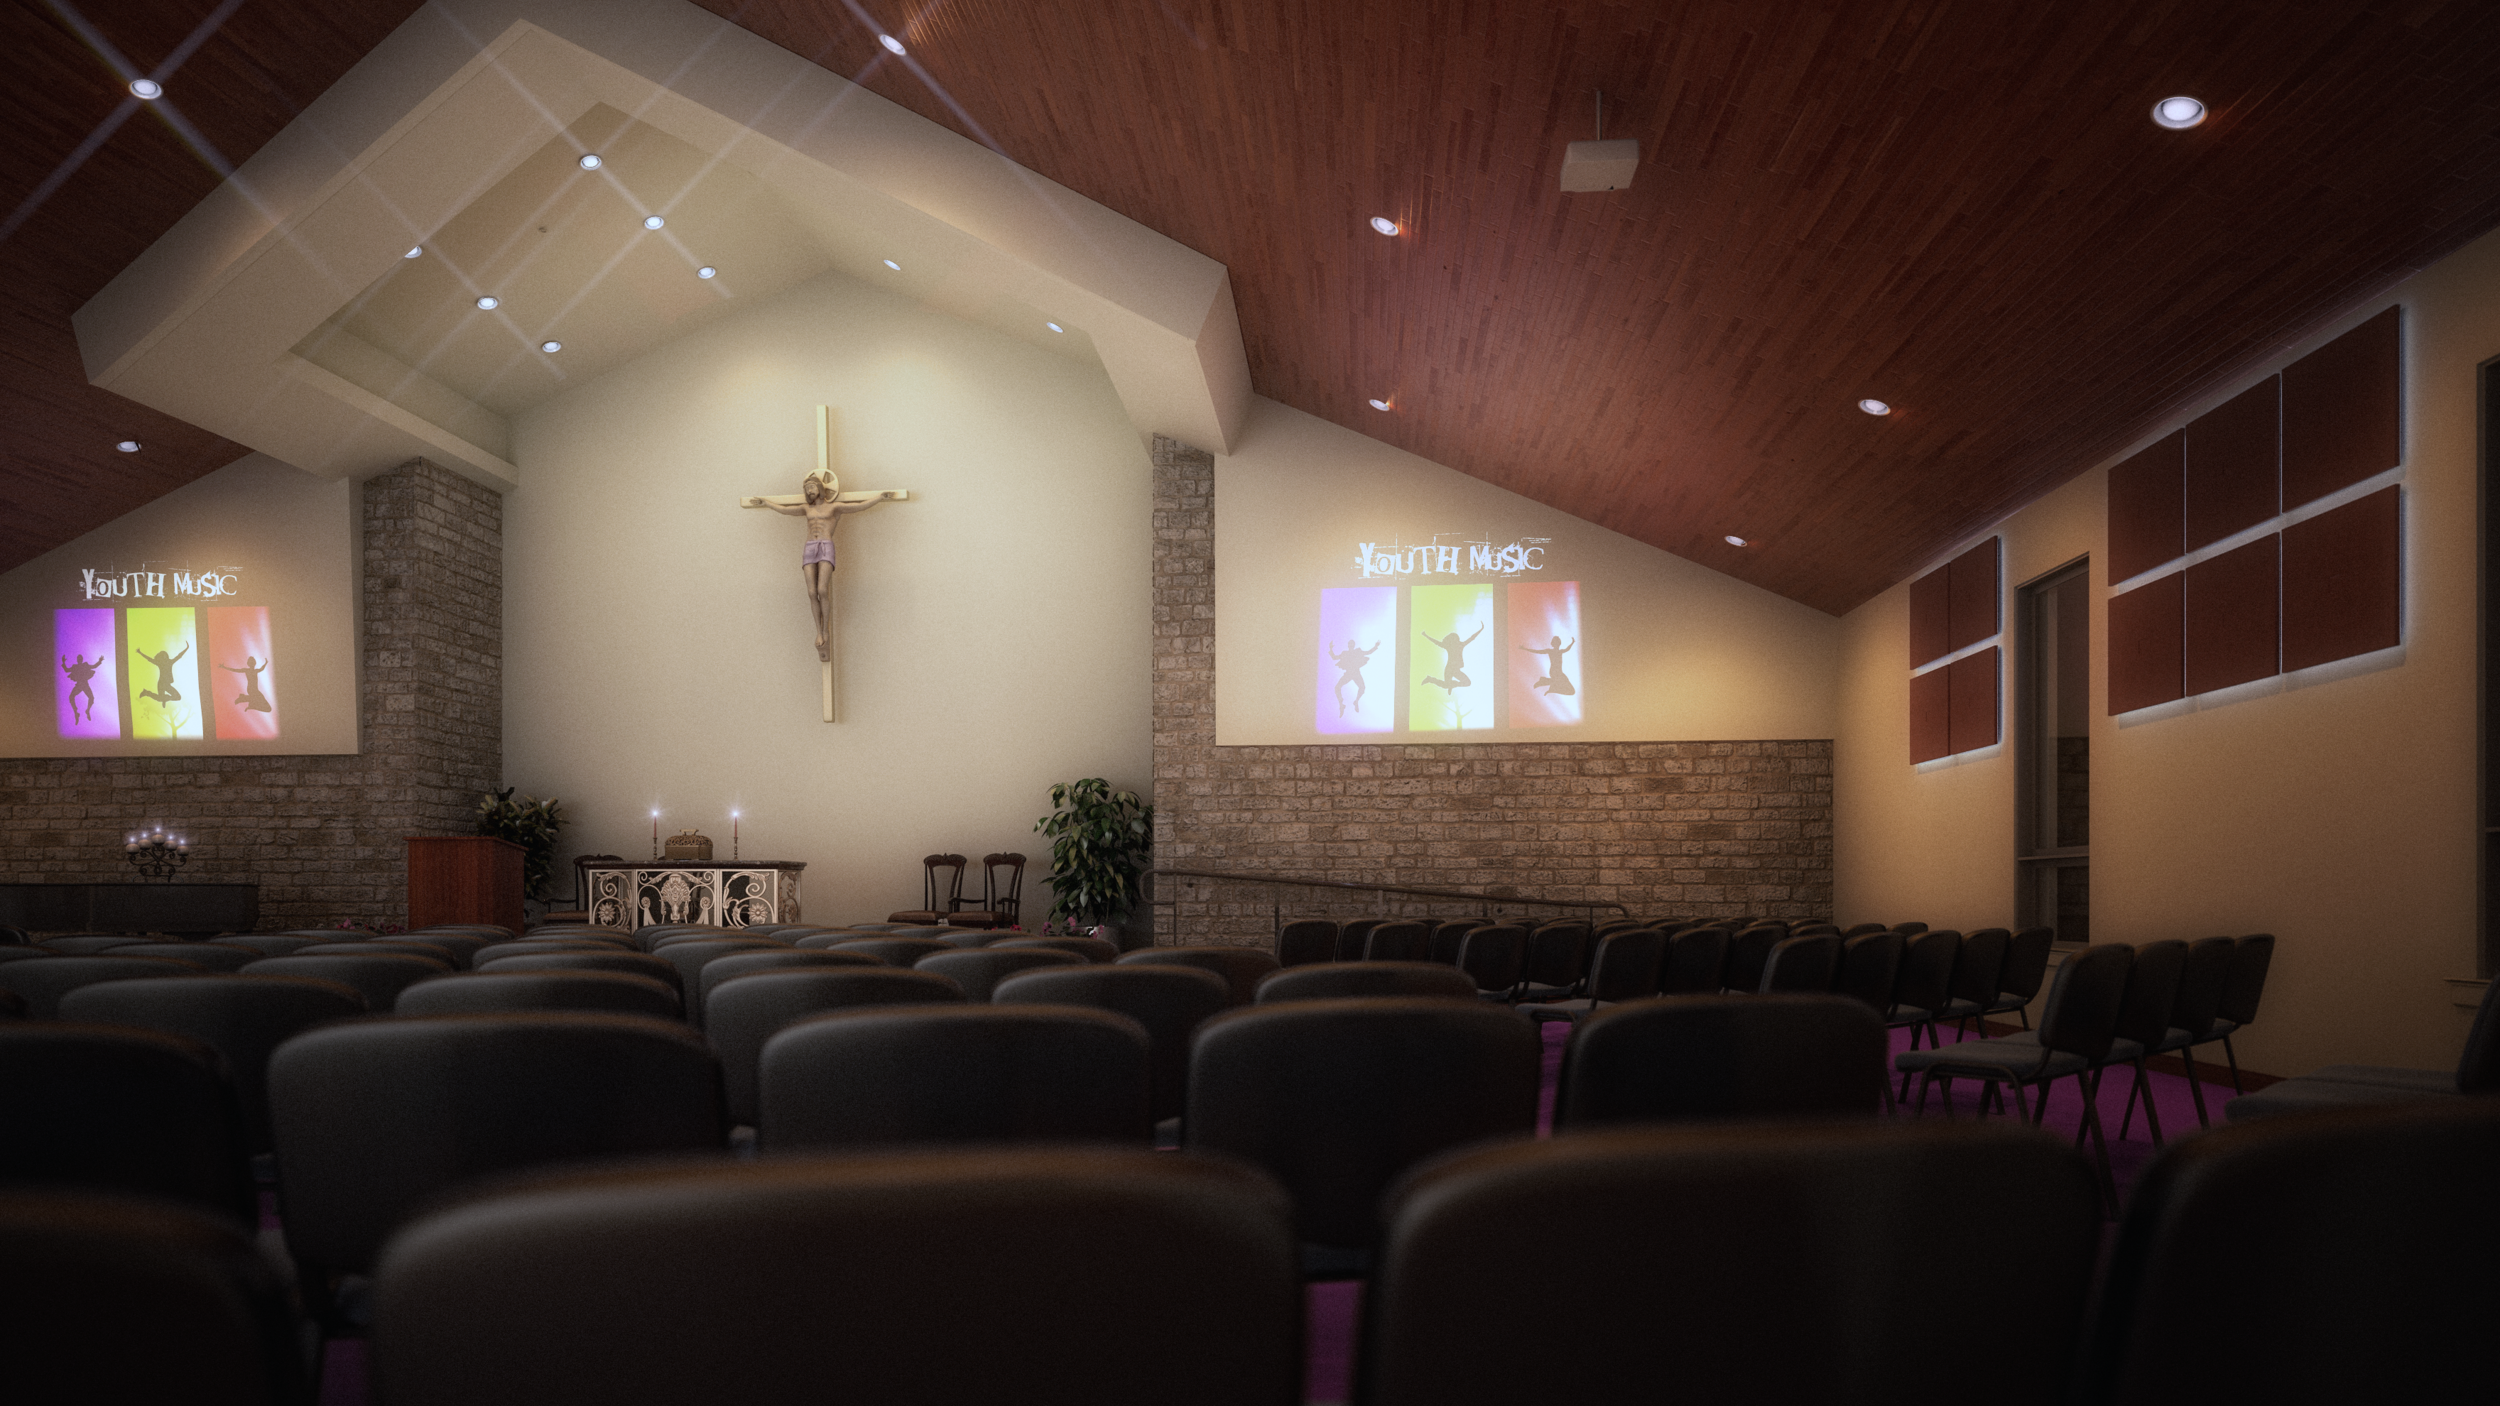


Here, is a Church Worship Center, that I had the pleasure to work on, and I would like to share it with you. If you have any questions, please leave a comment.
Center of Interest
The first and most important aspect of your 3D rendering is the focal point or center of interest, the one spot in your 3D rendering where your eye ultimately ends up.
Once you decide what your center of interest is and where you want to place it, you can begin adding all of the other elements of composition that help your eye flow through the 3D rendering The goal in any rendering is to lead the eye to your center of interest.
It takes a lot of thought and careful planning to make all the elements of composition successful.

Importance of Lighting
Whether lighting is harsh, gentle, glaring, or diffused; whether it is cold; whether it comes straight at us like a spotlight or from the side, behind, above, or below - it plays perhaps the greatest role in determining the mood of a 3D rendering.
All light - whether it's frontlight, sidelight, backlight, or diffused light - imparts a color cast onto the subject, depending on the time of day. Morning light is warmer than midday light, and late afternoon light (shortly before sunset) is even warmer still, wheres diffused light can at times be "blue".
What is meant by frontlight?
It's light that hits the front of your subject, as if your camera were a giant spotlight bathing everything in front of it in light.
Sidelight hits one side of a subject, illuminating only part of it leaving the other parts in "darkness". The subject takes on a three-dimensional quality due to the illusion of depth created by the contrast between light and dark. As a result, sidelight is often considered the most dramatic type of lighting.
It is backlighting (when the light hits the back of your subject) that renders so many subjects in silhouettes. Backlighting will always find you reaching for your sunglasses or, at least, shading your eyes. Why? Because to render backlight, you must be facing the sun itself.
Unlike sidelight, which conceals the subject in partial darkness, backlighitng can cloak the entire subject in total darkness. The resulting silhouetted shape - whether it's a tree, your building, or a person - is devoid of all detail.
If you have any question please, contact me, and I'll reply as soon as possible.
Sky Composition
Your skies will always profit from some preparation beforehand. In most renderings, the sky should enhance the building features without trying to dominate, and help to highlight the center of interest, particularly in those features that extend up into the sky, such as the tall buildings, trees, and so on.
The positioning of elements such as large cloud masses, the brightest part of the sky, or the most colorful, can considerably influence the overall composition of the rendering. On the other hand, you may wish to play down an area, most commonly the utmost point of the rendering.

In the above image, where is your eye drawn? because of the sky composition, your eye is drawn to the bottom, left 3rd, of the photo.
If you have any question please, contact me, and I'll reply as soon as possible.

Atmosphere - Pink Mud
Mood or atmosphere is the icing on the rendering cake. When used with thought, it can completely transform a scene and can inject a sense of power and drama at the same time. You can use atmosphere to enhance a "normal" rendering into one conveying power and beauty of nature's finest moods. We can use it to lose unwanted detail, or suggest mystery, impending doom, a light, airy afternoon, tranquil moments, and much more.
Mood can be especially effective in highlighting a center of interest or suggesting a narrative. Try to get out of the habit of always rendering fields green, clouds white, or mud brown - flood the whole composition with a color mood to suit your idea, even if it conflicts with color we normally assume to be correct. Those who fail to see pink mud are truly restricting their imaginative palette.

atmosphere and mood
If you have any question please, contact me, and I'll reply as soon as possible.
Creating a Tranquil Mood
While wind, storms, and dramatic scenes rely on diagonals and vertical emphasis, to convey a sense of peace and tranquility, you need the emphasis to be on a more horizontal composition.

A Tranquil Mood
If you have any question please, contact me, and I'll reply as soon as possible.
Light is a Key Requirement
Light is a key requirement for our renderings and with consideration it to be one of the most interesting facet of our work especially when combined with ambience.
The intent is to add something special to our renderings to raise them up above the norm.
So frequently with the dull, lifeless renderings with a light so flat, and boring, that however we executed our work it does not stand out in the crowd.
Color temperature can be an effective tool suggesting the time of the day as well as giving an feeling of hot or cold weather, and this can impact the entire rendering or just a part.

If you have any question please, contact me, and I'll reply as soon as possible.
Break The Rules!
This is not the last resort though, but many a times breaking the rules is all you have to do — not only for interesting captures but also for winning over the creative rut. For instance, one of the compositional guidelines suggest not to place the subject in the dead center. It makes up for a boring composition. But at times placing the subject in the center works wonders. So first learn the rules and then try to break them often. After all rules are meant to be broken.
If you have any question please, contact me, and I'll reply as soon as possible.
Skies, Light, and Atmosphere
Skies, light, and atmosphere are all bound together, and to blend these elements together will enhance your exterior renderings substantially.
Even the most ordinary of subjects can be transformed by the right lighting and mood. Many 3D artists find themselves in a rut from time to time, incapable to bring forth exuberance for the next exterior rendering. By creating or changing the sky, lighting or atmosphere, you can come up with a genuinely fresh look for your work.
Skies set the mood of an exterior rendering and greatly influence the light, yet many 3D artist scarcely give any consideration.
So before starting an exterior rendering, I ask myself a number of questions:
What sort of mood do I wish to create that would work with the composition?
- Do I want a cool, warm, or neutral sky?
- What time of day do I want to suggest?
- Is there a need for the sky to balance the composition?
- Can the clouds or light in the sky be arranges to highlight a prominent feature?
- How should the sky relate to the landscape, especially where the two elements meet?
- Do I want intense light coming from some part of the sky and if so, where?
These questions may seem to be over- complicated, but after a while they become second nature and most are instantly solved.
With just a little forethought and knowledge you can turn your skies into absolute gems
If you have any question please, contact me, and I'll reply as soon as possible.
Cast Shadows
Cast shadows are a outstanding way to evoke a notion of sunshine in your rendering, so make the most out of them. Where you have a house or building, by all means push those trees closer in to give yourself an excuse to lay cast shadows over the walls and roof - it will breathe a little magic into your rendering.

Cast Shadows
Another thing you can do, to utilize cast shadows, is place a Gobo off screen. A Gobo is a partial screen used in front of a spotlight to project a shape. Here is a great resource for some free Gobos:
If you have any question please, contact me, and I'll reply as soon as possible.
Try to Avoid Parallax
Who wants a building to look like it’s falling over?

If everything in the scene is approximately the same distance from the camera, or very far away, the parallax effect will be elminated or at least minimized.
The way you keep your verticals vertical is to try to keep the plane of your camera parallel to the vertical line of the building, which is not always possible, of course.
Wide angle lenses can help reduce parallax effects because a wide angle lens accentuates perspective, making everything seem further away. However wide angle lenses also have a larger field of view so there is a greater chance that things in the foreground (including the ground itself) are captured and then cause problems.
If you use a render engine like V-Ray, you'll have a guess parallax toggle, but if you don't, there are post-processing tricks to do the necessary tweaks!
If you have any question please, contact me, and I'll reply as soon as possible.
Kahn's Exeter Short Film
CG Shortfilm about Louis Kahn's Phillips Exeter Academy Library.
Footage from "The Third & The Seventh" project for illustrating Mundos Digitales 2009 conference.
Done with 3dsmax, Vray, AE and Premiere
Know Your Rights: Copyright 101 for Artists
How Much Do You Know About Copyright?
Artist Daily and the staff at Interweave have released a new free eBook Know Your Rights: Copyright 101 for Artists to help raise awareness of the issues surrounding copyright and give credit to the talented writers, designers, artists, photographers, and innovators who work with us to share their products and ideas with our readers.
This guide to the basics of copyright is for anyone and everyone: designers and makers, crafters, retailers, library staff, educators, and more.
Most people think of pirated movies or music when they hear about copyright violations, says Eunny Jang, editor ofInterweave Knits magazine. But we answer questions about copyright for crafters, artists, designers, and authors every day—copyright and other intellectual property issues are a big deal in the DIY marketplace, where the "I can do that!" spirit and respect for original, independent design and authorship need to coexist peacefully.

This free resource addresses topics such as:
- What is copyright?
- How does copyright work?
- What is copyright infringement?
- Plus other pressing topics from simple questions to more complex issues, such as:
- Can I resell a pattern/magazine/book/DVD I own? What about purchases of my digital downloads?
- Can I make and sell projects I found in a book or magazine?
- Where can I find more instructions for projects that I can make and sell?
- How can I tell if a work is in the public domain?
- Do I always retain copyright as the original author of a piece?
- What do I do if someone’s violating my copyright?
- And much more.
Ultimately, copyright is about protecting the creative process, ensuring that the creator of a work can benefit from that work," adds Jang.
Our goal at Interweave is to educate our consumers about what copyright is, and why it matters—and to give authors, artists, and designers everywhere the tools they need to protect their own rights so they can continue to create new works and share them with the public.