

BLOG

House Plan Renderings
About once a month I get a house plan company emailing me for a quote on doing their house plan renderings. The email usually goes like this, "I have someone committed to X dollars per house, but I like your work so much better; would you be willing to match their price?". Typically, the price they say they were quoted wouldn't get me out of bed in the morning, so the conversation doesn't usually go past a few email exchanges.
The number of hours I put into my work would make most wonder what my motivations could be. I love what I do and smaller houses are my favorite. I do a lot of larger projects, so when a smaller house comes along it is a breath of fresh air. Here, is a smaller house for a house plan company that I did settle on a price that we both were happy with. It made front cover, which makes me smile.

Did you enjoy this article? I would love to hear your thoughts, so don’t be shy and comment below! Please don’t forget to subscribe to my RSS-feed or follow my feed onTwitter, Google+ andFacebook! If you enjoyed the following article we humbly ask you to comment, and help us spread the word! Or, if you would like, drop me an email.

What is a 3D LUT
A LUT is basically a table that says if the input is 1 make the output 7. If the input is 0 make the output 5 – or whatever, these numbers are arbitrary, it is just a conversion matrix – take this, make it that. This can happen to the image over all or per colour channel (RGB). For example in the red channel use LUT A to make 1 = 7 but in the blue channel use LUT B to make 1=15.

Digital Watercolor

Here is a Photoshop action that turns my digital architectural renderings into a digital architectural watercolor rendering. It's awesome!
Now, coming from traditional media I know this isn't close to being as awesome as a really well-done water color, but heck, it took about a minute. Please, if you would like to know more leave me a comment below. If you fill out my contact form I will ignore it.
Did you enjoy this article? I would love to hear your thoughts, so don’t be shy and comment below! Please don’t forget to subscribe to my RSS-feed or follow my feed onTwitter, Google+ andFacebook! If you enjoyed the following article we humbly ask you to comment, and help us spread the word! Or, if you would like, drop me an email.

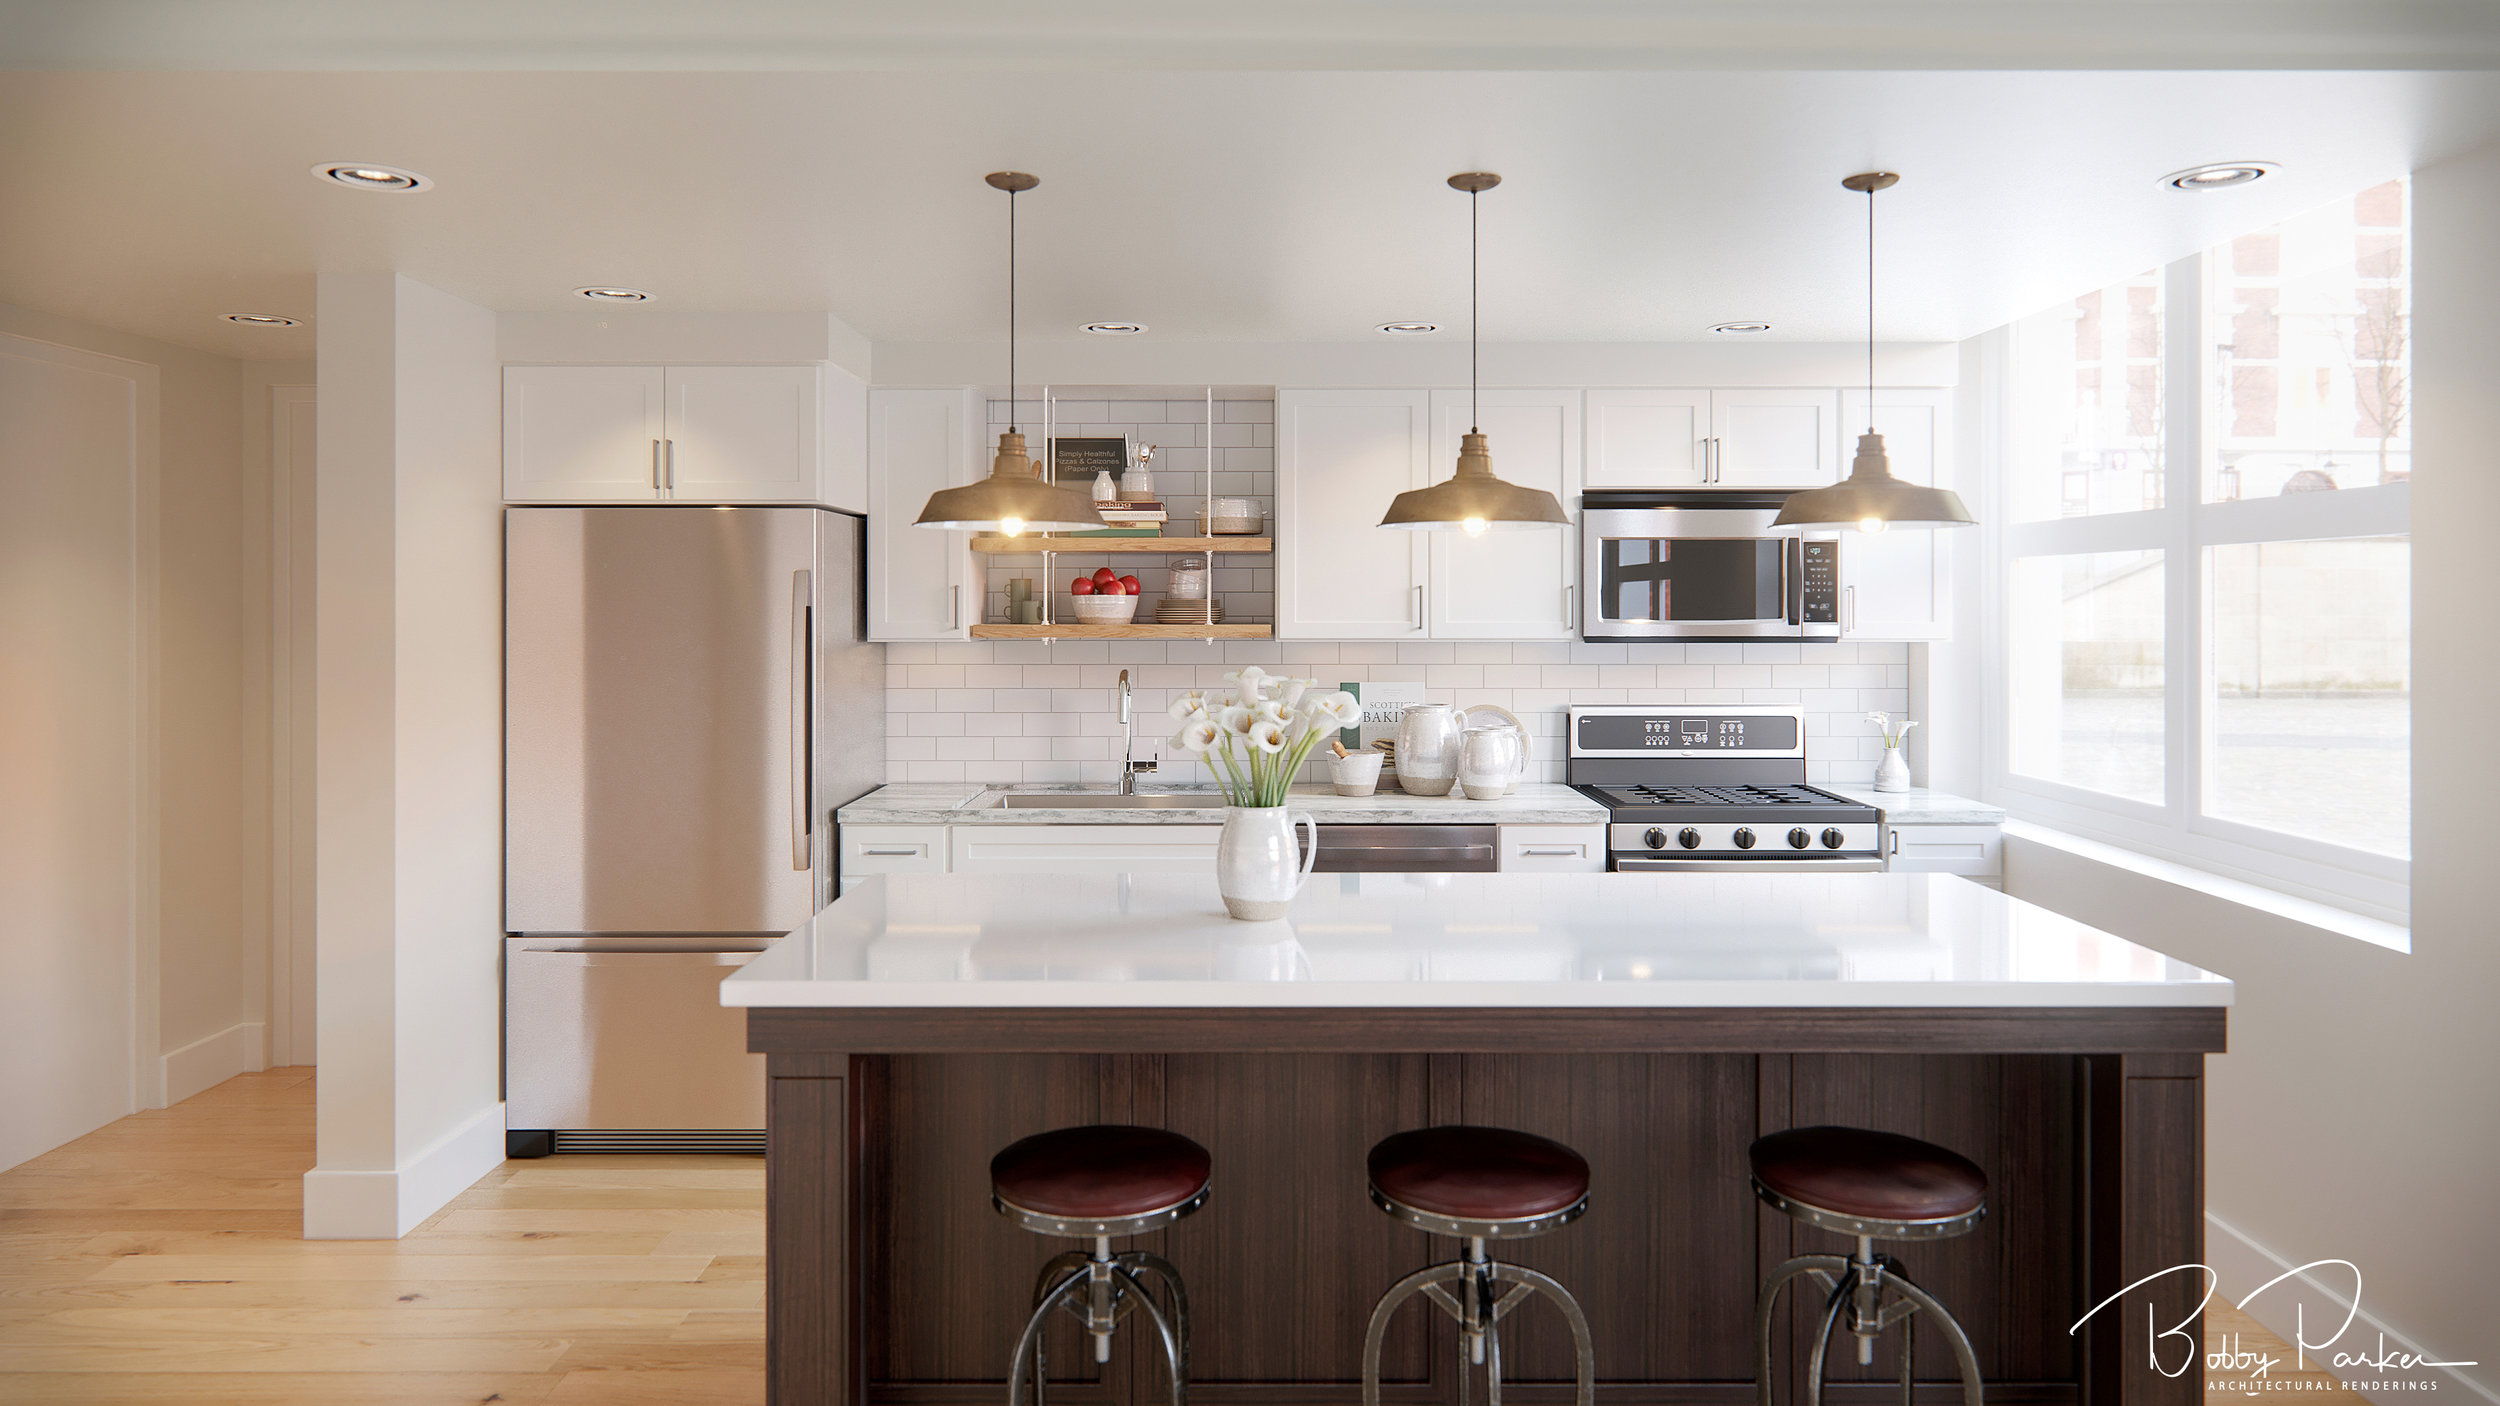
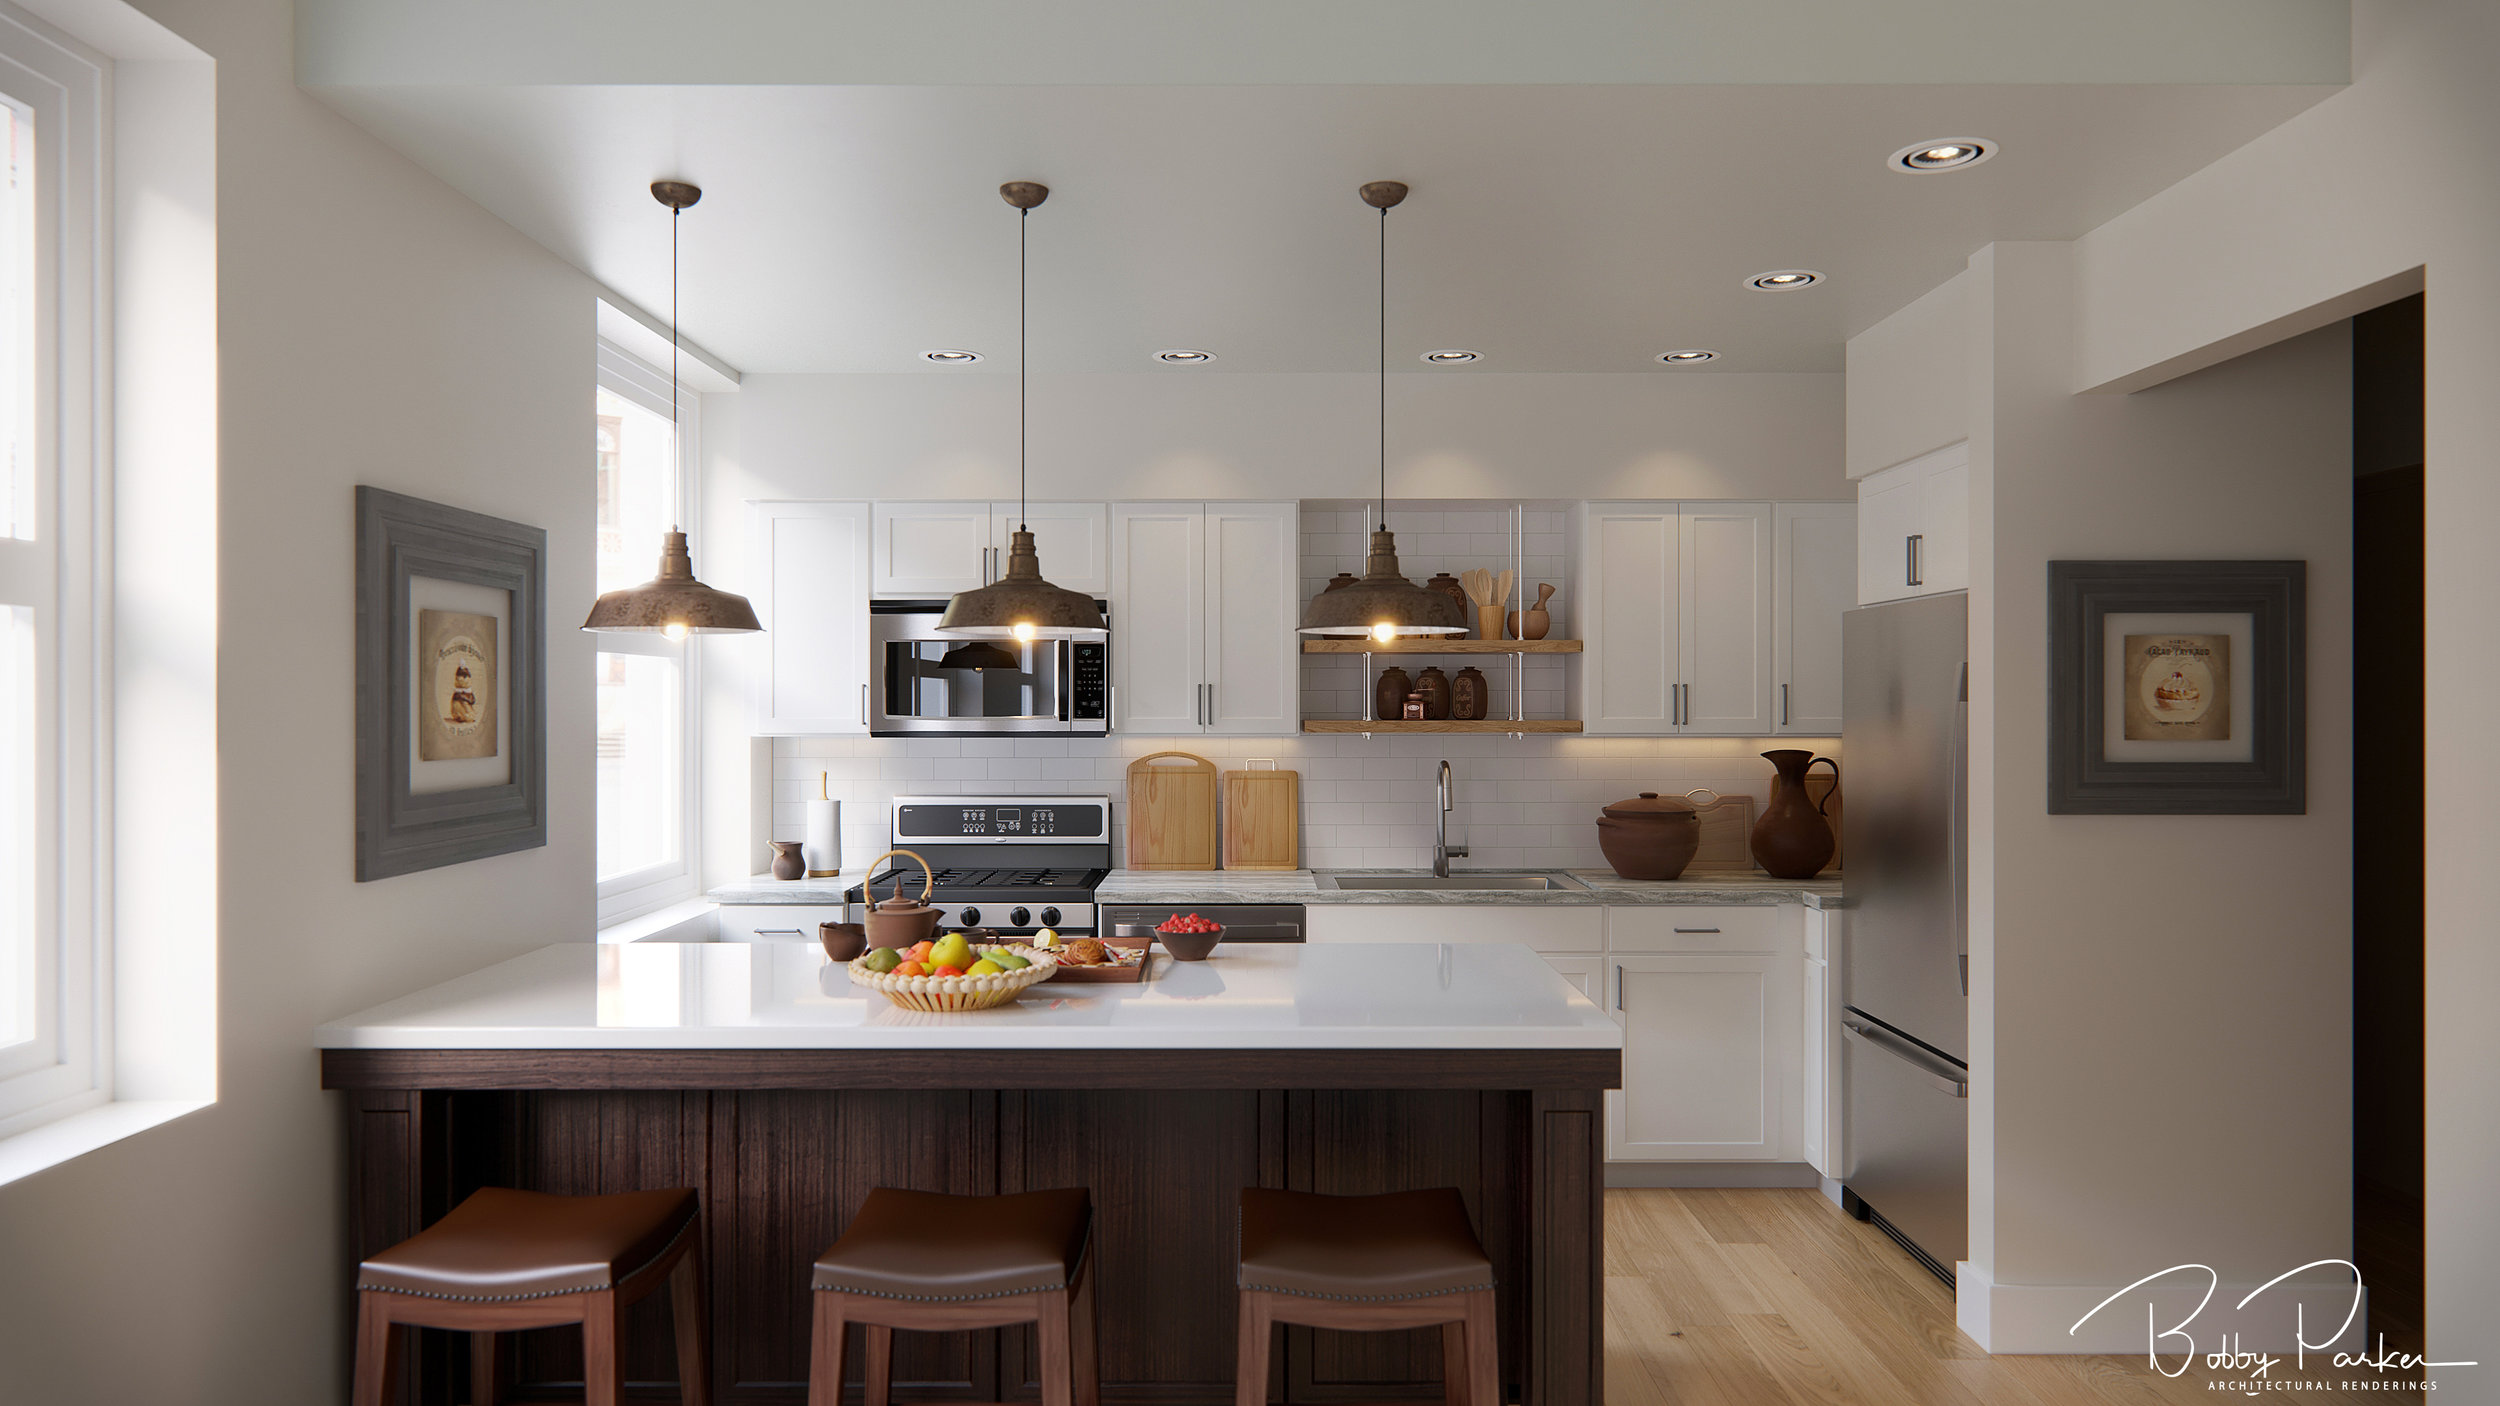
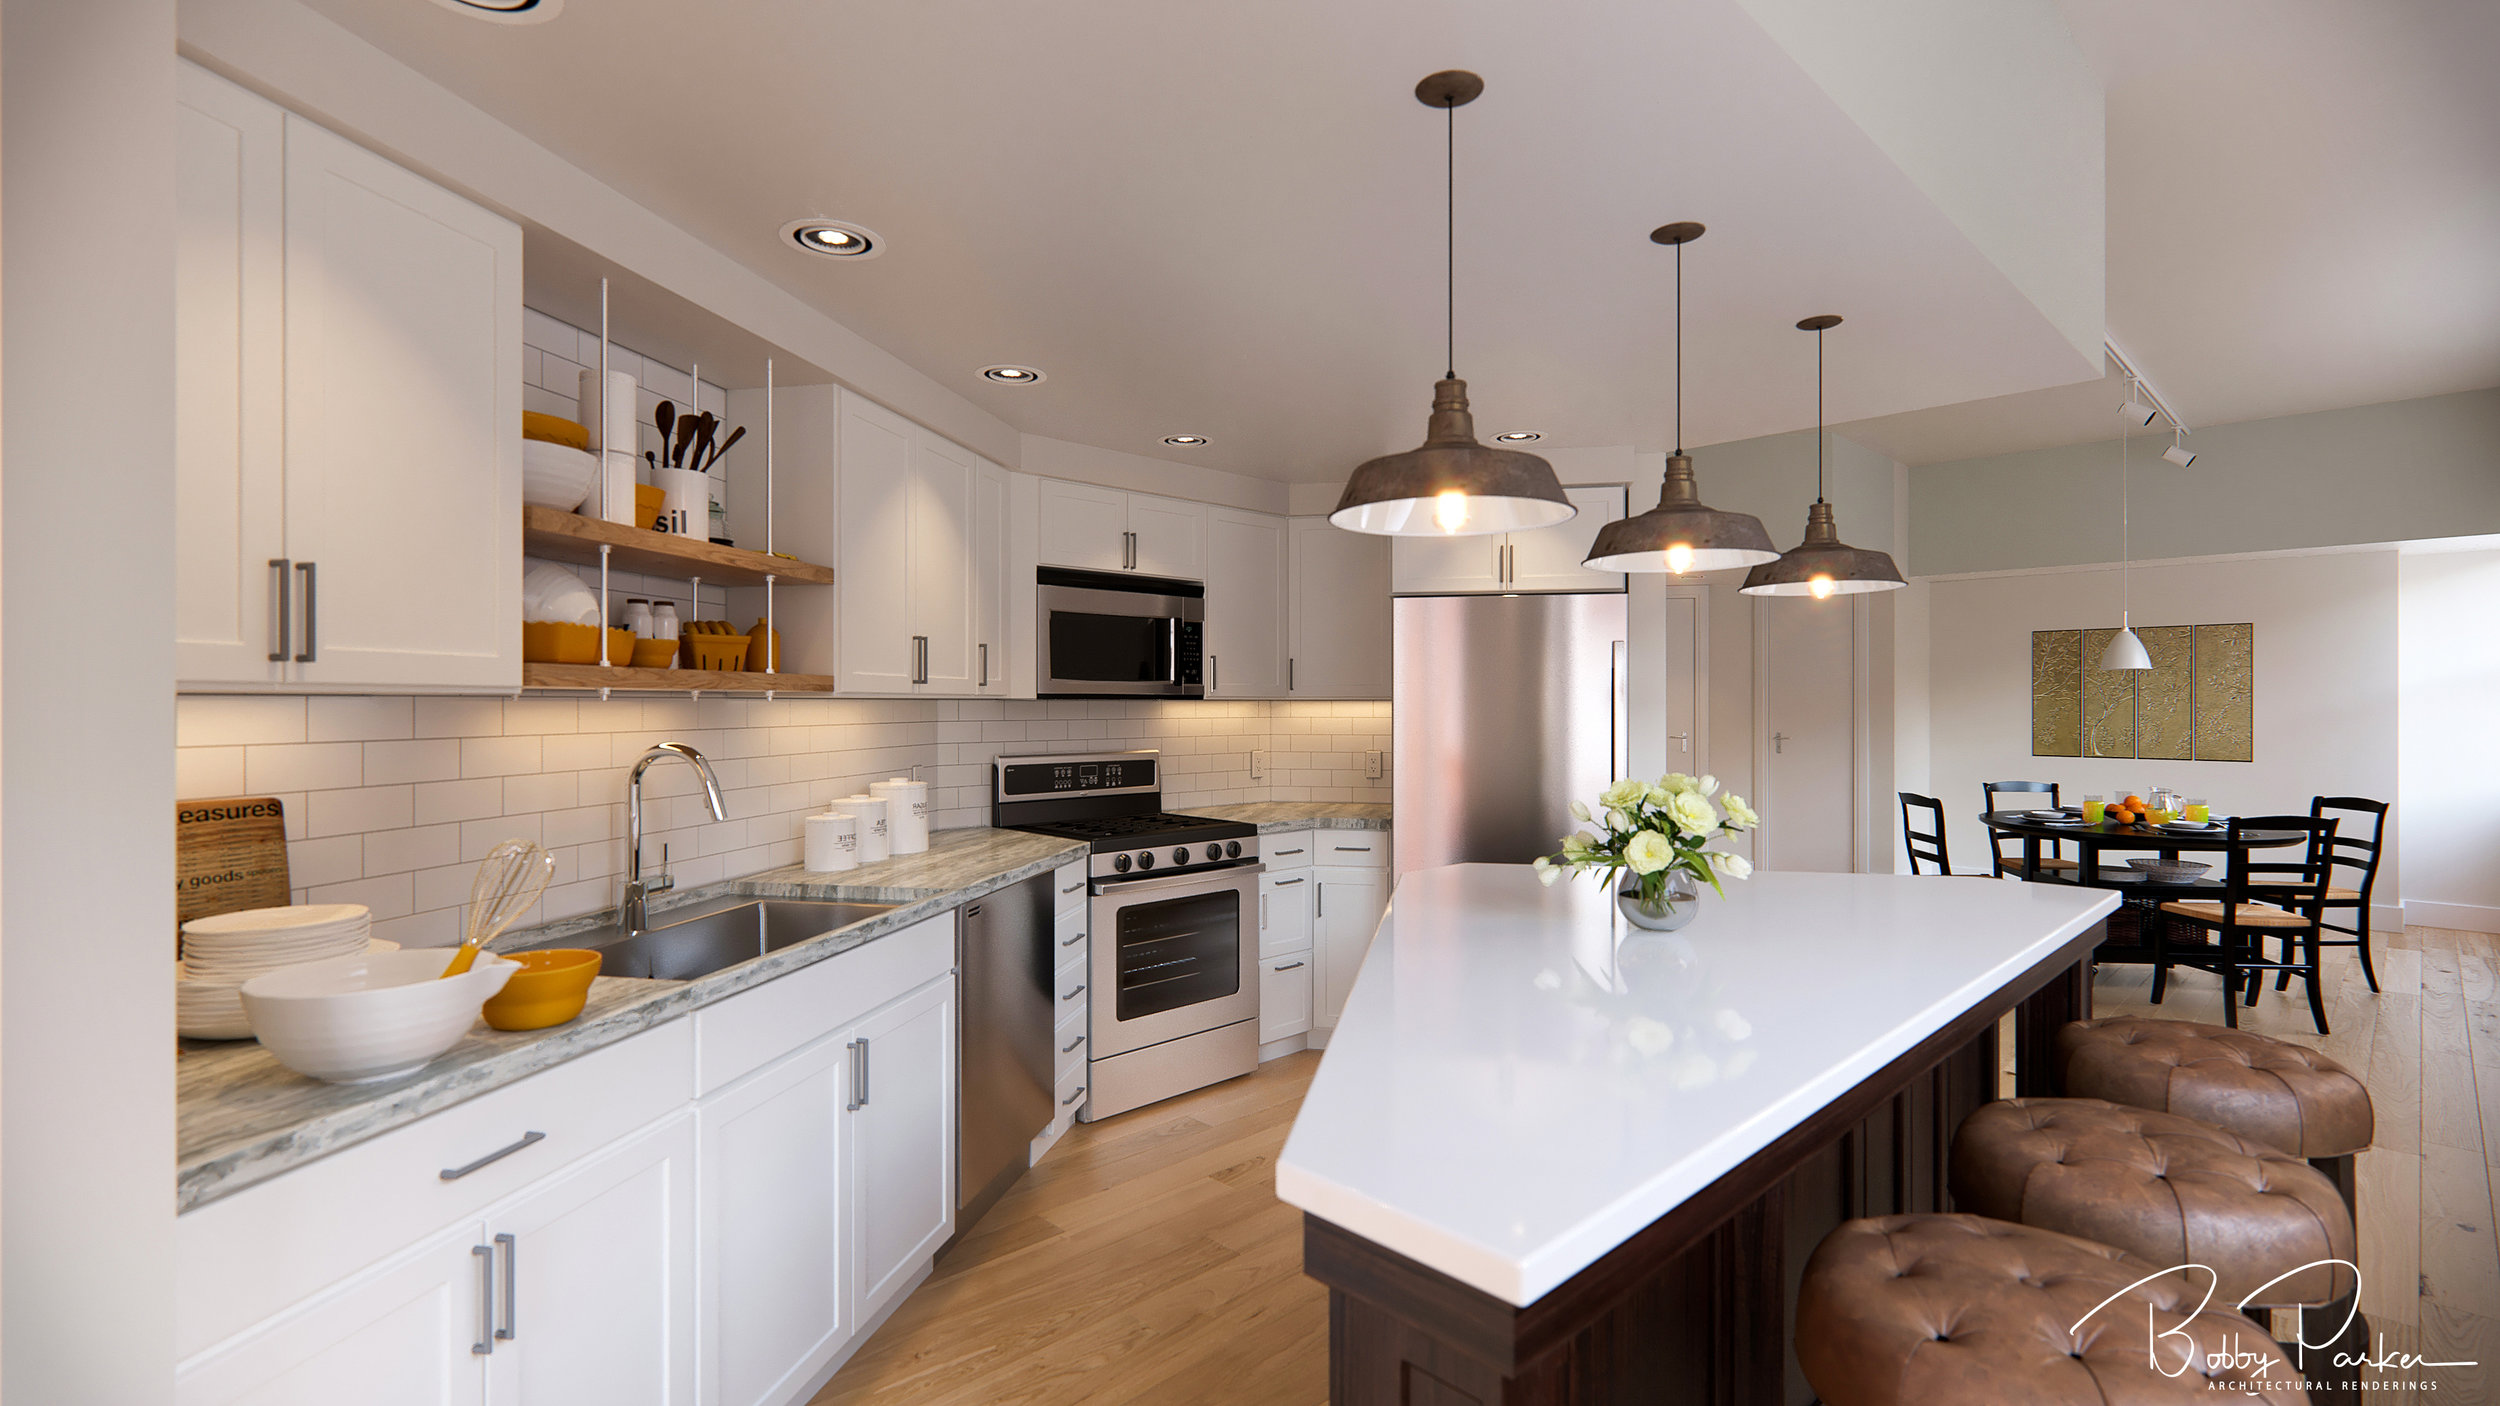
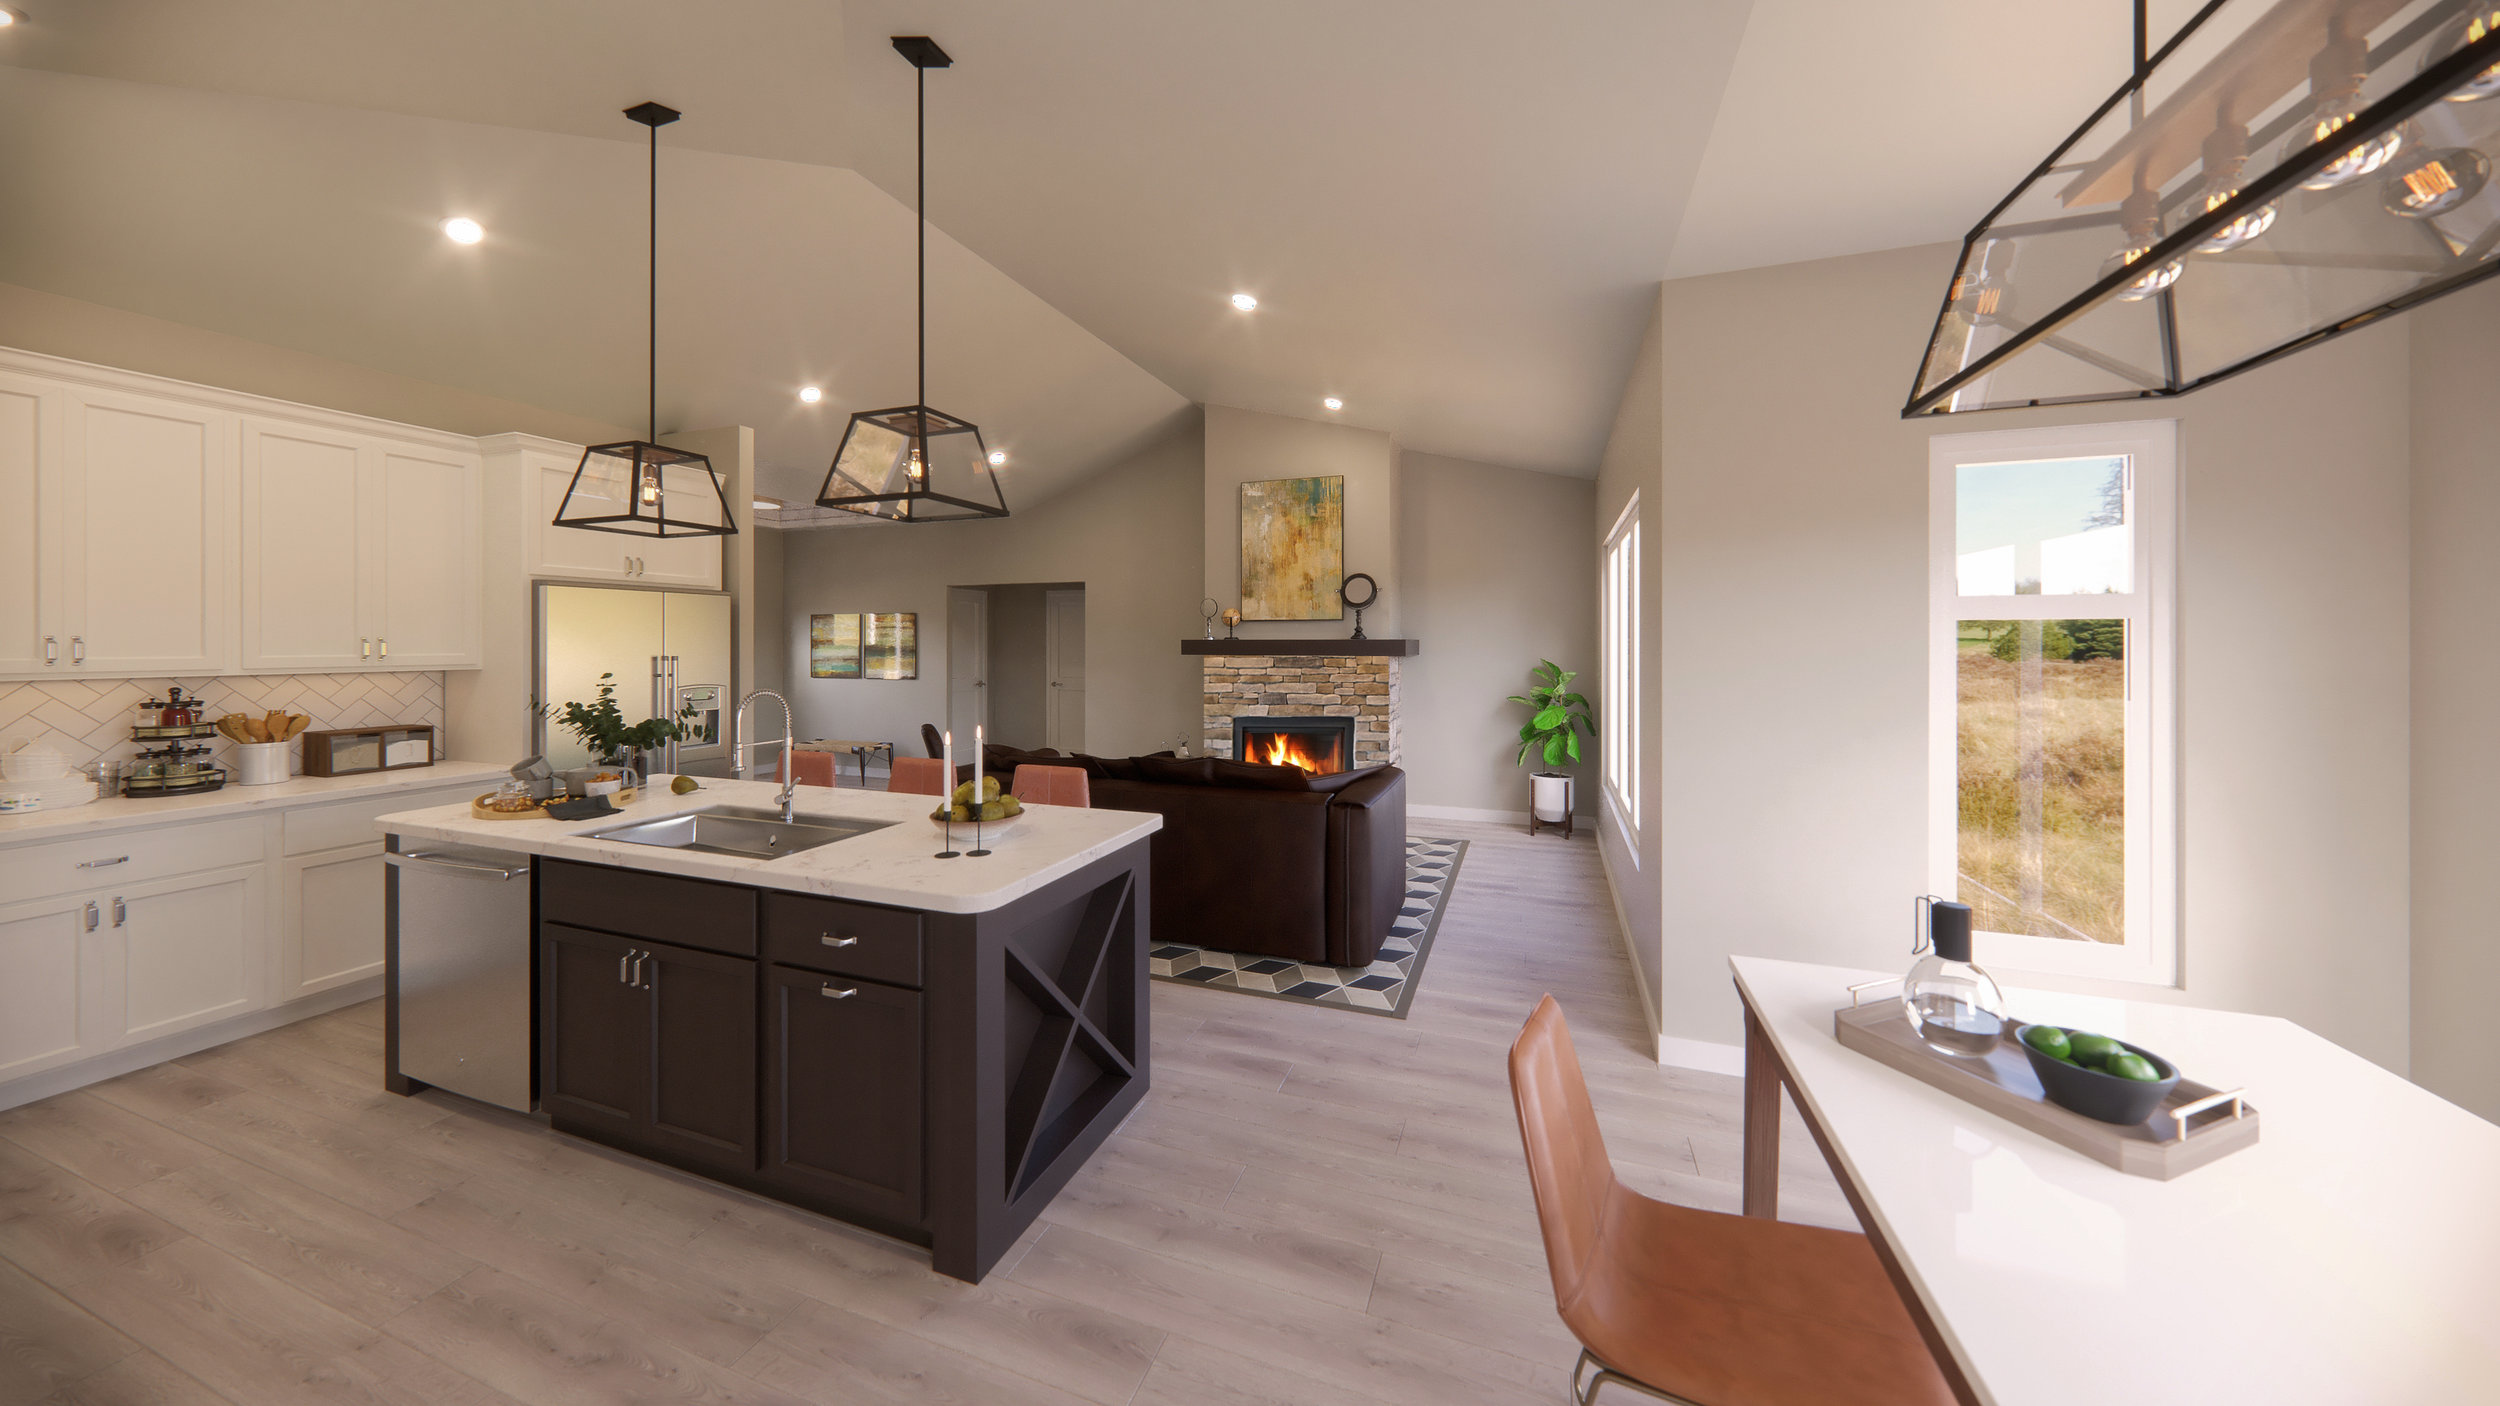
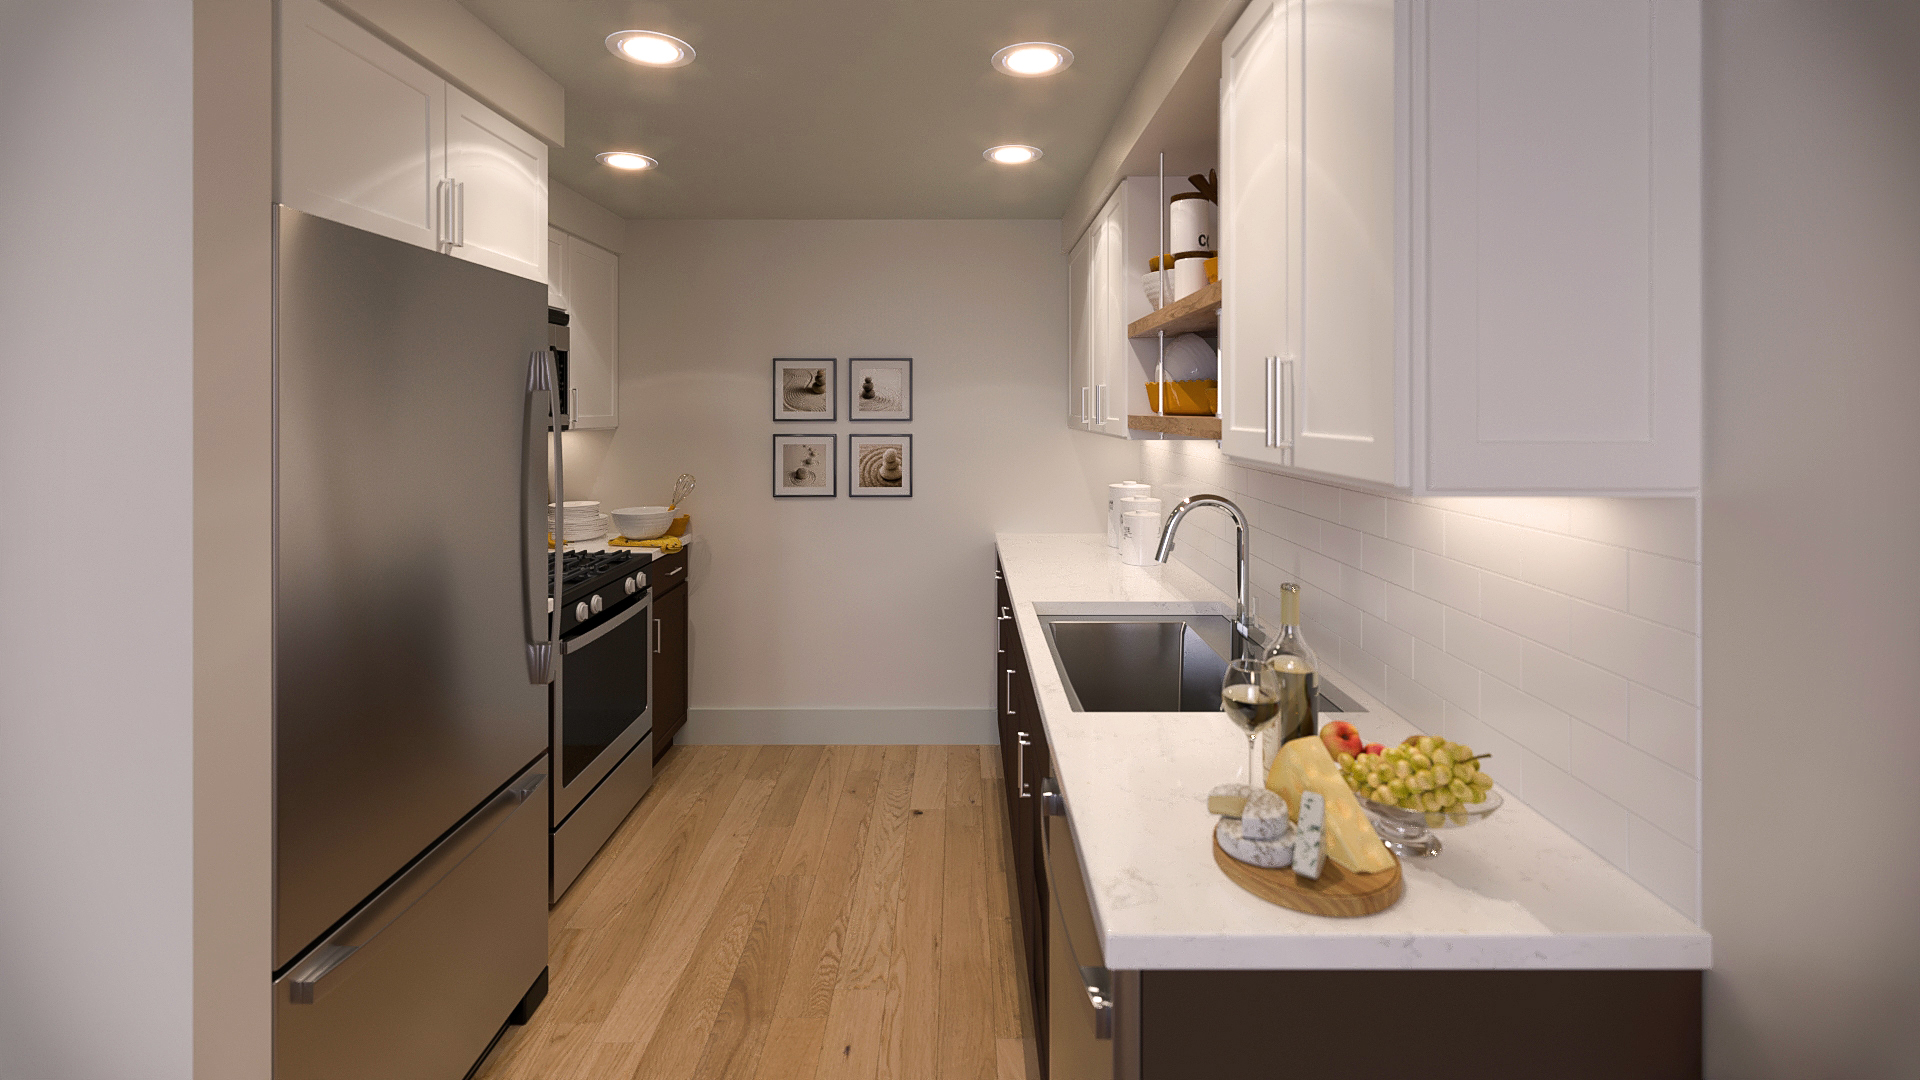
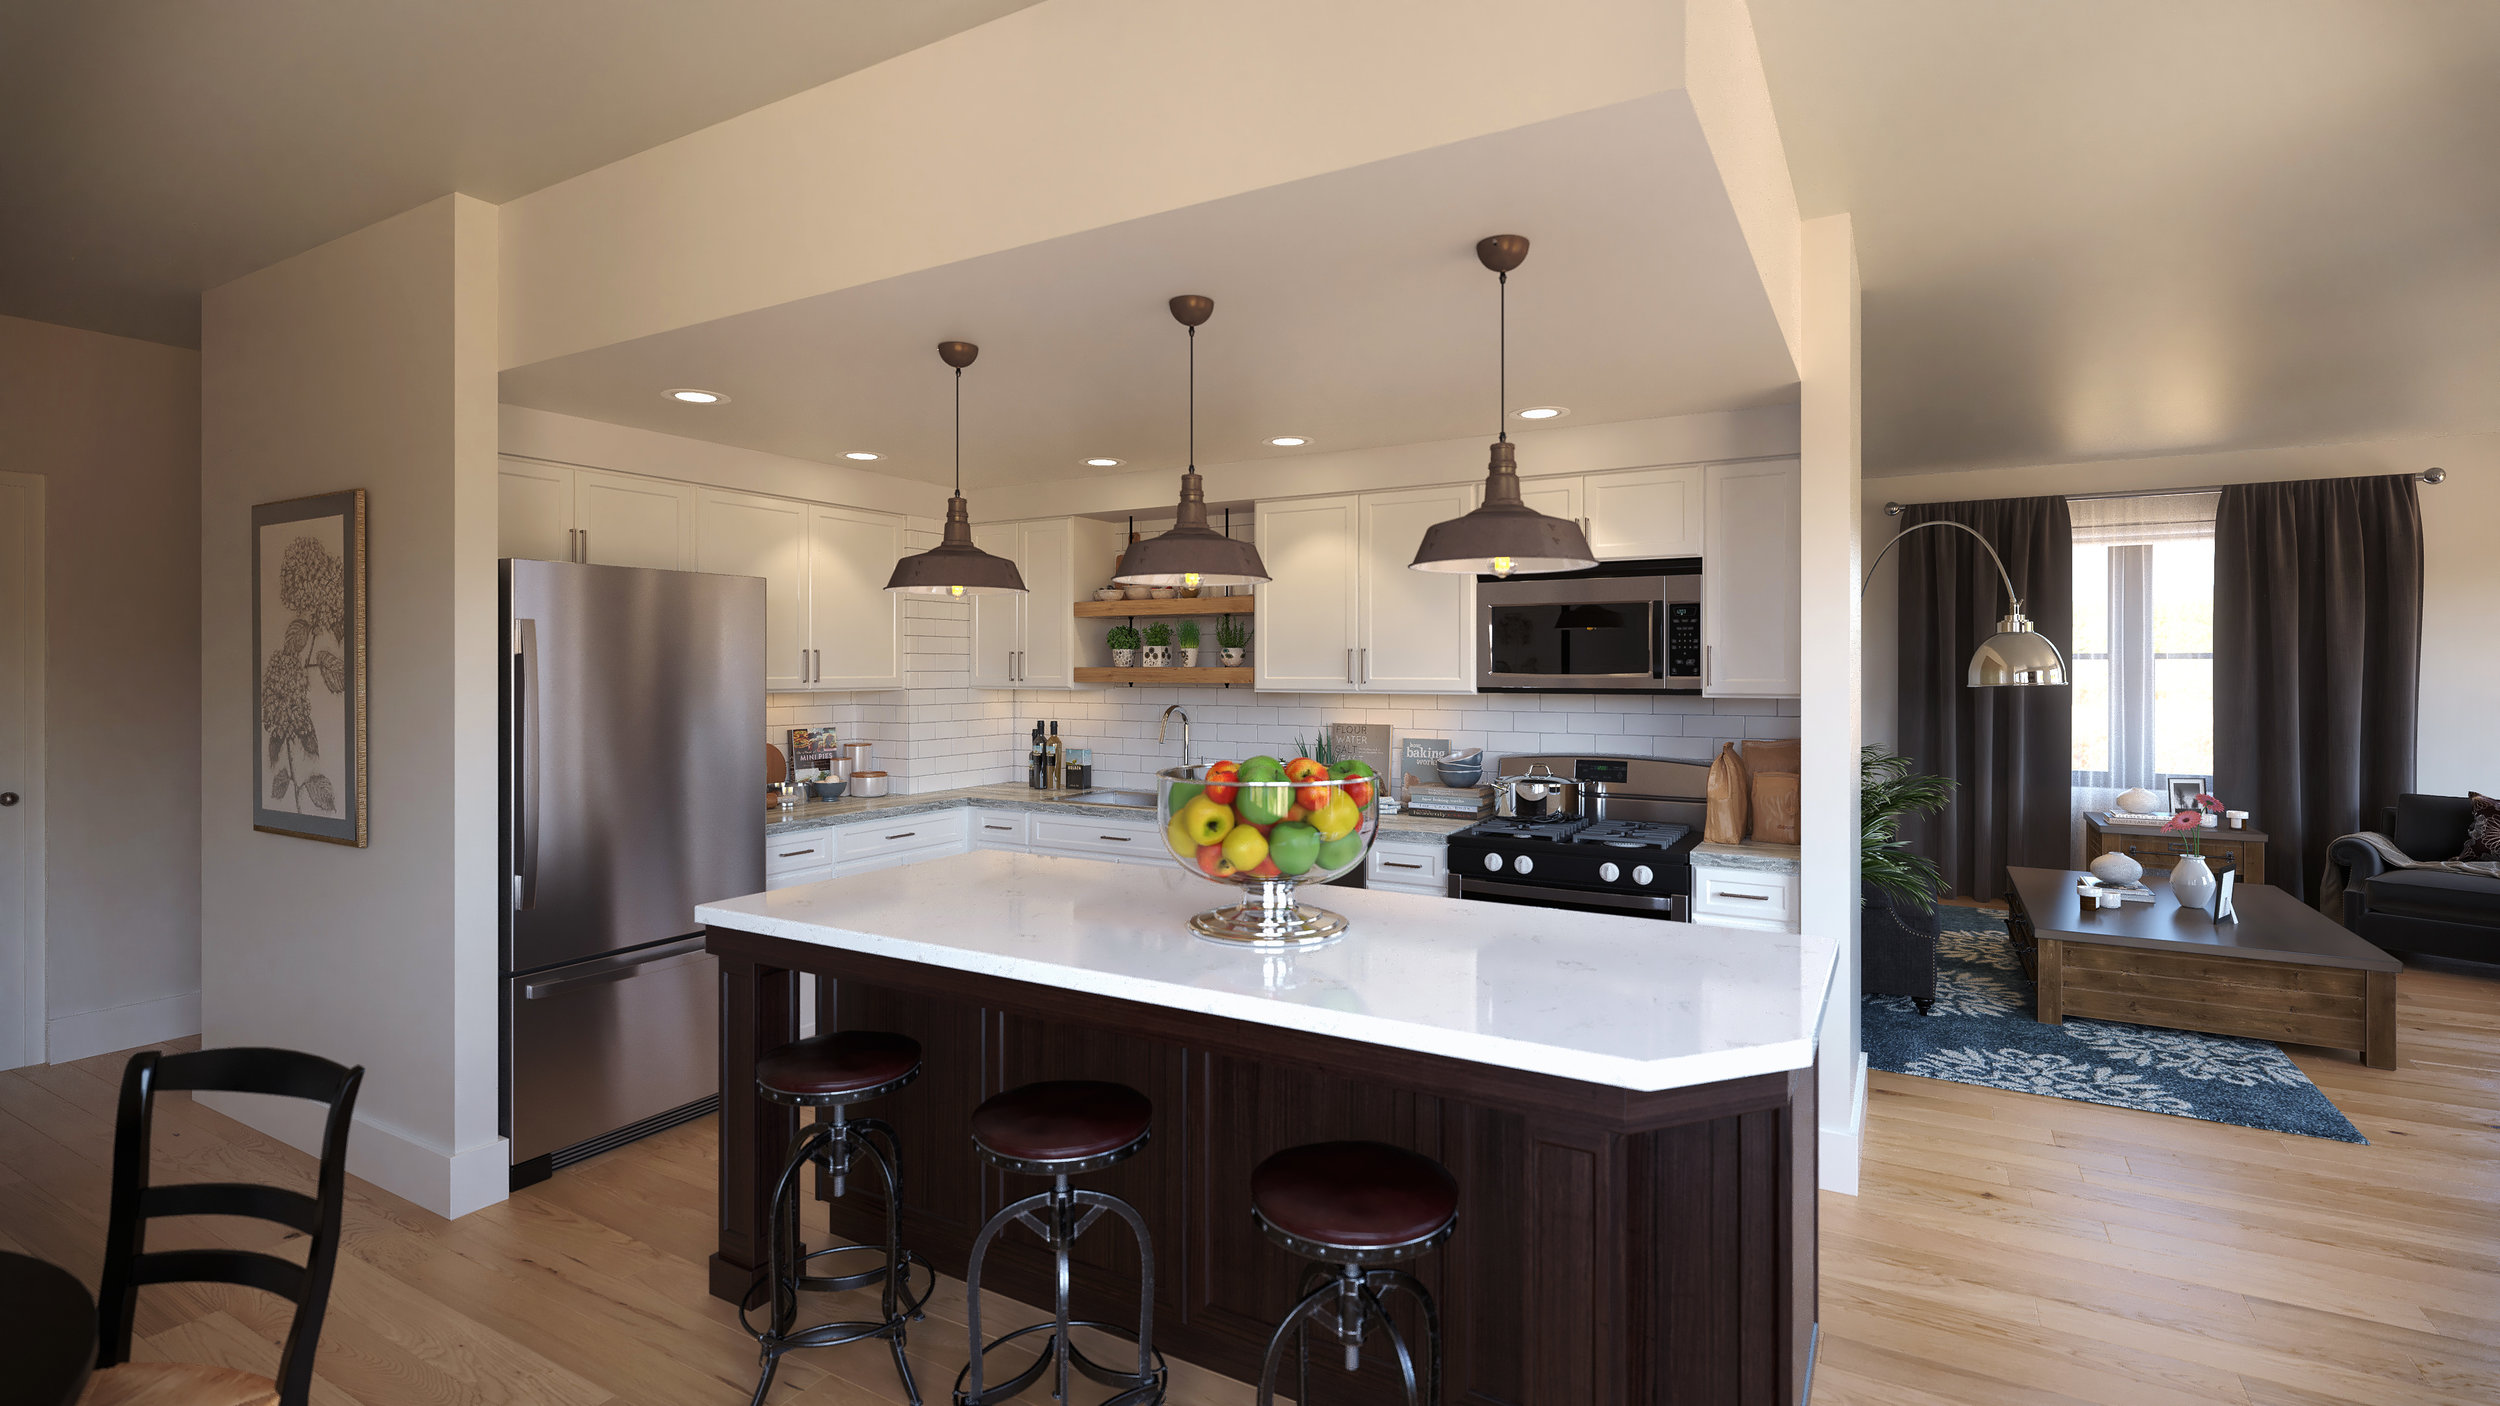
Kitchen Renderings
I have been doing a lot of interior renderings lately, specifically, kitchen renderings. For the most part, kitchen renderings are the most complex of interior spaces to render. These, however, are pretty simple one.
Did you enjoy this article? I would love to hear your thoughts, so don’t be shy and comment below! Please don’t forget to subscribe to my RSS-feed or follow my feed onTwitter, Google+ andFacebook! If you enjoyed the following article we humbly ask you to comment, and help us spread the word! Or, if you would like, drop me an email.

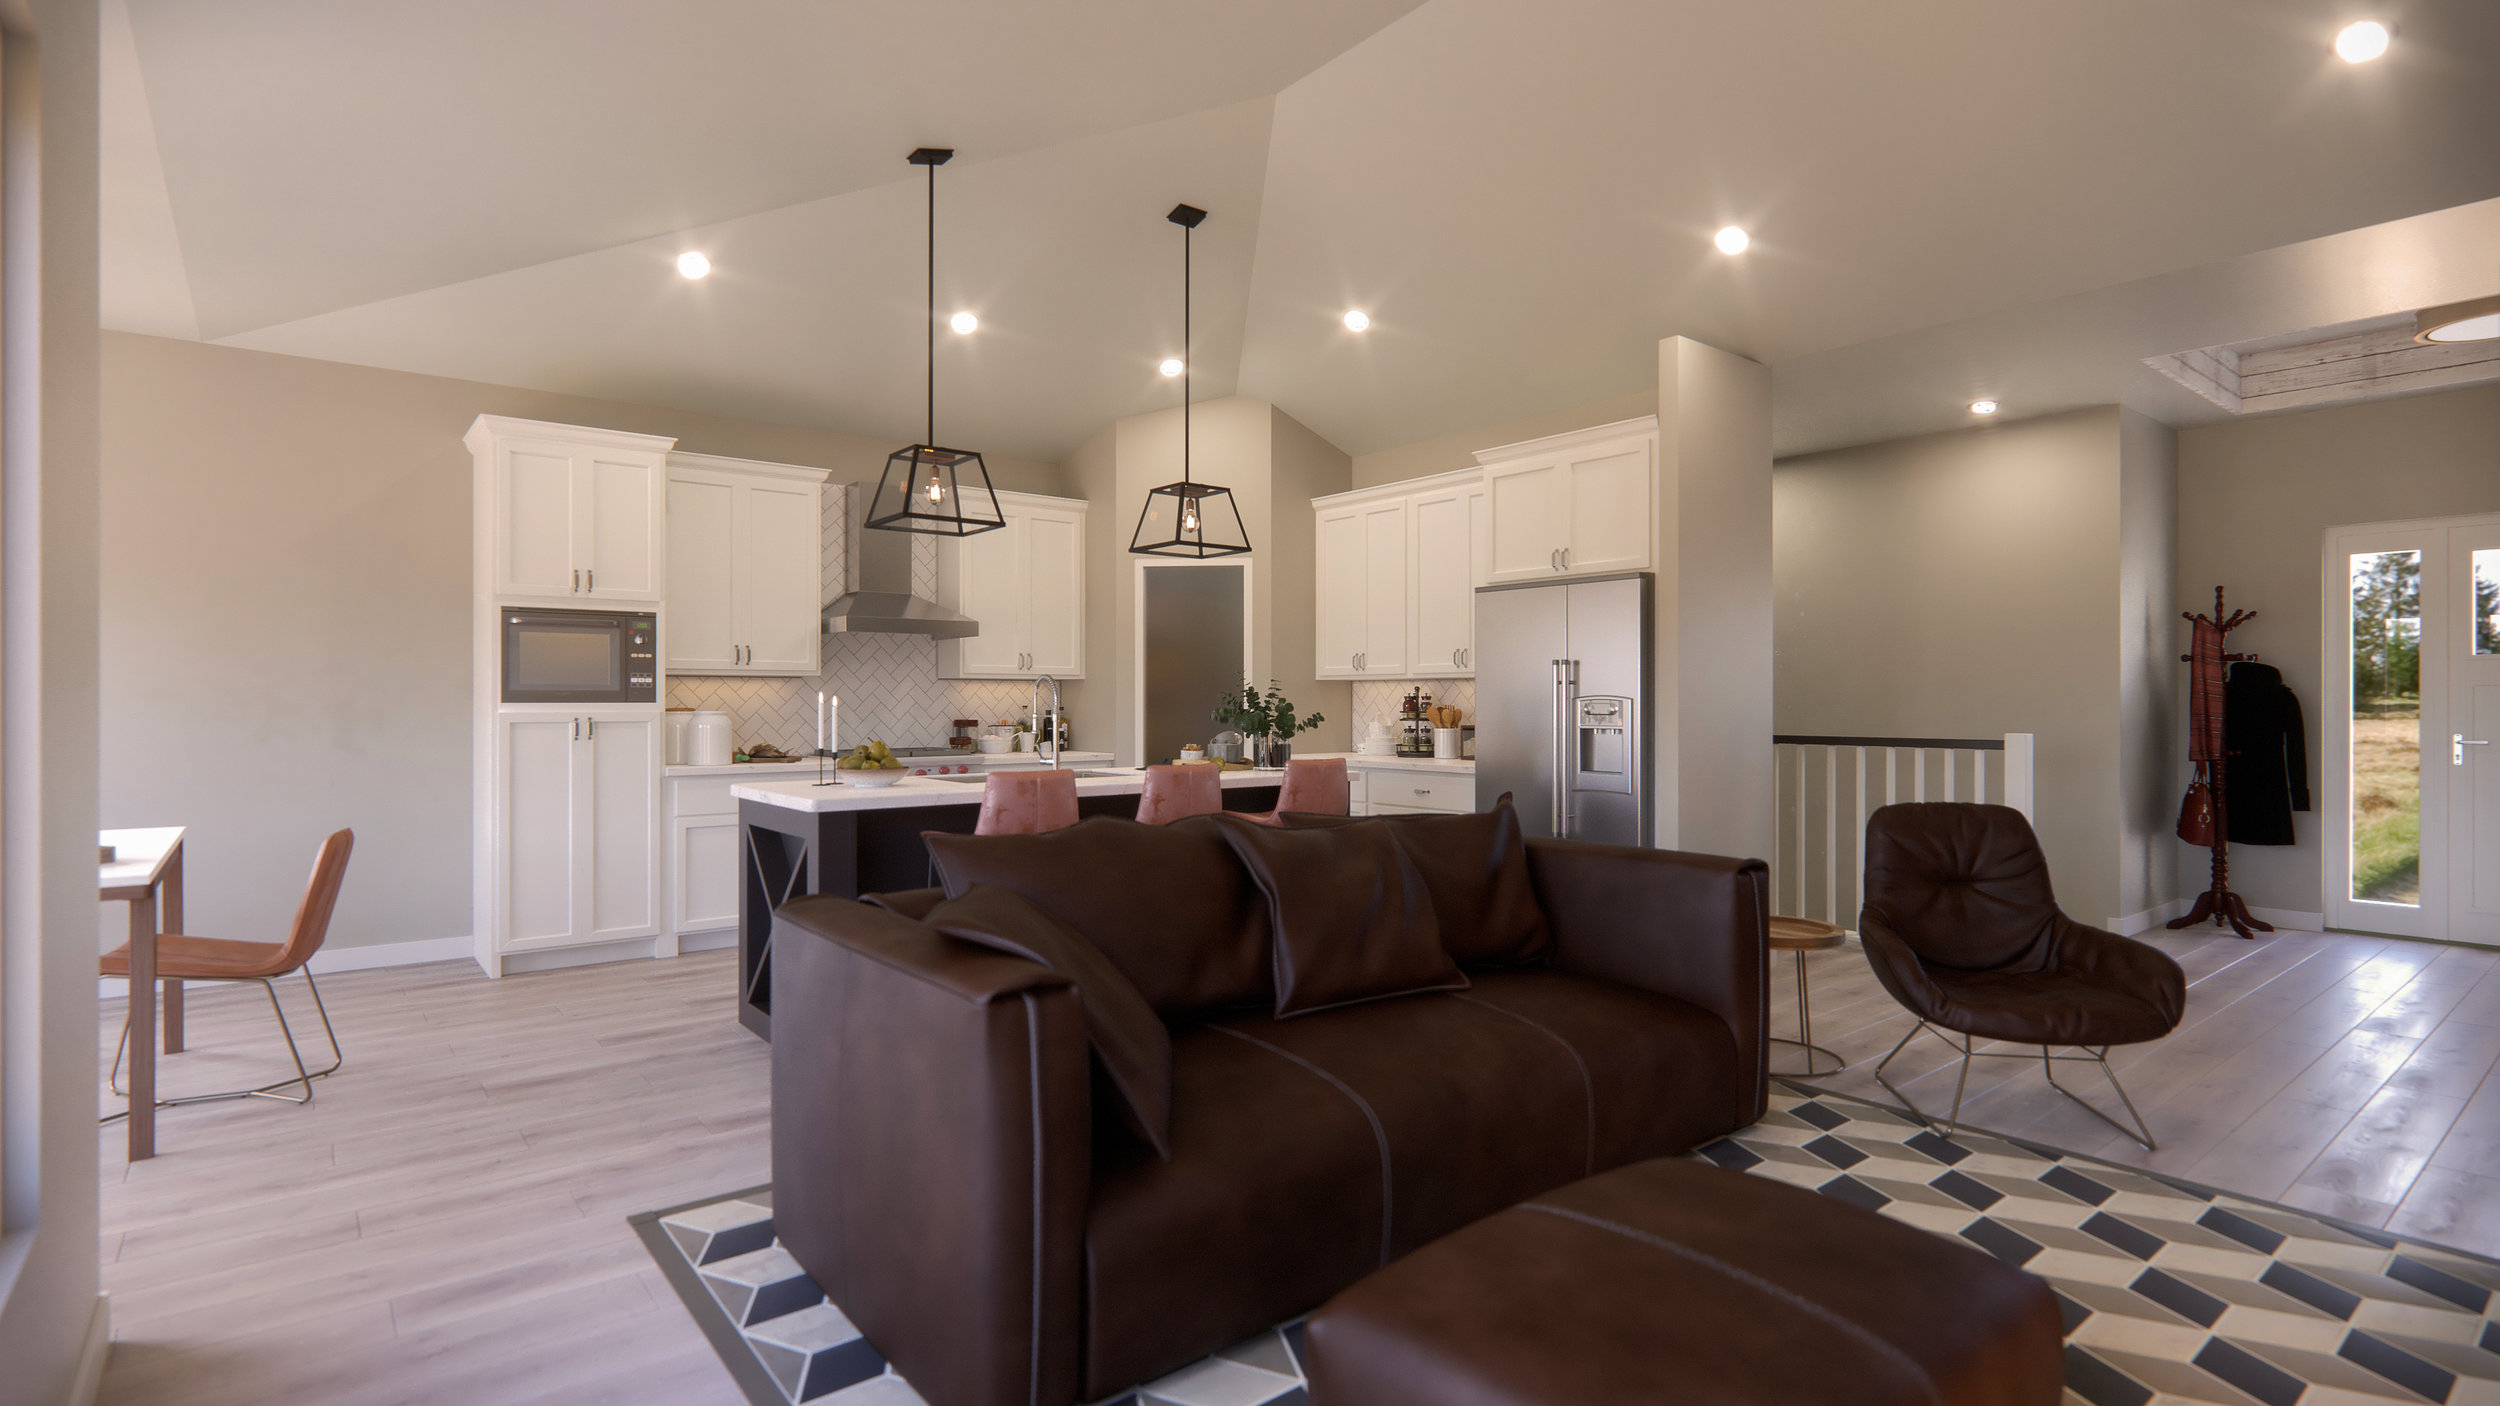
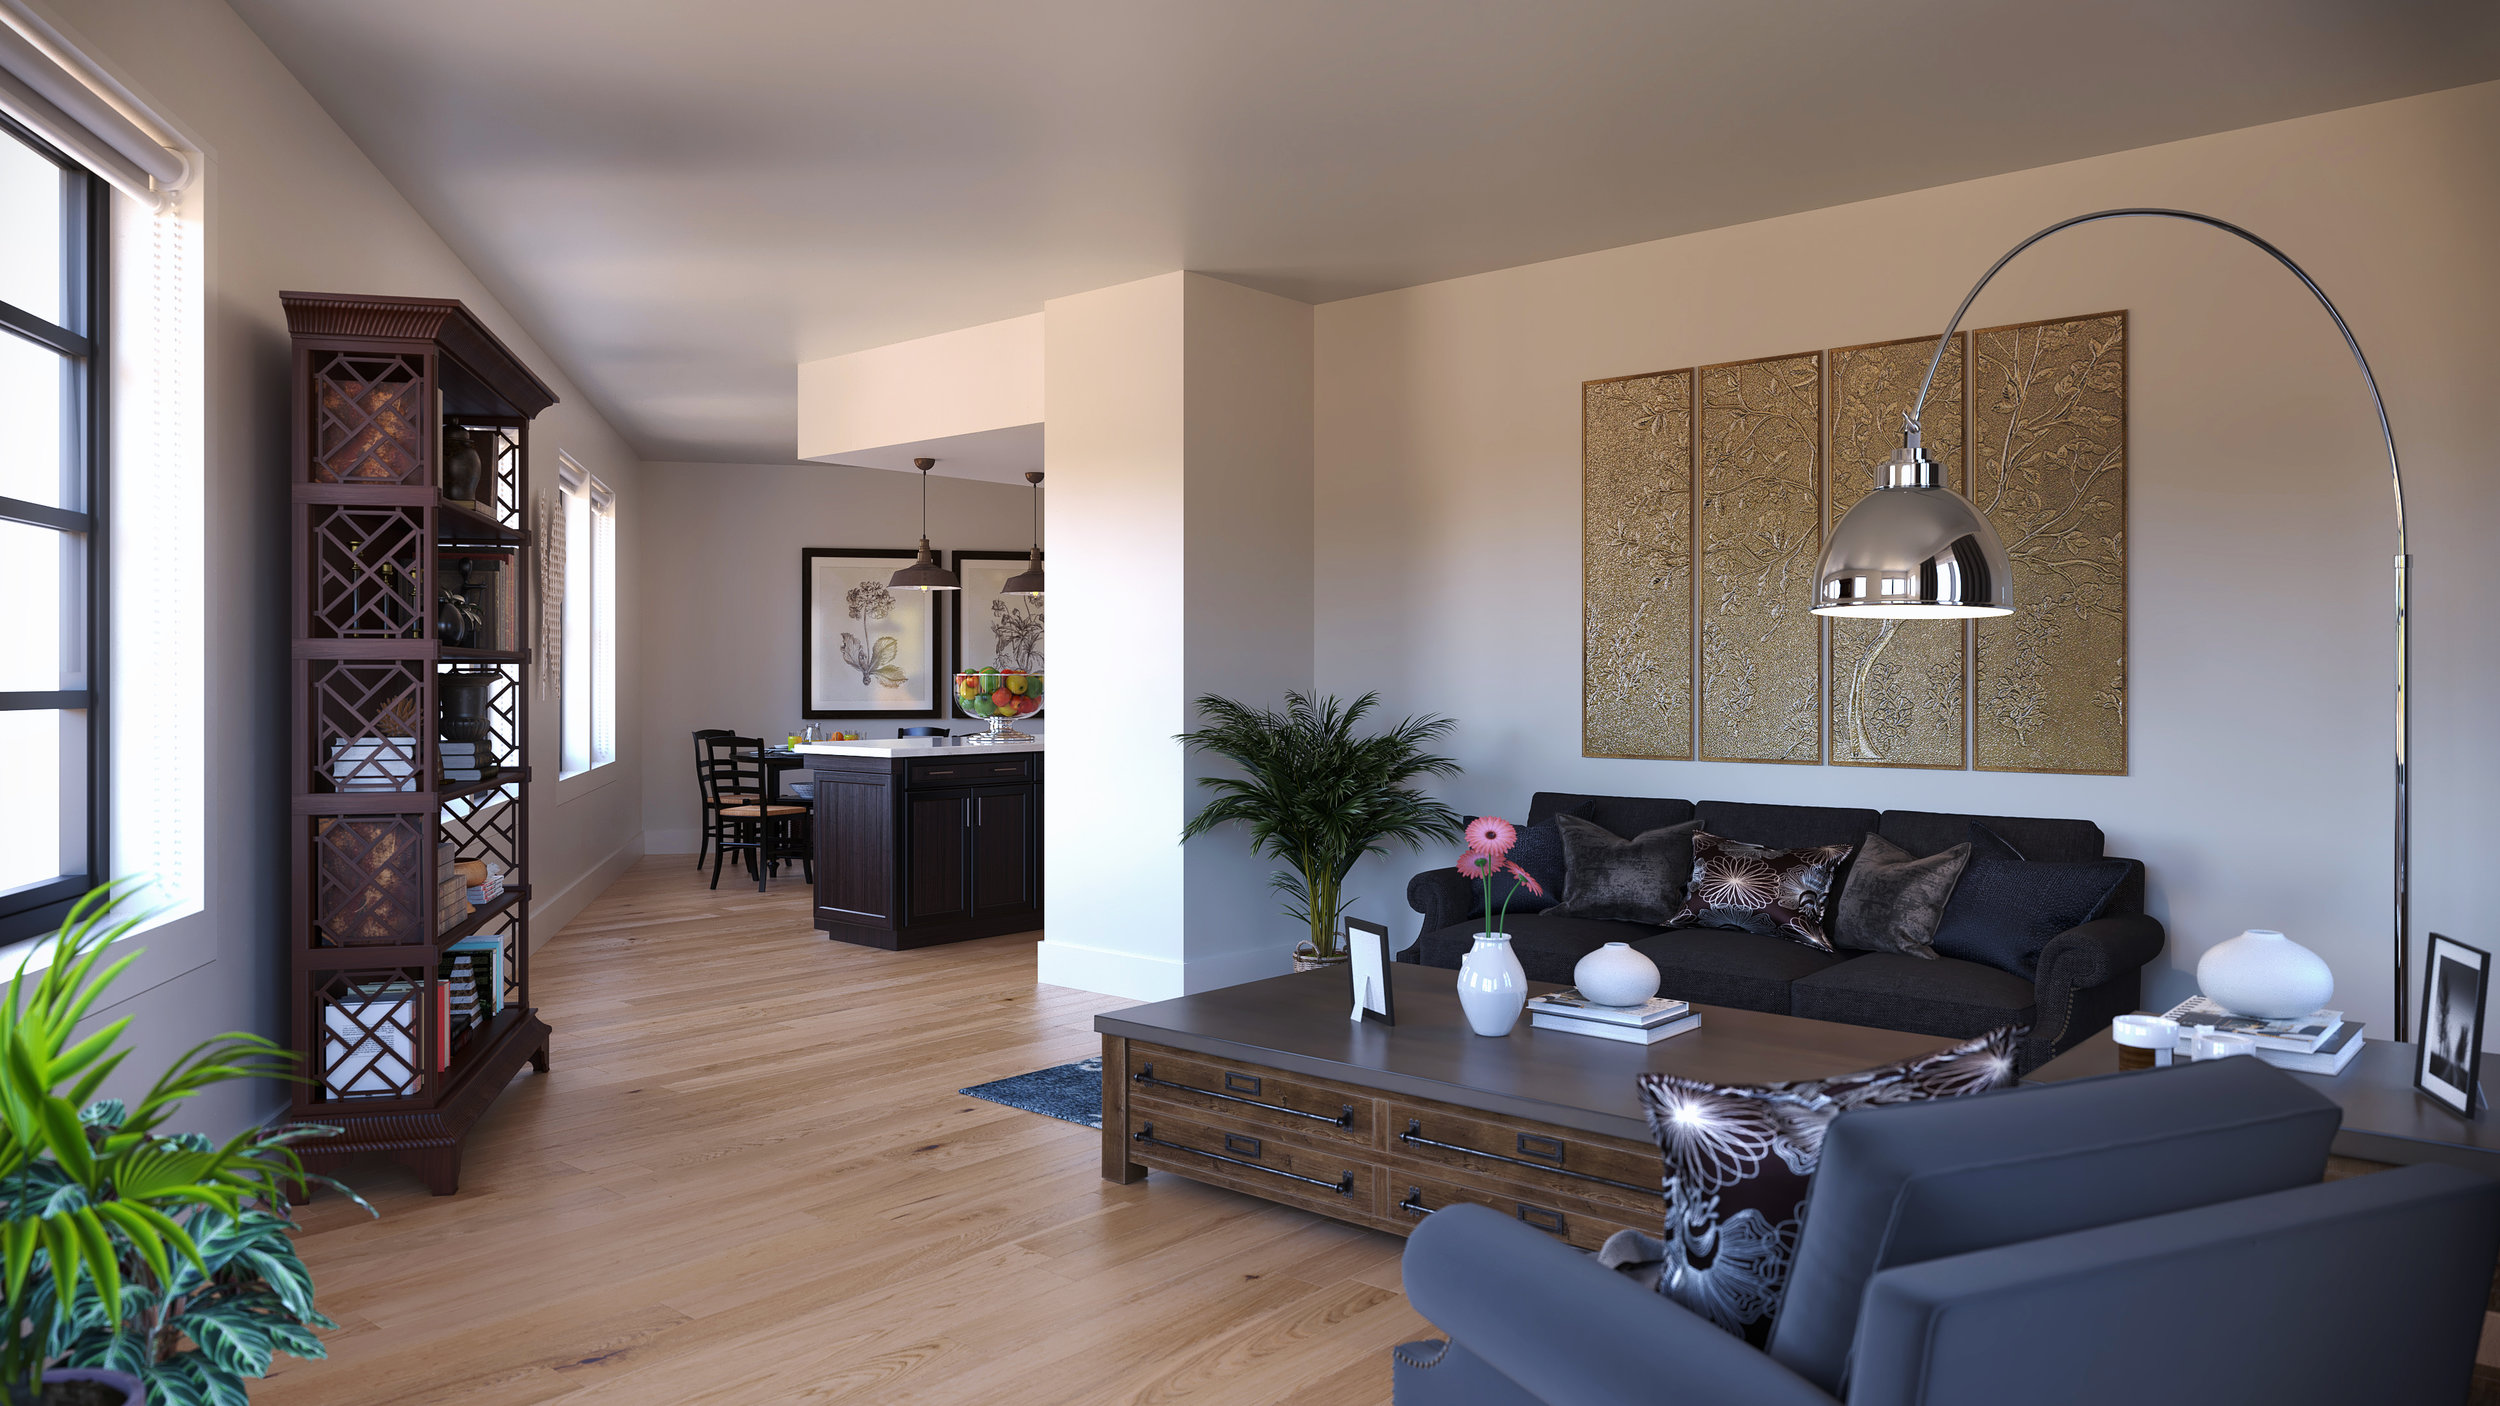
The Rambler Interior Rendering
Working back and forth with the builder, with a couple of iterations, here are the Rambler interior renderings. Starting with CAD files, I build a gray-scale model, which shows the basic geometry and initial composition. Once the gray-scales are approved, I start adding colors and materials, sending low-resolution proofs along the way. Dialing into everything each iteration brings us to this final high-resolution architectural rendering of the Rambler.
Did you enjoy this article? I would love to hear your thoughts, so don’t be shy and comment below! Please don’t forget to subscribe to my RSS-feed or follow my feed onTwitter, Google+ andFacebook! If you enjoyed the following article we humbly ask you to comment, and help us spread the word! Or, if you would like, drop me an email.

Perfect 3DS MAX Roof
Recently, I was asked about how I build my 3DS MAX roofs. Since I have been asked several times before I thought I would record how I build them.
The secret is told. I learned this from deconstructing the roofs created by a script I found over at DigitalxModels.com, however, the script stopped working a long time ago, so I can't use it anymore. Since the script is broken in later MAX versions, I dug into one I already built, using the script, and found that it was rather simple. I couldn't figure out how it was mapping things so well until I discovered 3DS MAX's map scaler, which was the missing piece to the 3D Displacement roof script.
If you have any questions or comments, please post them below. If you would like the 3DS MAX file with my roof, please request it in the comments section and I'll email it over to you. Please, do not fill out my contact form, which will place into my contact management system (CMS). If you would like the file, please comment to this post. Thank you :).
Did you enjoy this article? I would love to hear your thoughts, so don’t be shy and comment below! Please don’t forget to subscribe to my RSS-feed or follow my feed onTwitter, Google+ andFacebook! If you enjoyed the following article we humbly ask you to comment, and help us spread the word! Or, if you would like, drop me an email.

One South Interior Rendering
The longest single project on record!
My first contact left the company early in the project, which happens, however, her replacement also left soon after. Now, months later, I am working with yet another person and each person had their own vision for the project. Once I thought things were dialed down I find out the image will be reviewed by the decision maker. After a few dozen revisions (only contracted for two sets of revisions), the decision maker leaves 16 comments.

Anyway, the project is done, at least as far as I know. It was a lot of work for such a small space. Every piece was hand modeled from photo references and it came down to nudging things inches to where the client was pleased. Literally, I signed in April and now, in August we are wrapping things up.
Did you enjoy this article? I would love to hear your thoughts, so don’t be shy and comment below! Please don’t forget to subscribe to my RSS-feed or follow my feed onTwitter, Google+ andFacebook! If you enjoyed the following article we humbly ask you to comment, and help us spread the word! Or, if you would like, drop me an email.

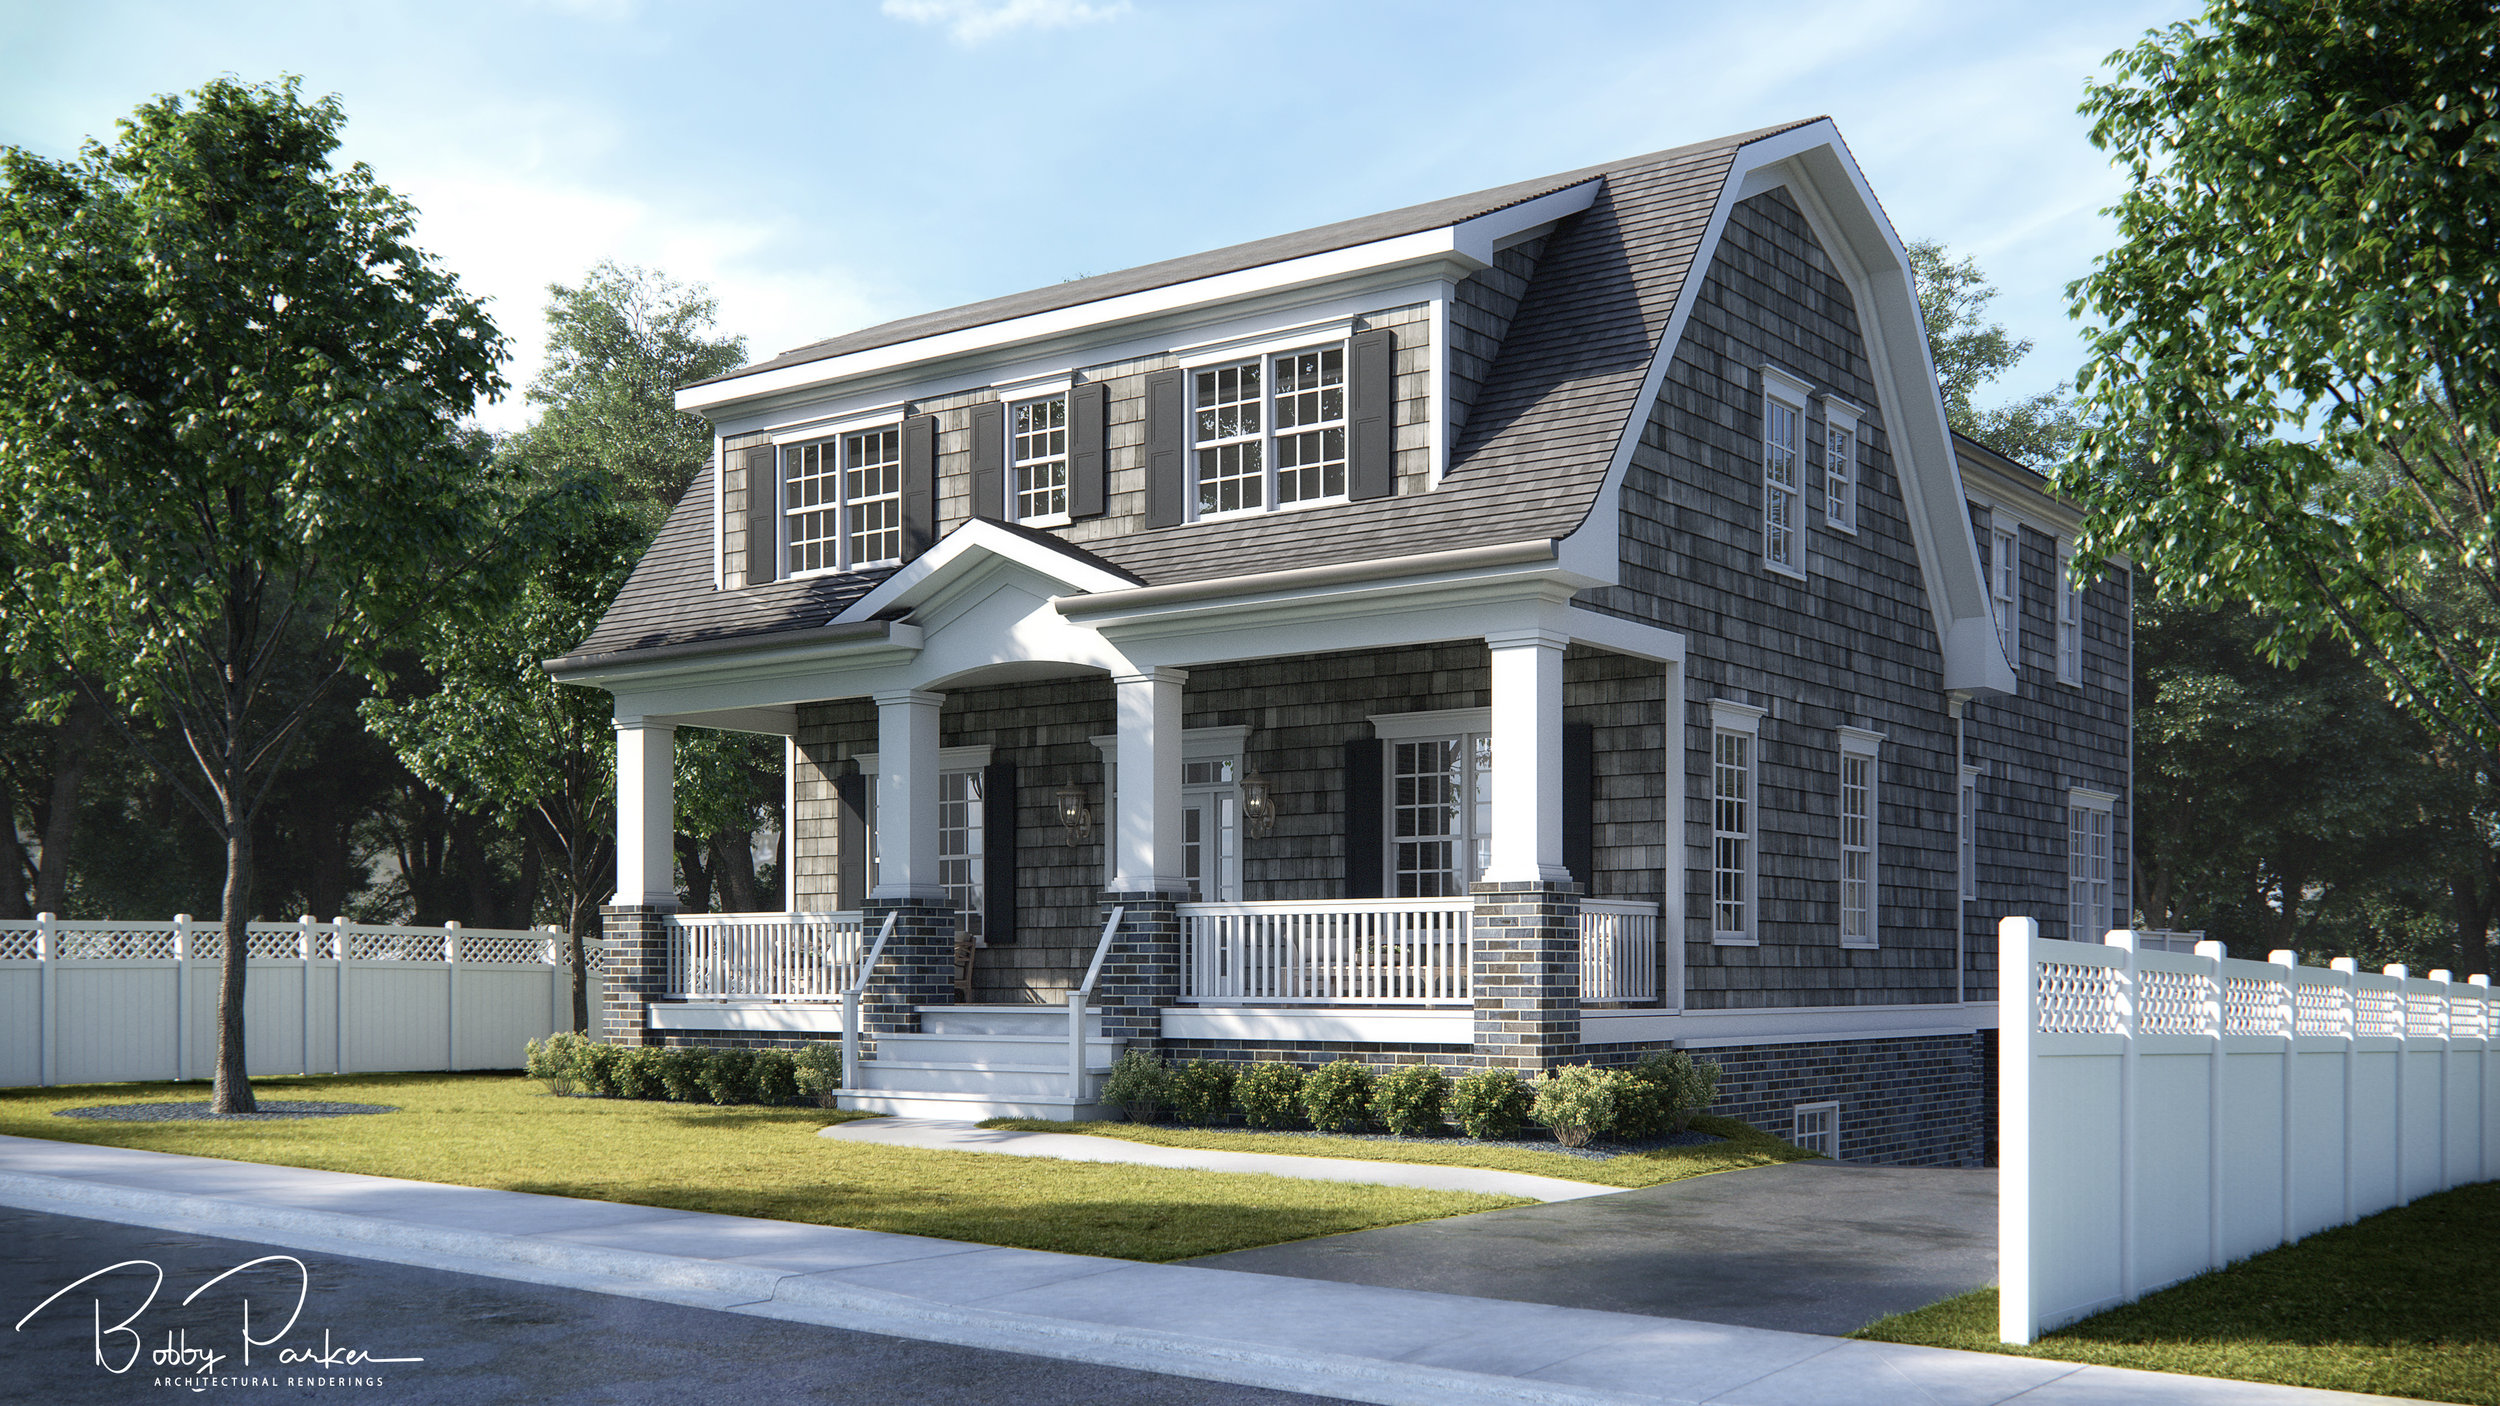
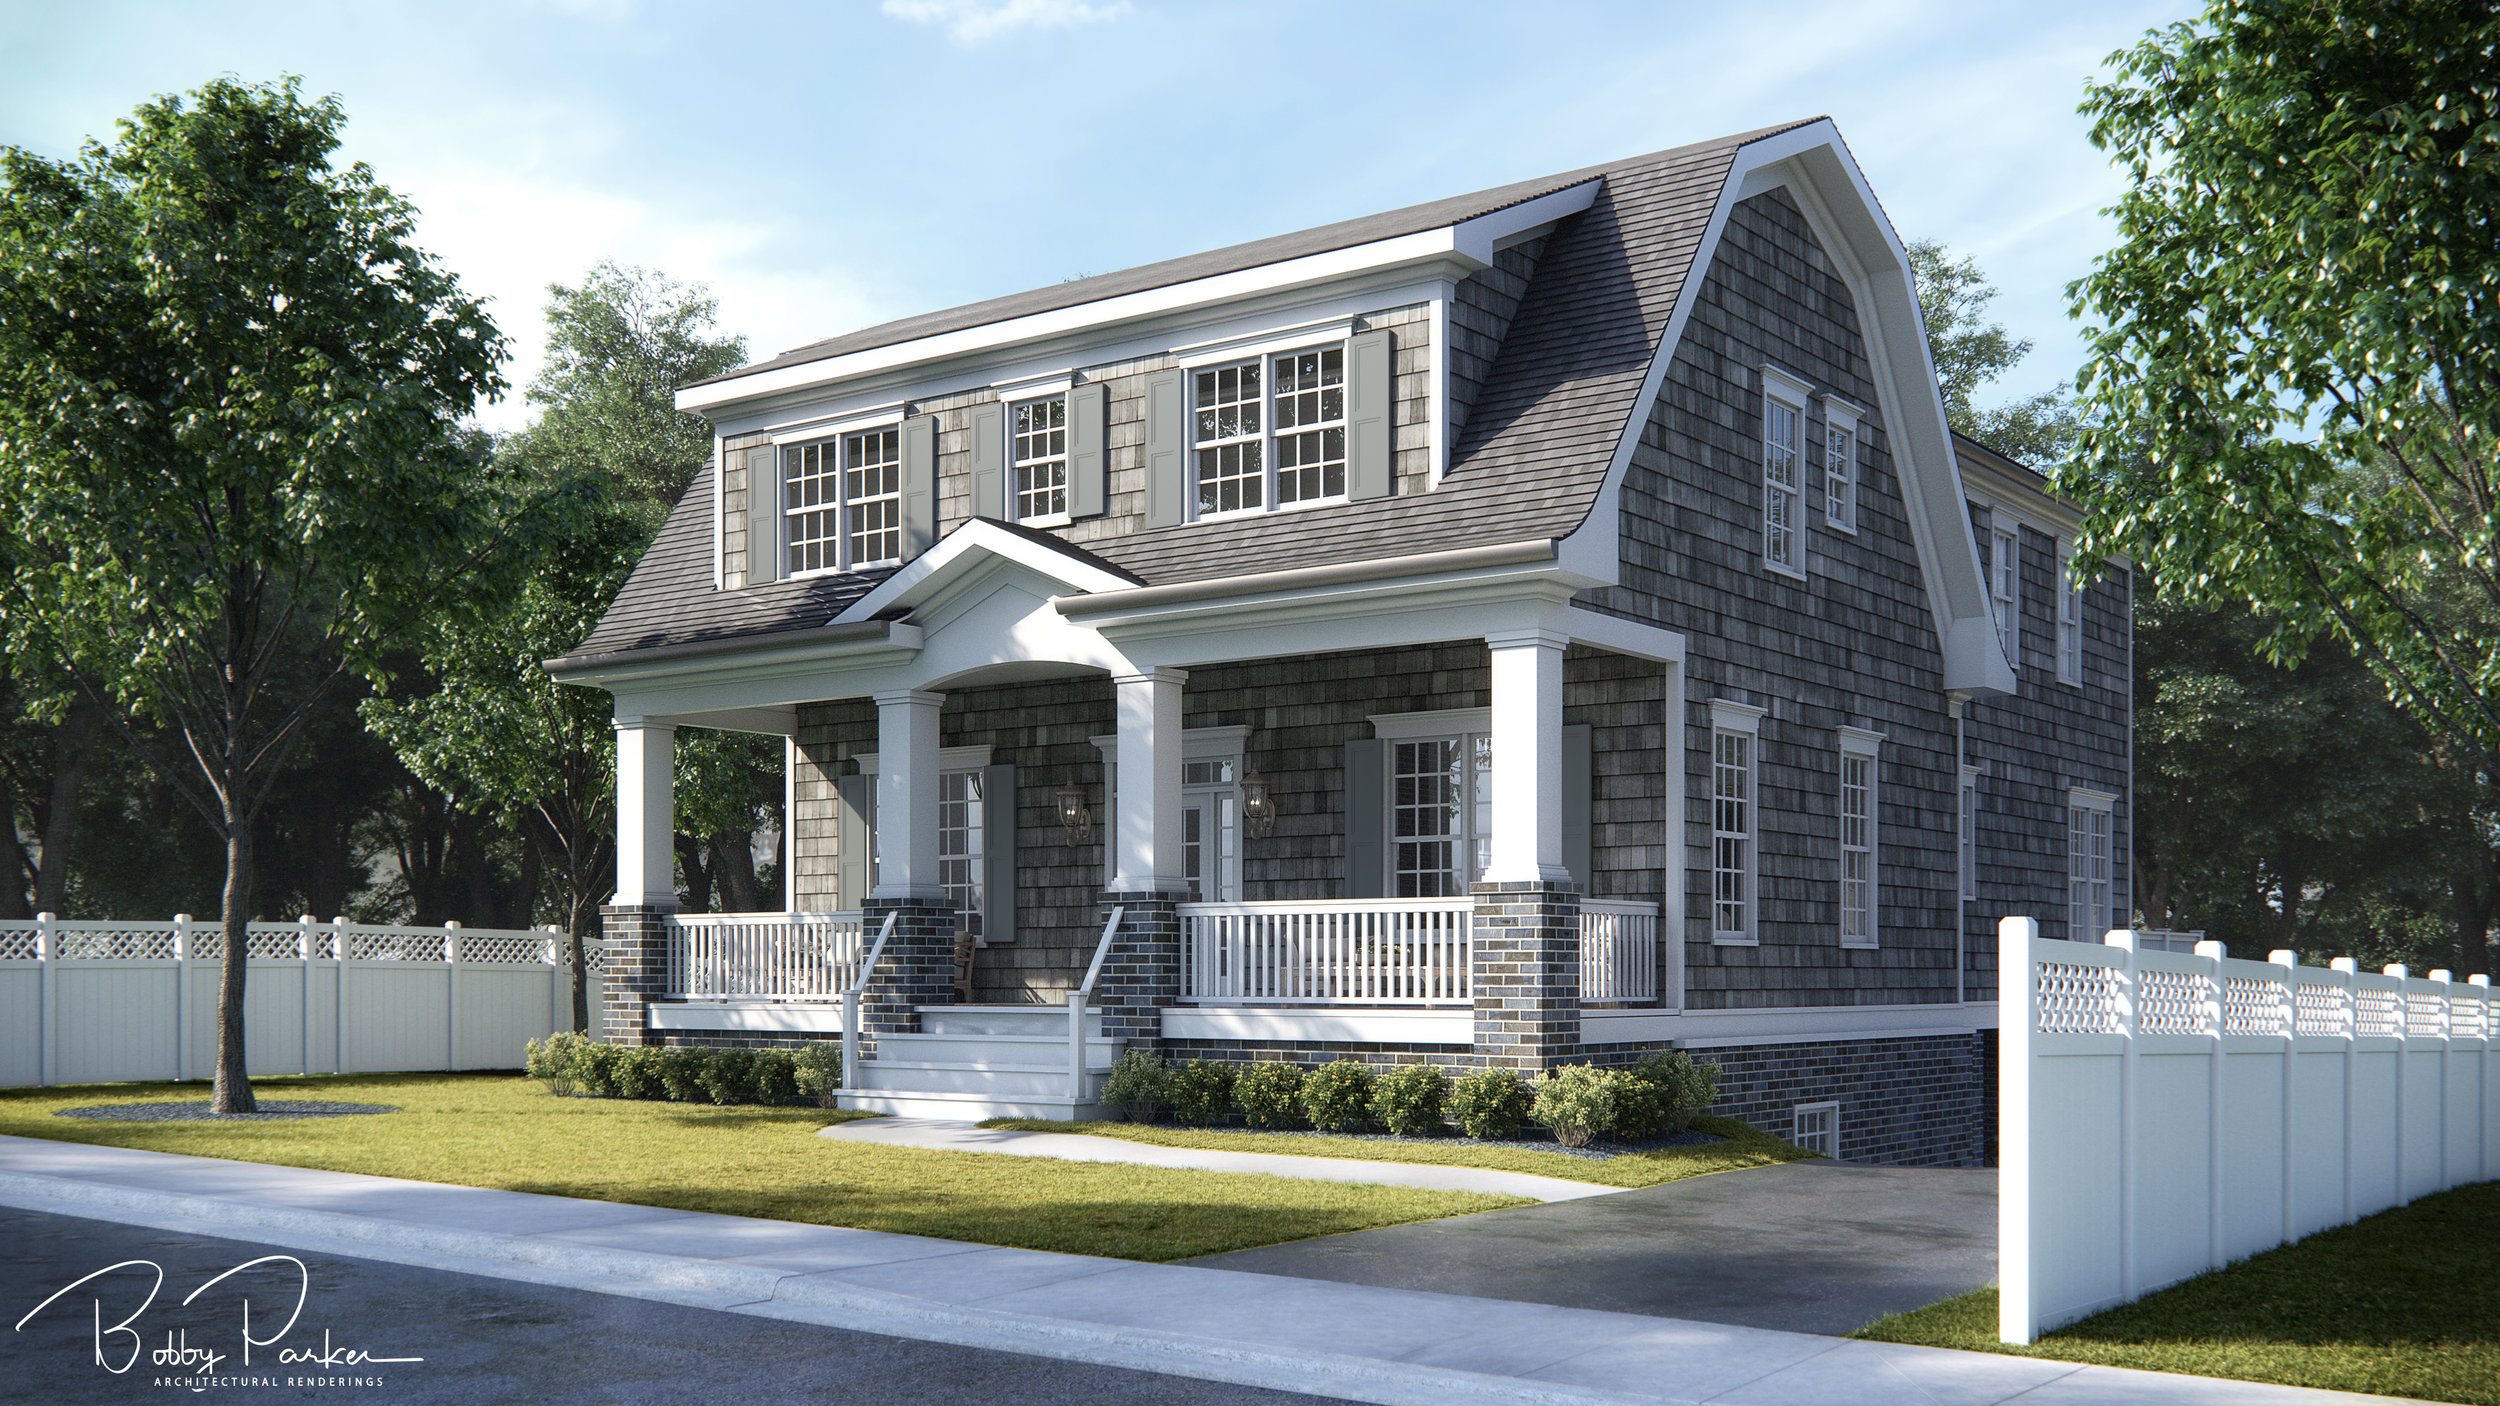
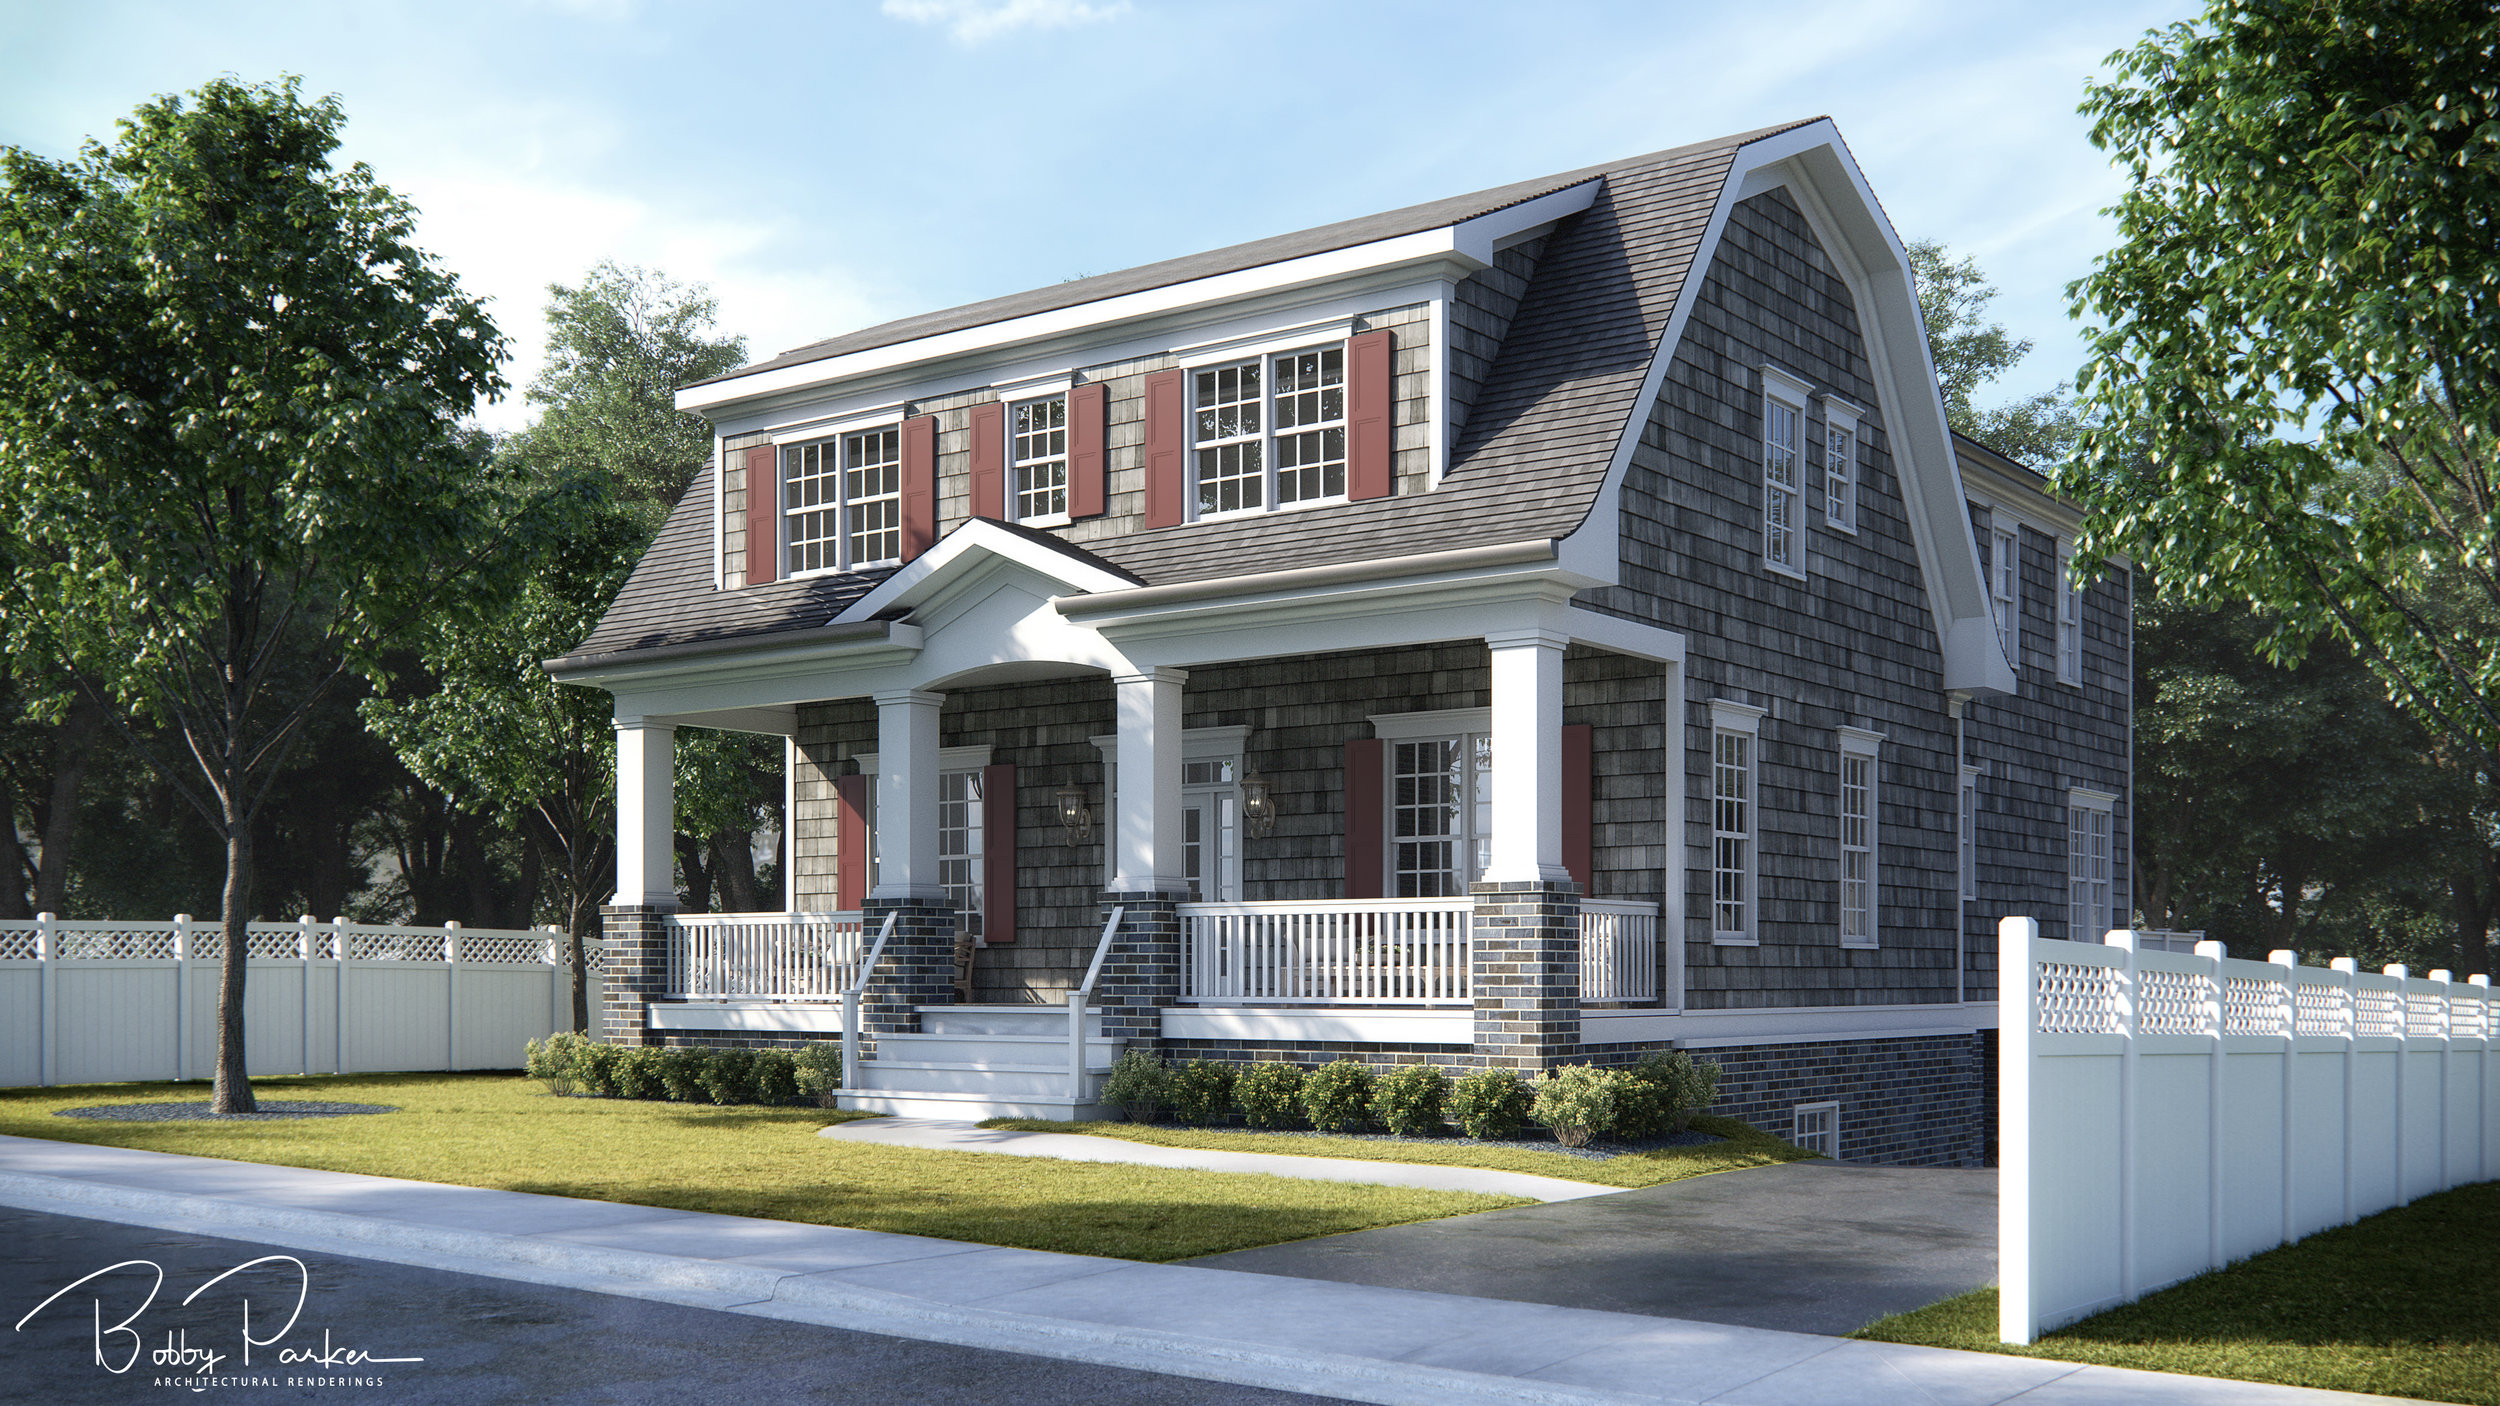
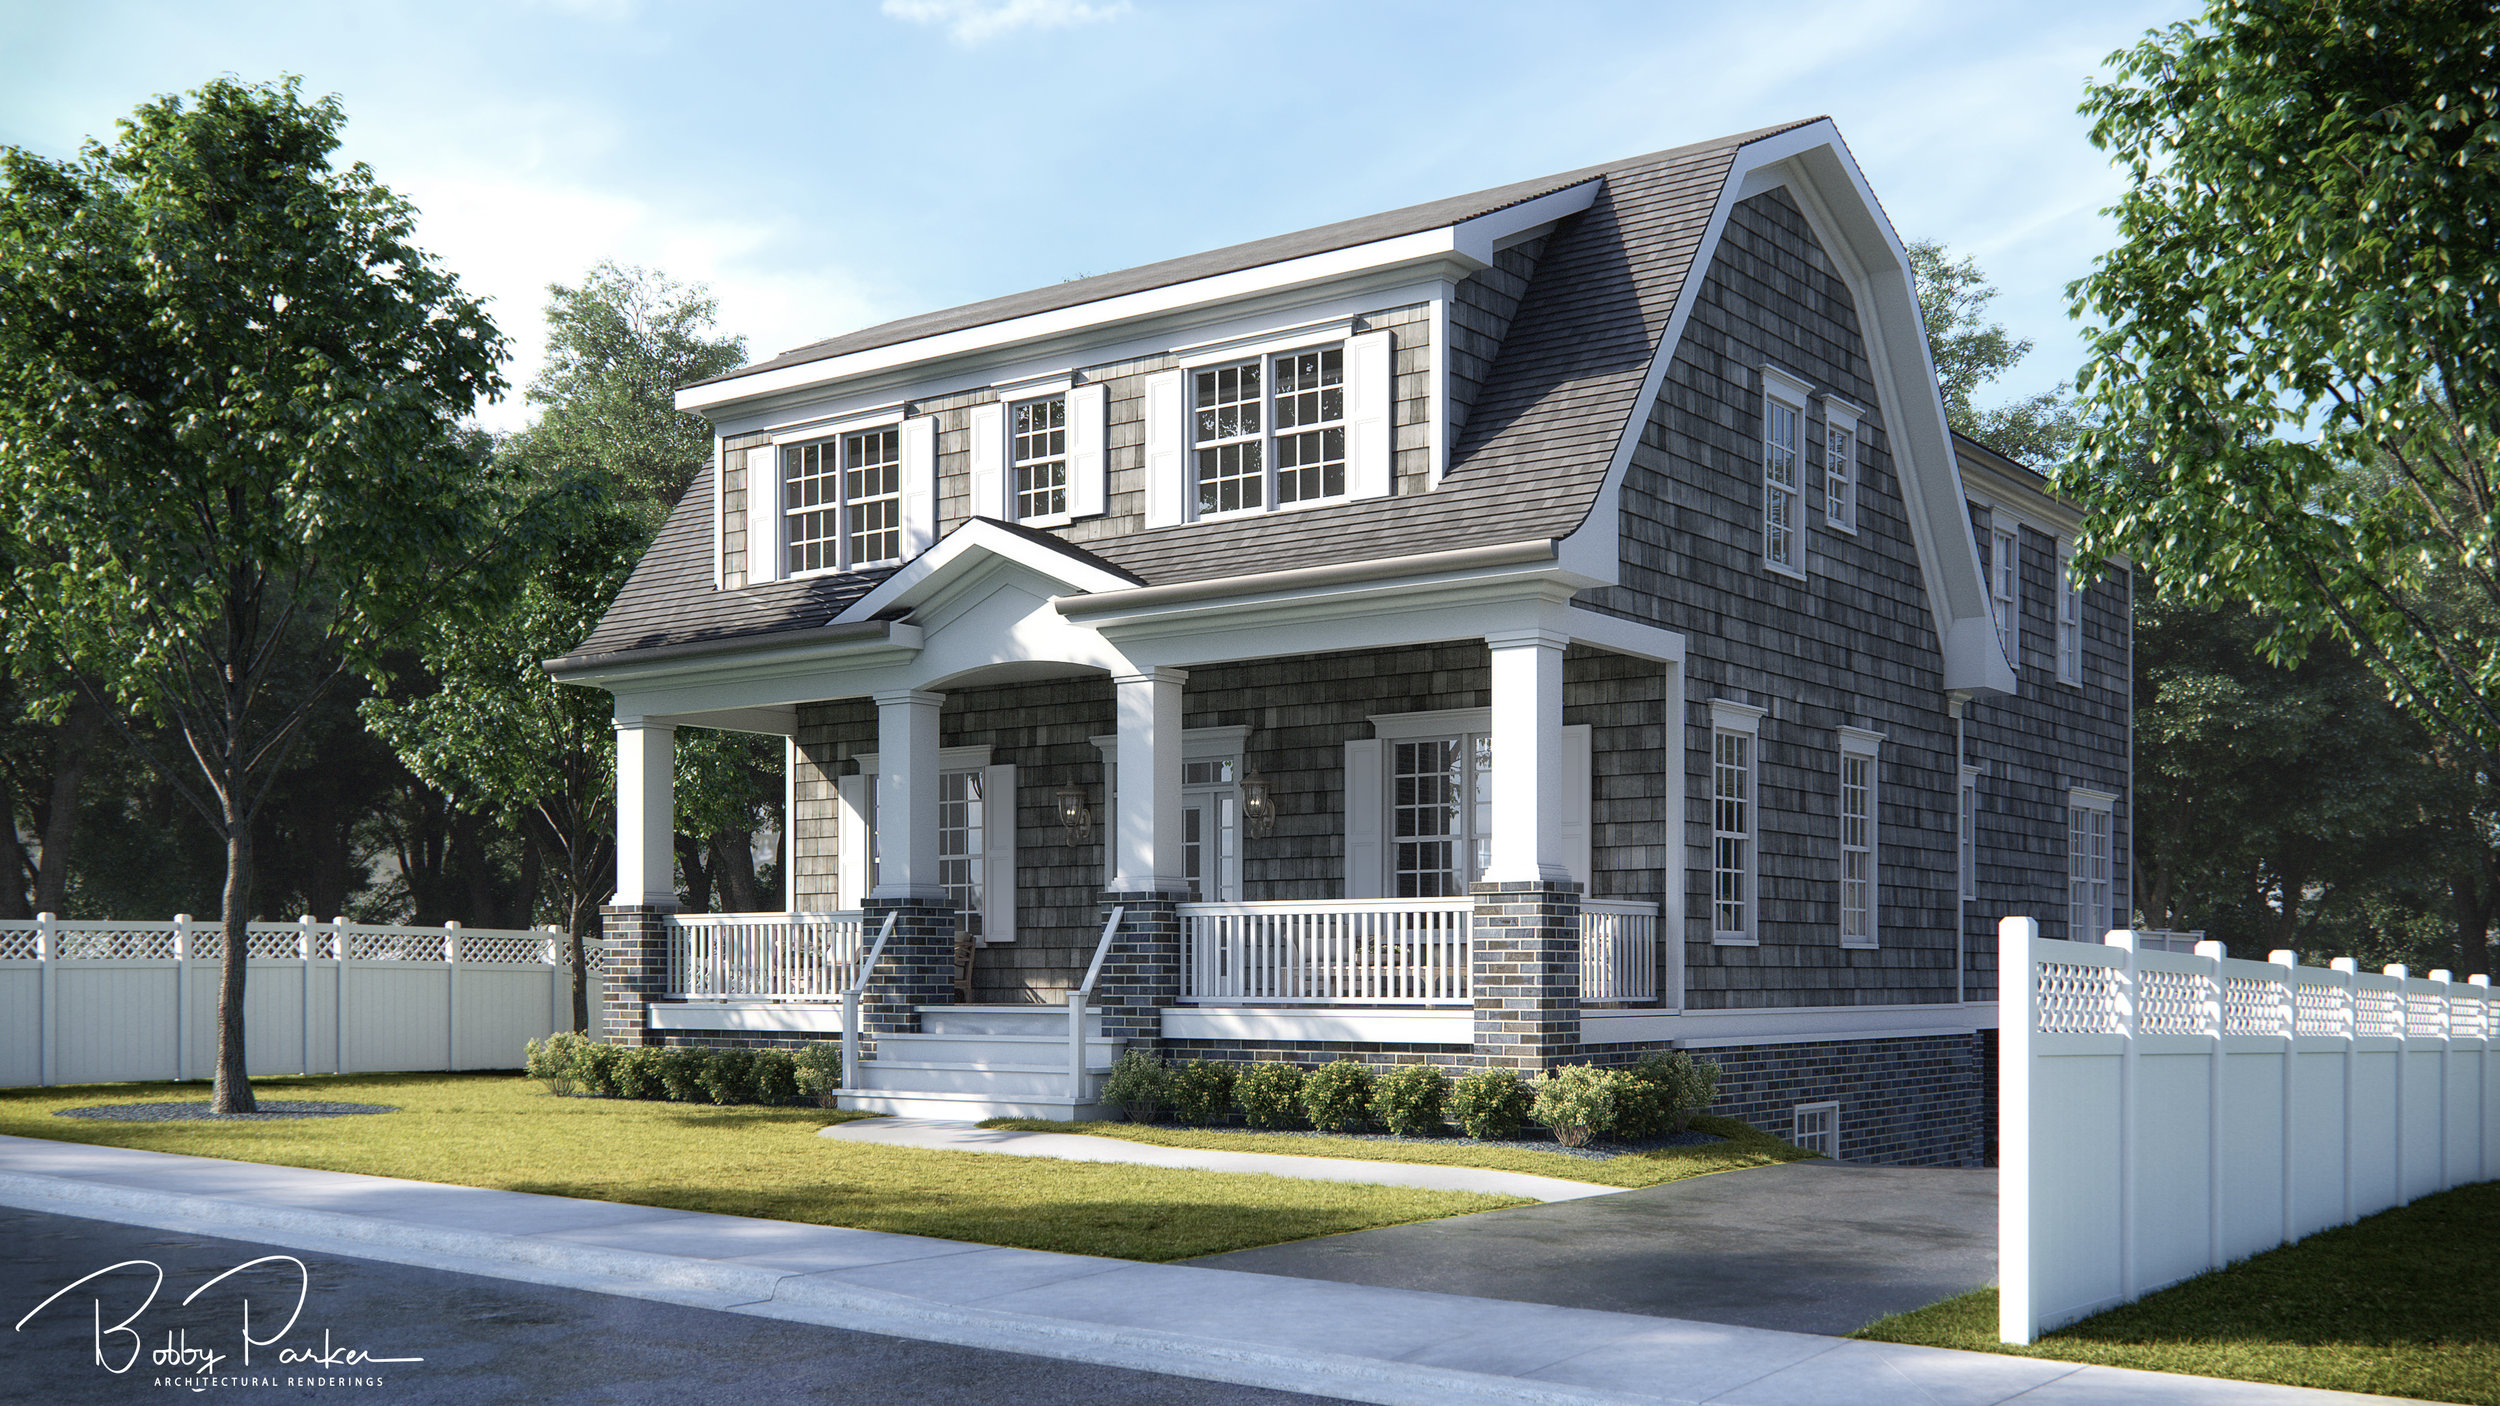
Benson Street House Rendering
These smaller houses are a pleasure to illustrate. Here, the owner had an idea what colors he wanted for his new construction, but he wanted to see it first. To me, and I do have a bias, the dollar amount invested in a rendering is well justified to study not only design but color. Apparently, I nailed the siding, trim and window colors the first round. We added a few windows and played with shutter colors.
Did you enjoy this article? I would love to hear your thoughts, so don’t be shy and comment below! Please don’t forget to subscribe to my RSS-feed or follow my feed onTwitter, Google+ andFacebook! If you enjoyed the following article we humbly ask you to comment, and help us spread the word! Or, if you would like, drop me an email.

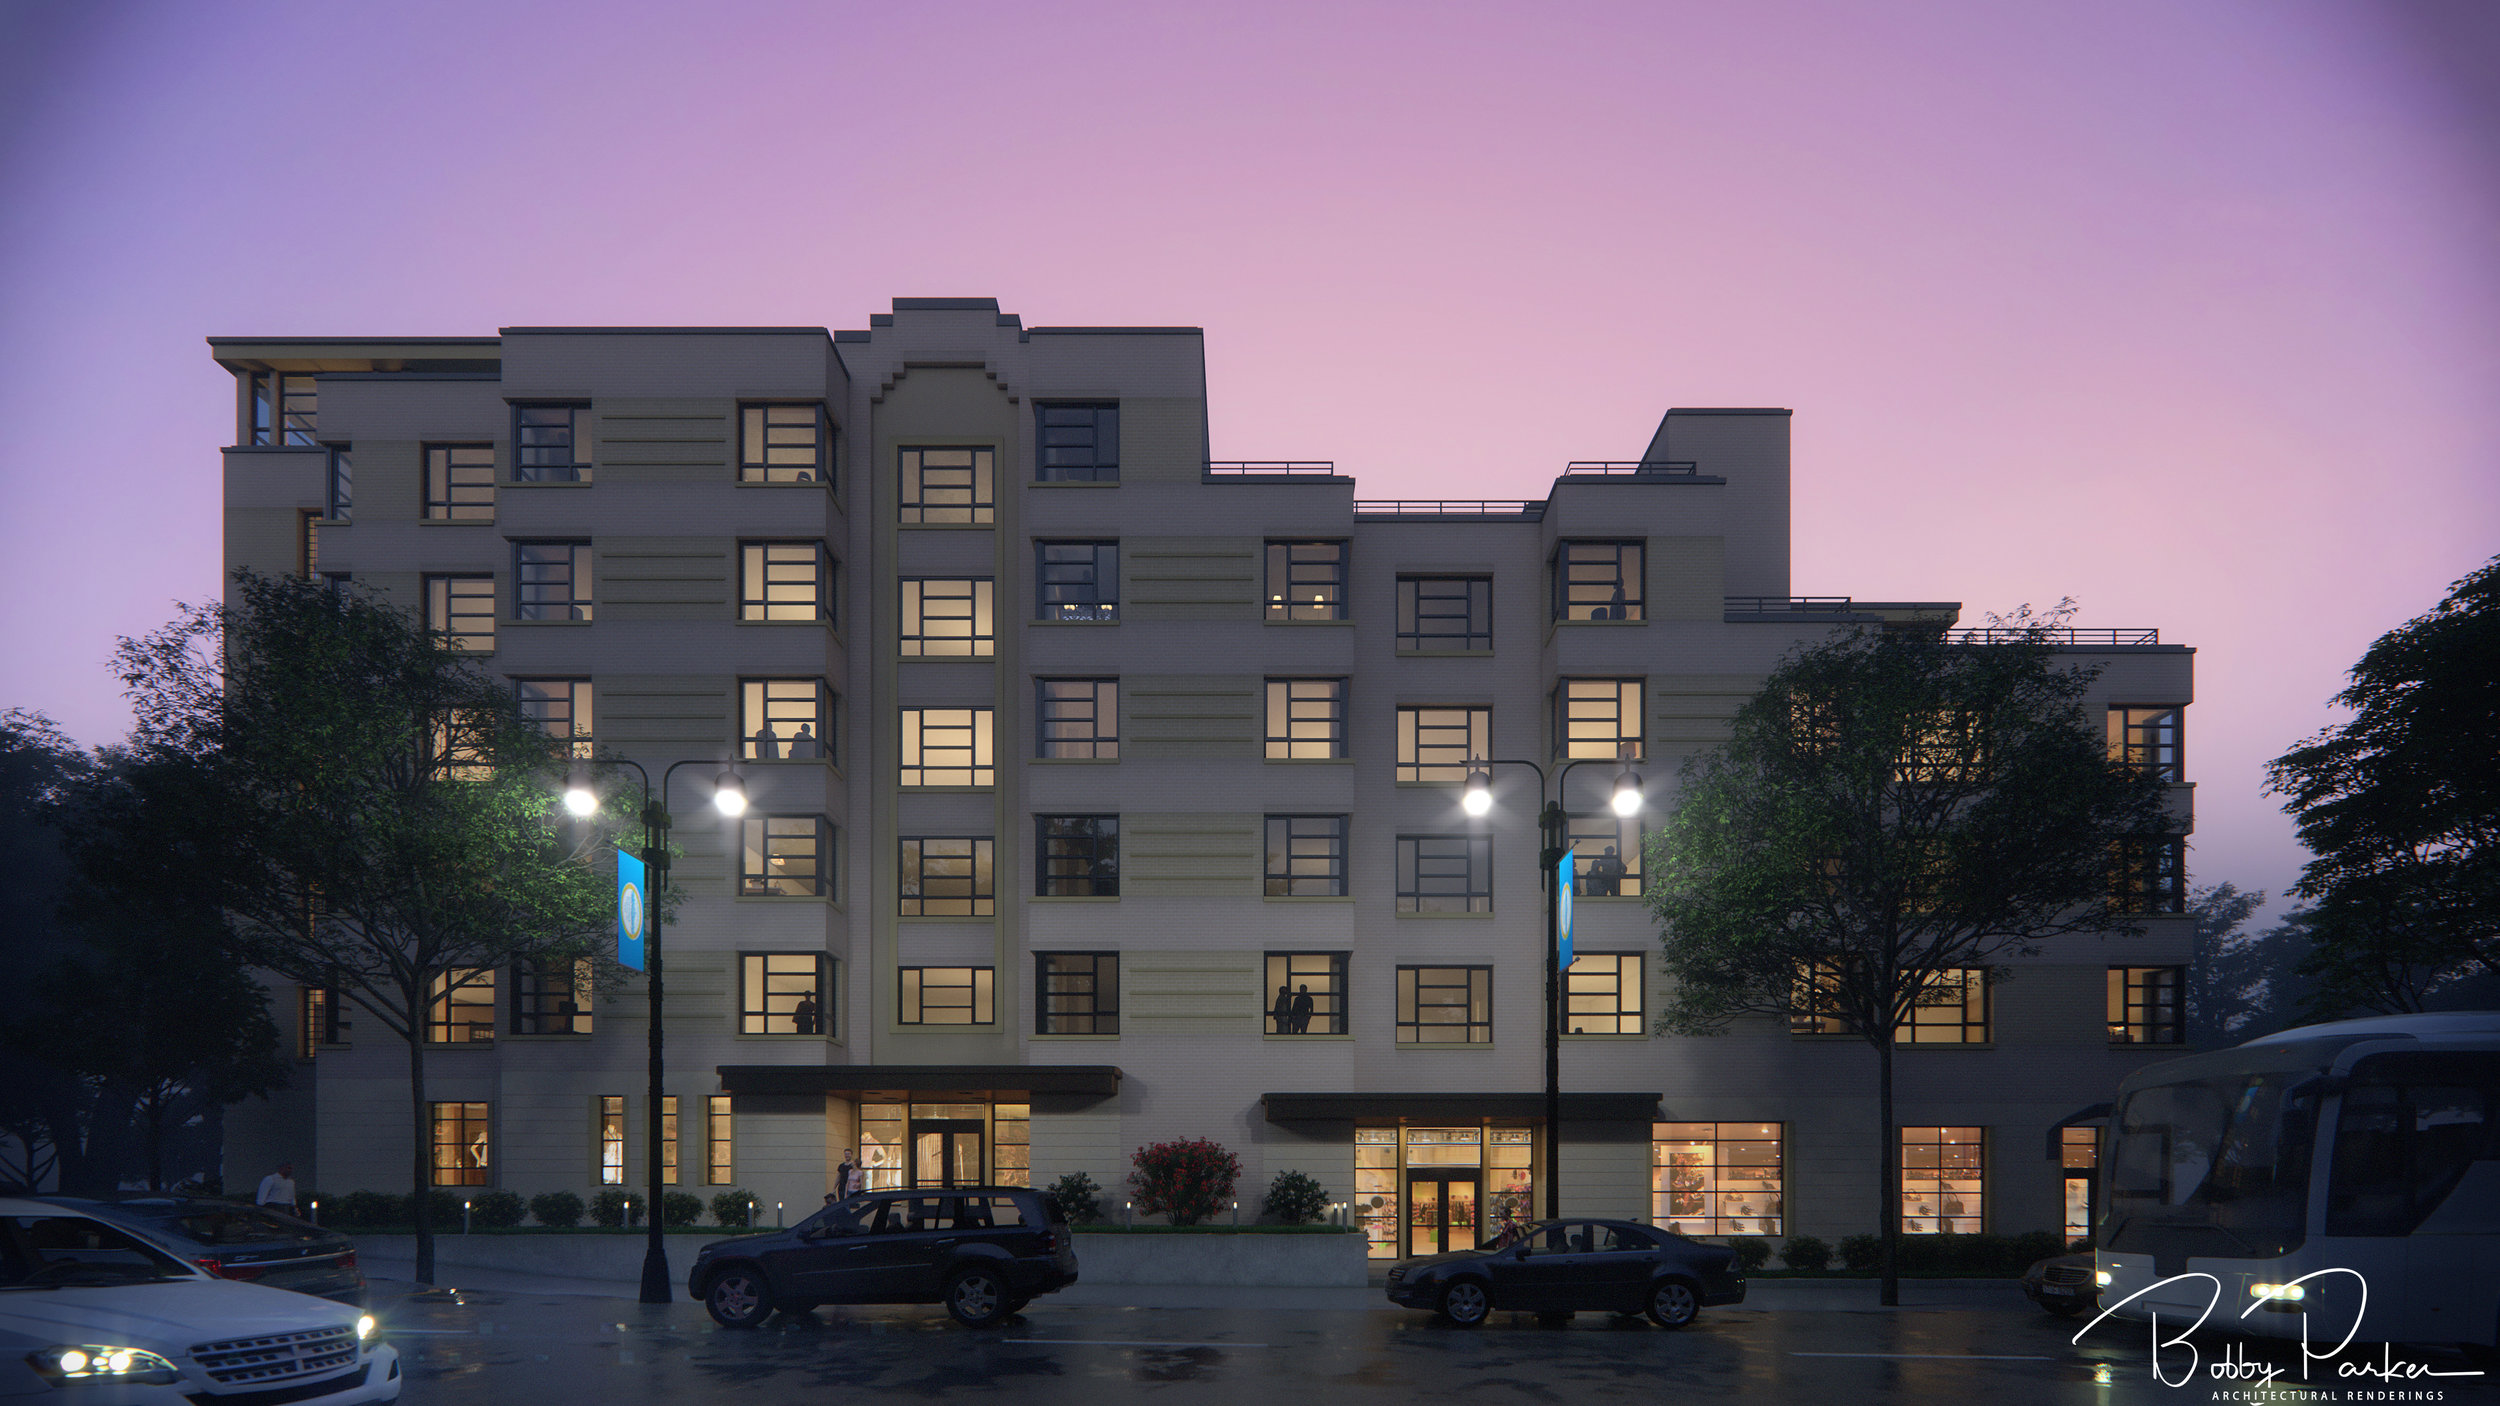
1650 Comm Ave. Renderings
Here are the architectural renderings for 1650 Comm Ave. project. The project is currently under construction and these images will be used for pre-sale and marketing.
Typically, and per my contract, all custom furniture modeling is quoted separately. However, there were some miscommunications between the party I entered into the contract with and the design team, so I went ahead and modeled each of the assets used in the scene.
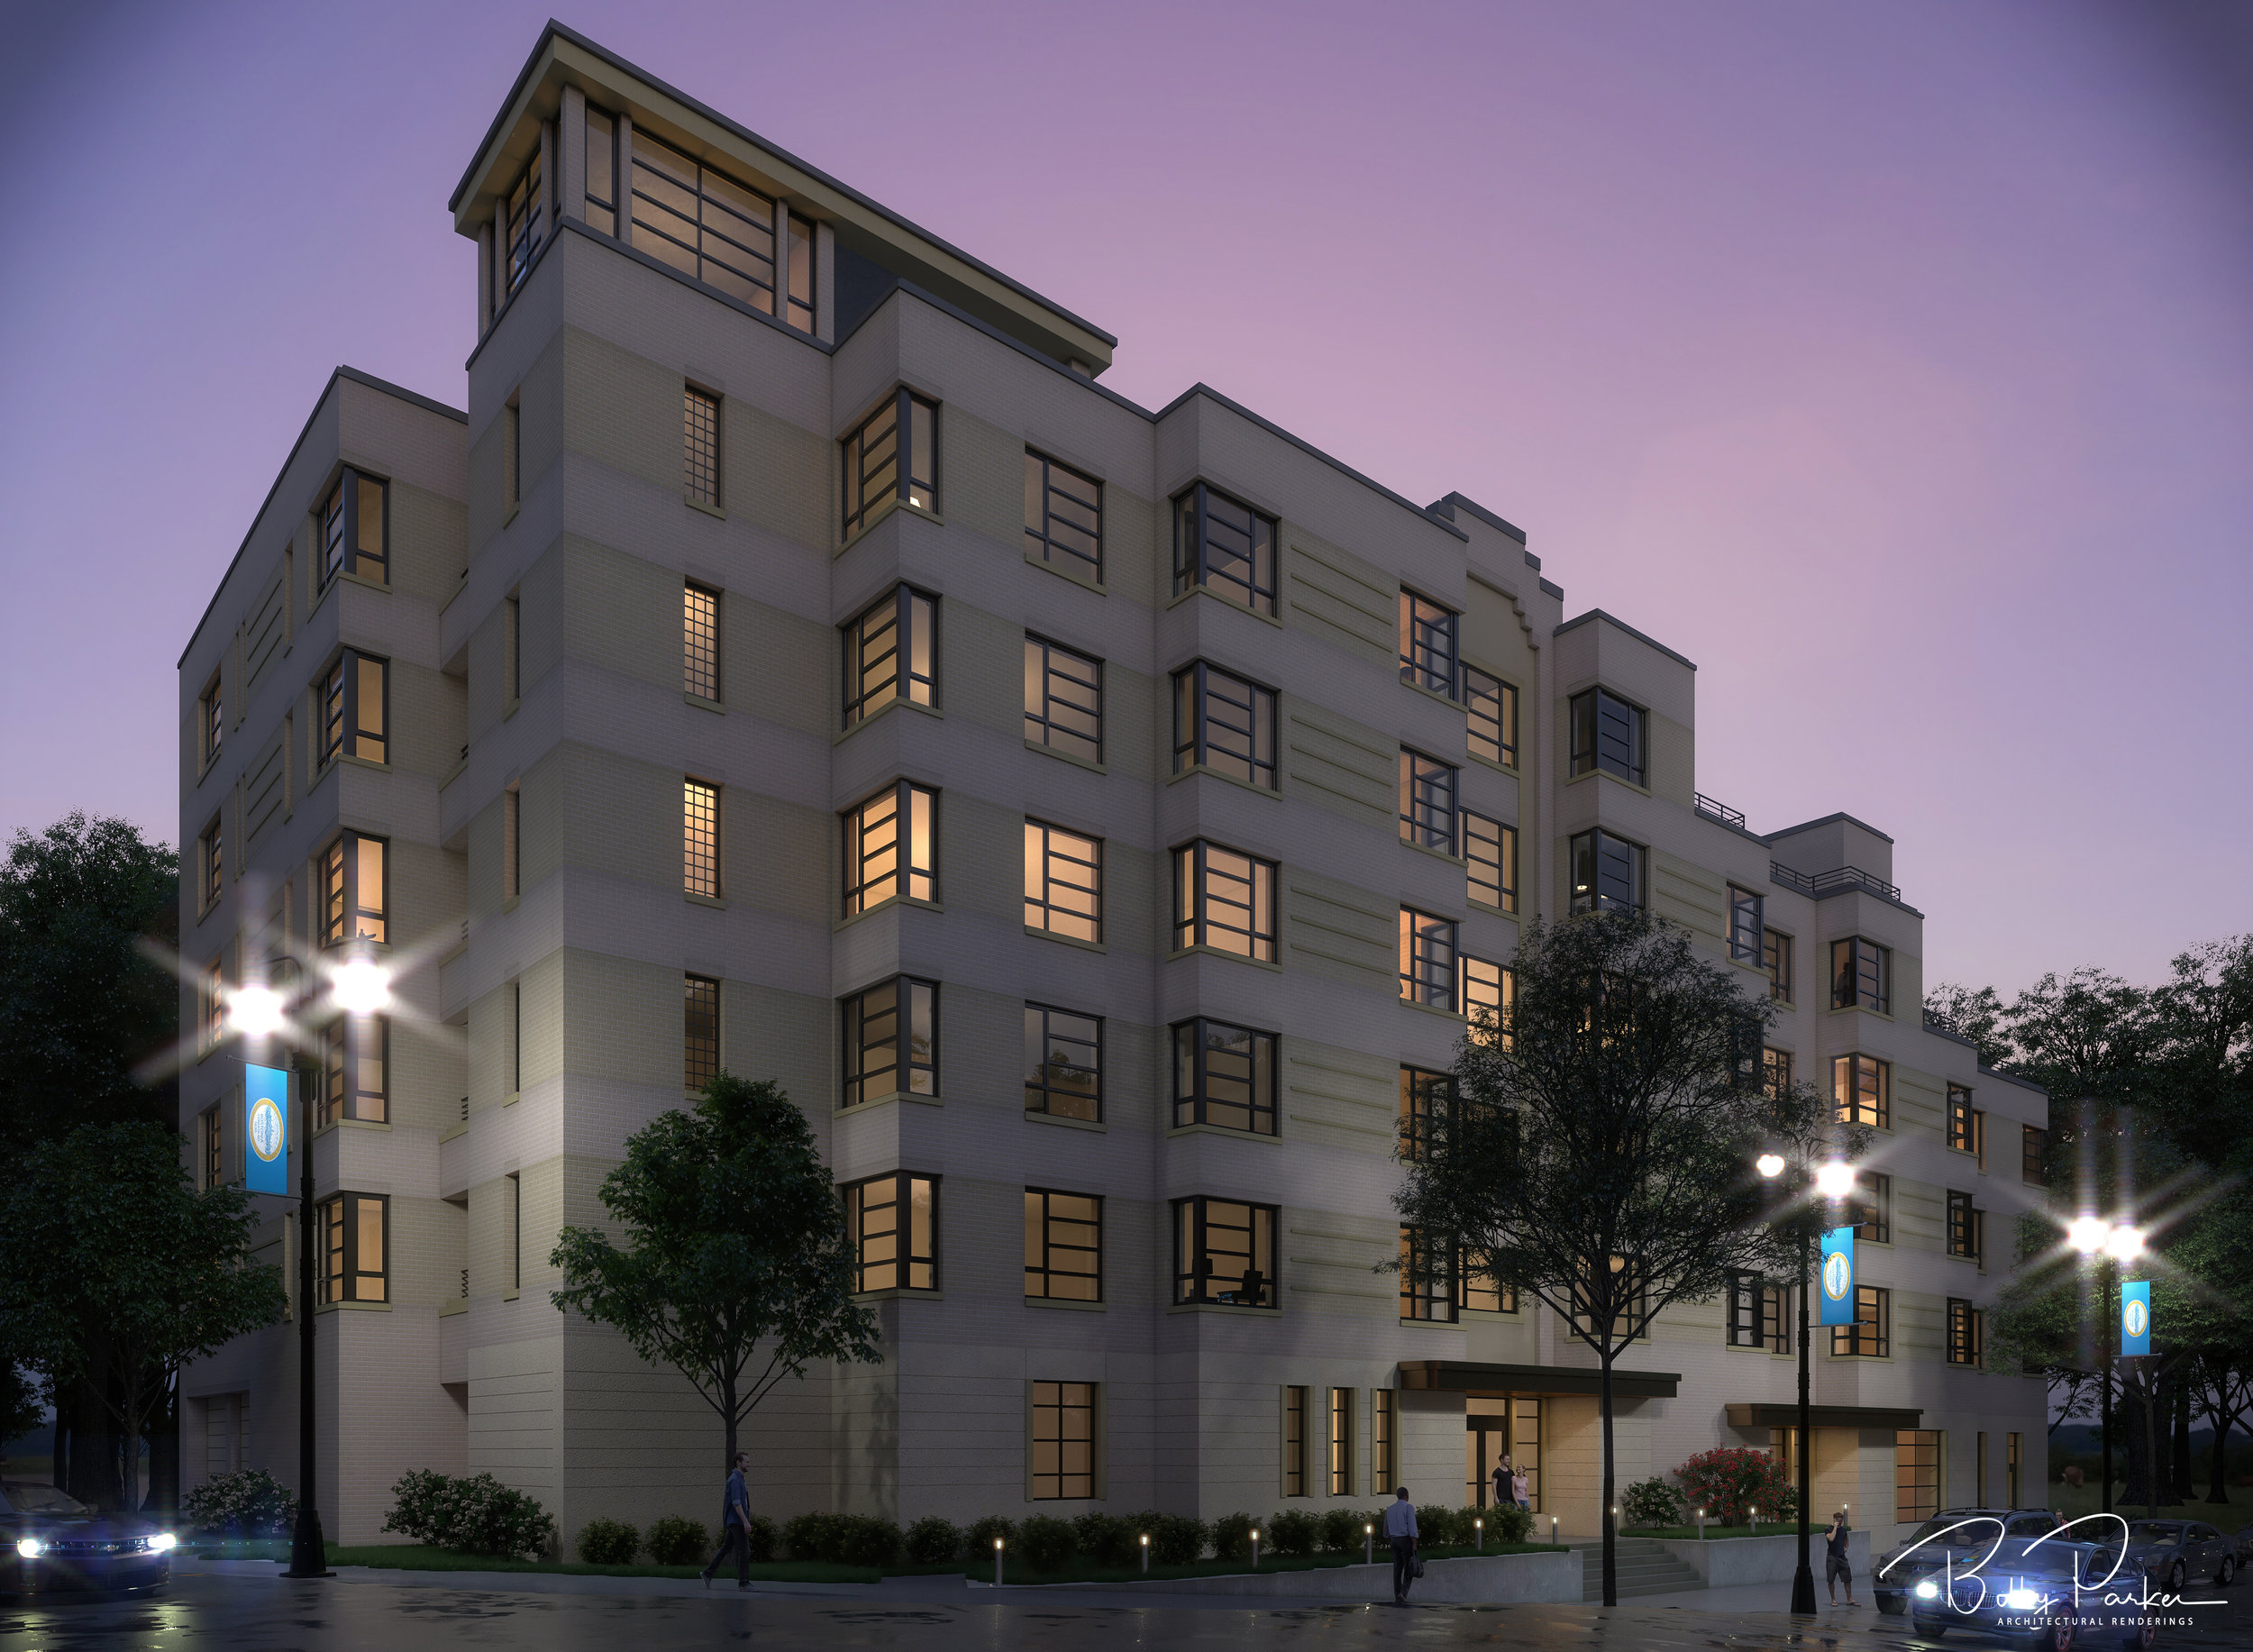
For almost all my work I am the creative lead. This architectural rendering, however, I was just following directions. Without having much say in things and not working with the party I entered into the contract with, things took a long time and personally, not the feel I would go for. Sometimes you have to remember that your client has to be happy more than you do, but I do try to make each of my renderings a portfolio piece, so I take it personally.
Anyway, any comments on this project would be appreciated. HEck, maybe I have been looking at in for far to long and it might have turned out better than these eyes are seeing.
Did you enjoy this article? I would love to hear your thoughts, so don’t be shy and comment below! Please don’t forget to subscribe to my RSS-feed or follow my feed onTwitter, Google+ andFacebook! If you enjoyed the following article we humbly ask you to comment, and help us spread the word! Or, if you would like, drop me an email.

81 Montford Architectural Rendering
Over the past several years I have seen a shift in my client based. For a couple decades, my clients were architects and developers, but now it is realtors and home owners. Since the advent of software like Revit Architecture, architects are doing a lot of their illustrations in-house. Sadly, most of the digital illustrations you see coming out of the architect's office are of poor quality. Not because of the lack of artistic skill, but rather the lack of time and dedication to learning the software. Have you ever seen those celebrities before makeup and after makeup photos? Well, if you would see the before rendering of this project, you would be just as startled. It takes many, many hours to bring a digital model, let's say out of Revit Architecure, to a finished rendering like the 81 Montford rendering you see below.
Over the last couple years, my client base has shifted to realtors, who need to market their property prior to construction and the architect's renderings are not meeting the needs of the realtor, which is to show the structure in its best light; something the viewer will fall in love with.
Here, is a rendering for 81 Montford, which will be used to sell the house prior to the properties construction is complete.

Did you enjoy this article? I would love to hear your thoughts, so don’t be shy and comment below! Please don’t forget to subscribe to my RSS-feed or follow my feed onTwitter, Google+ andFacebook! If you enjoyed the following article we humbly ask you to comment, and help us spread the word! Or, if you would like, drop me an email.

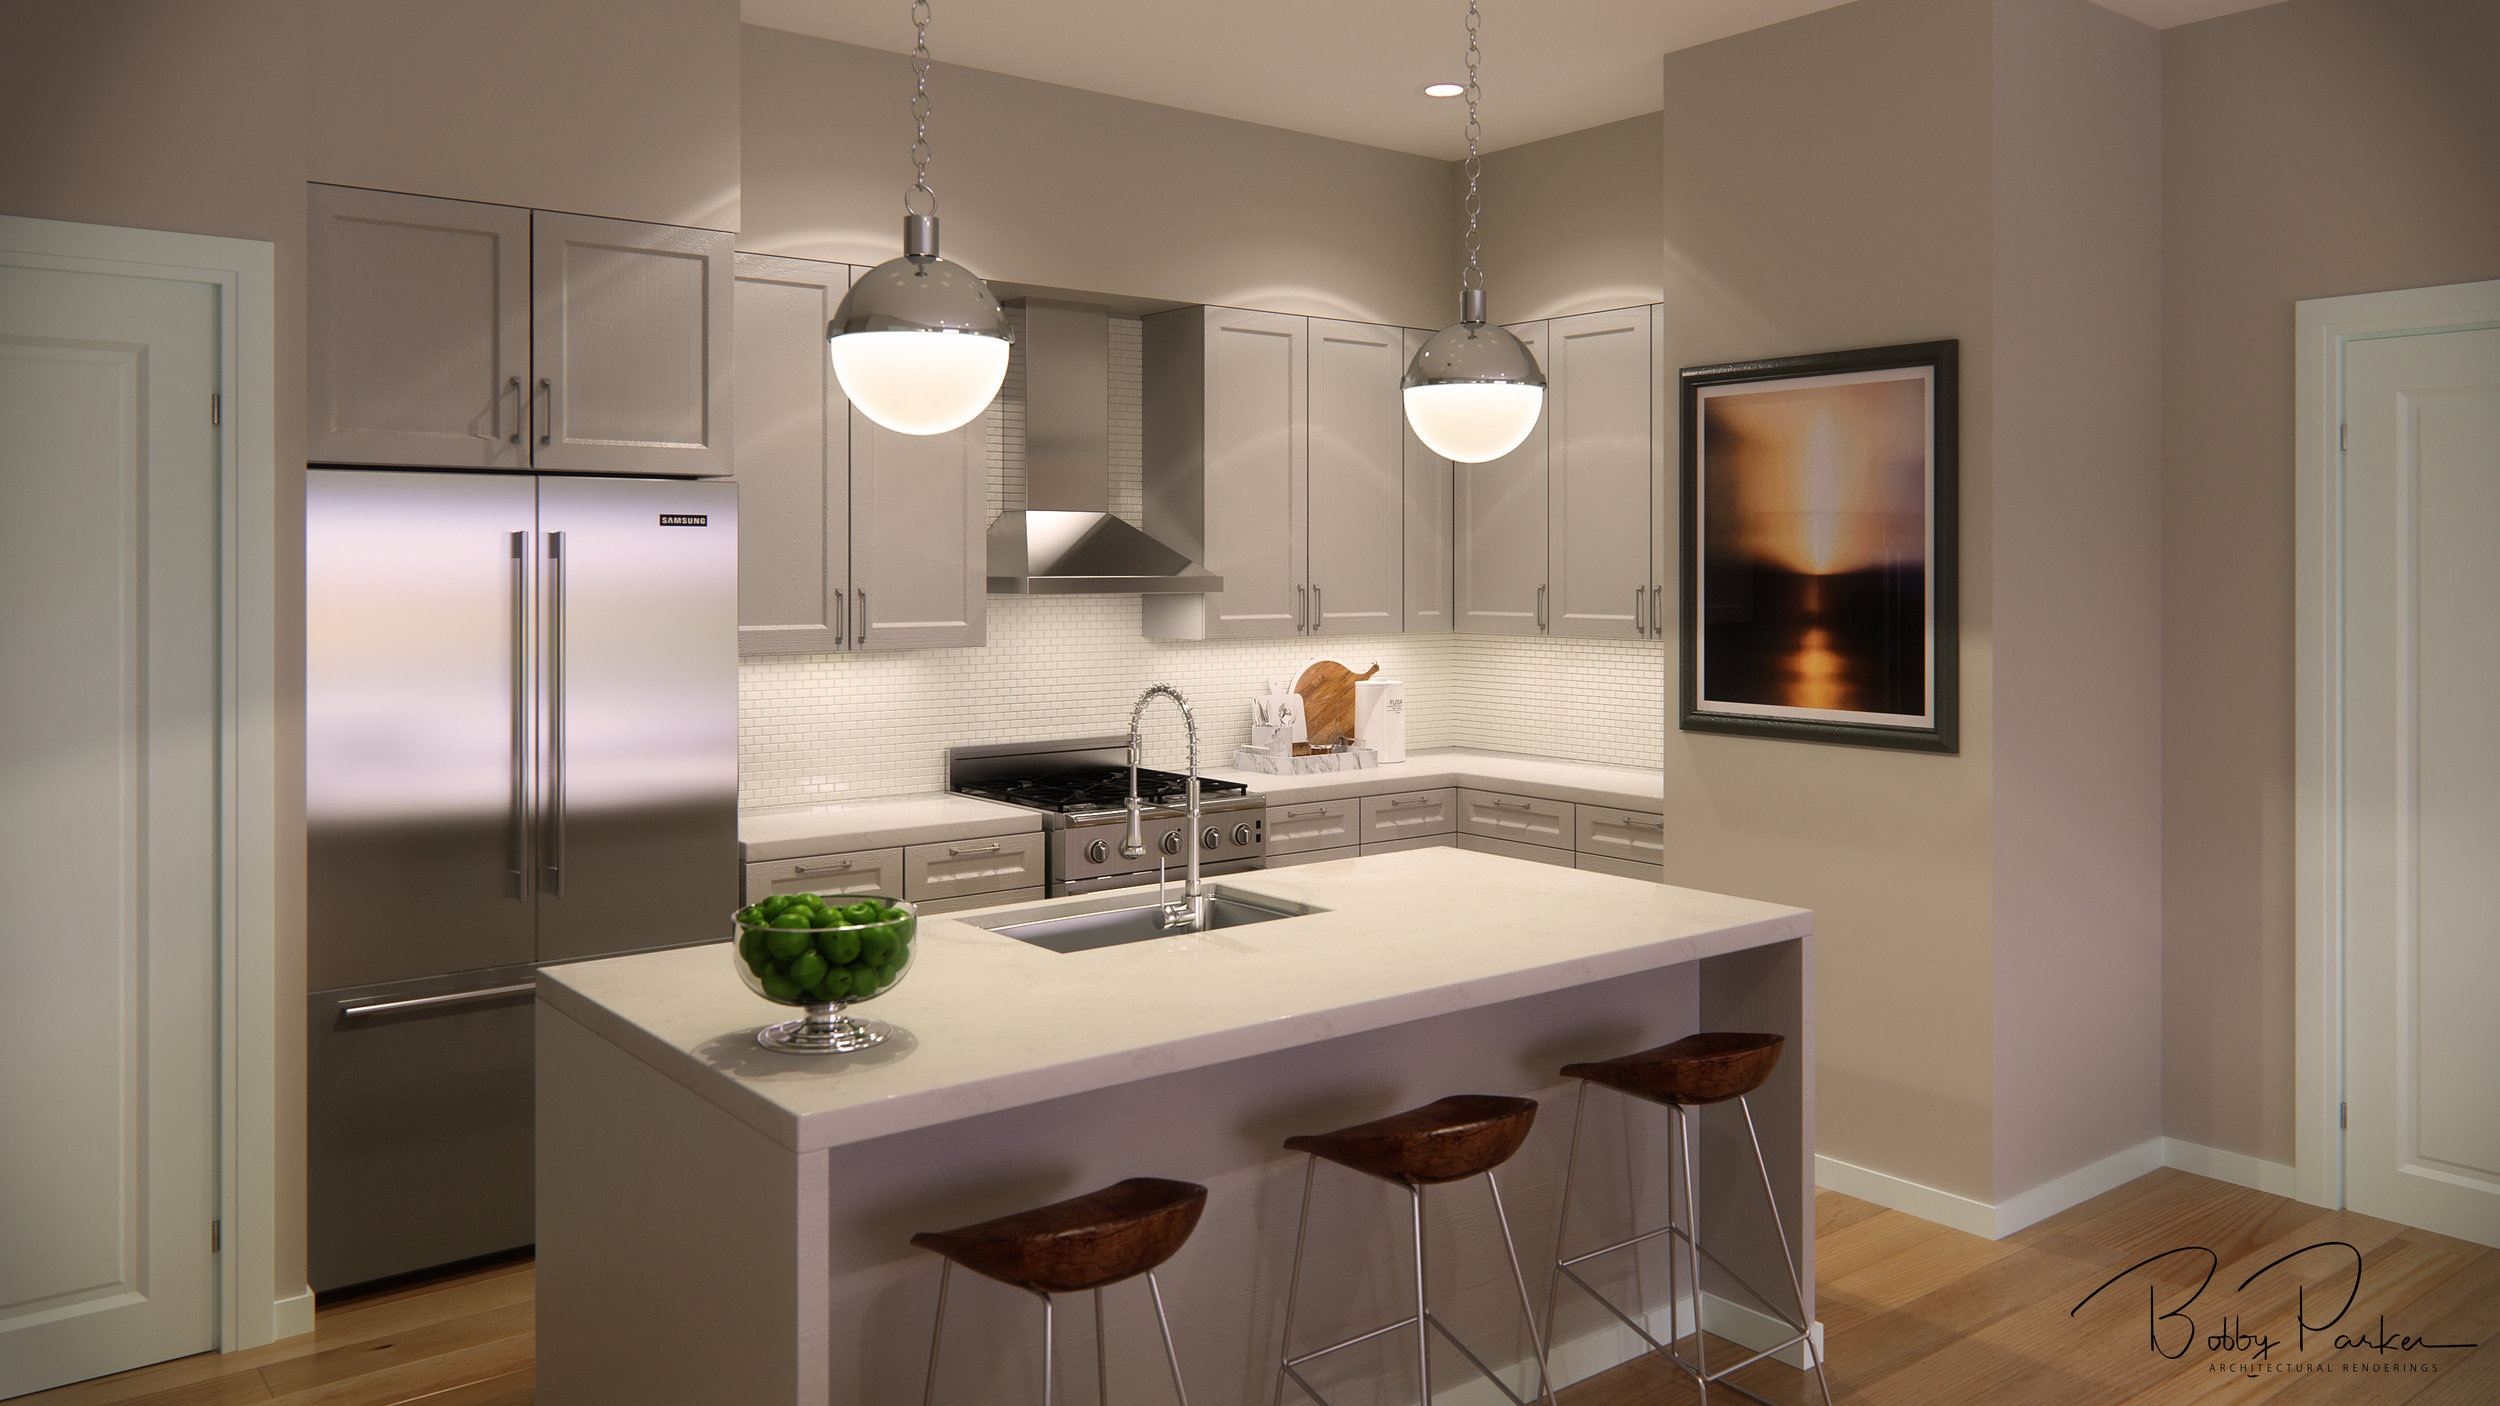
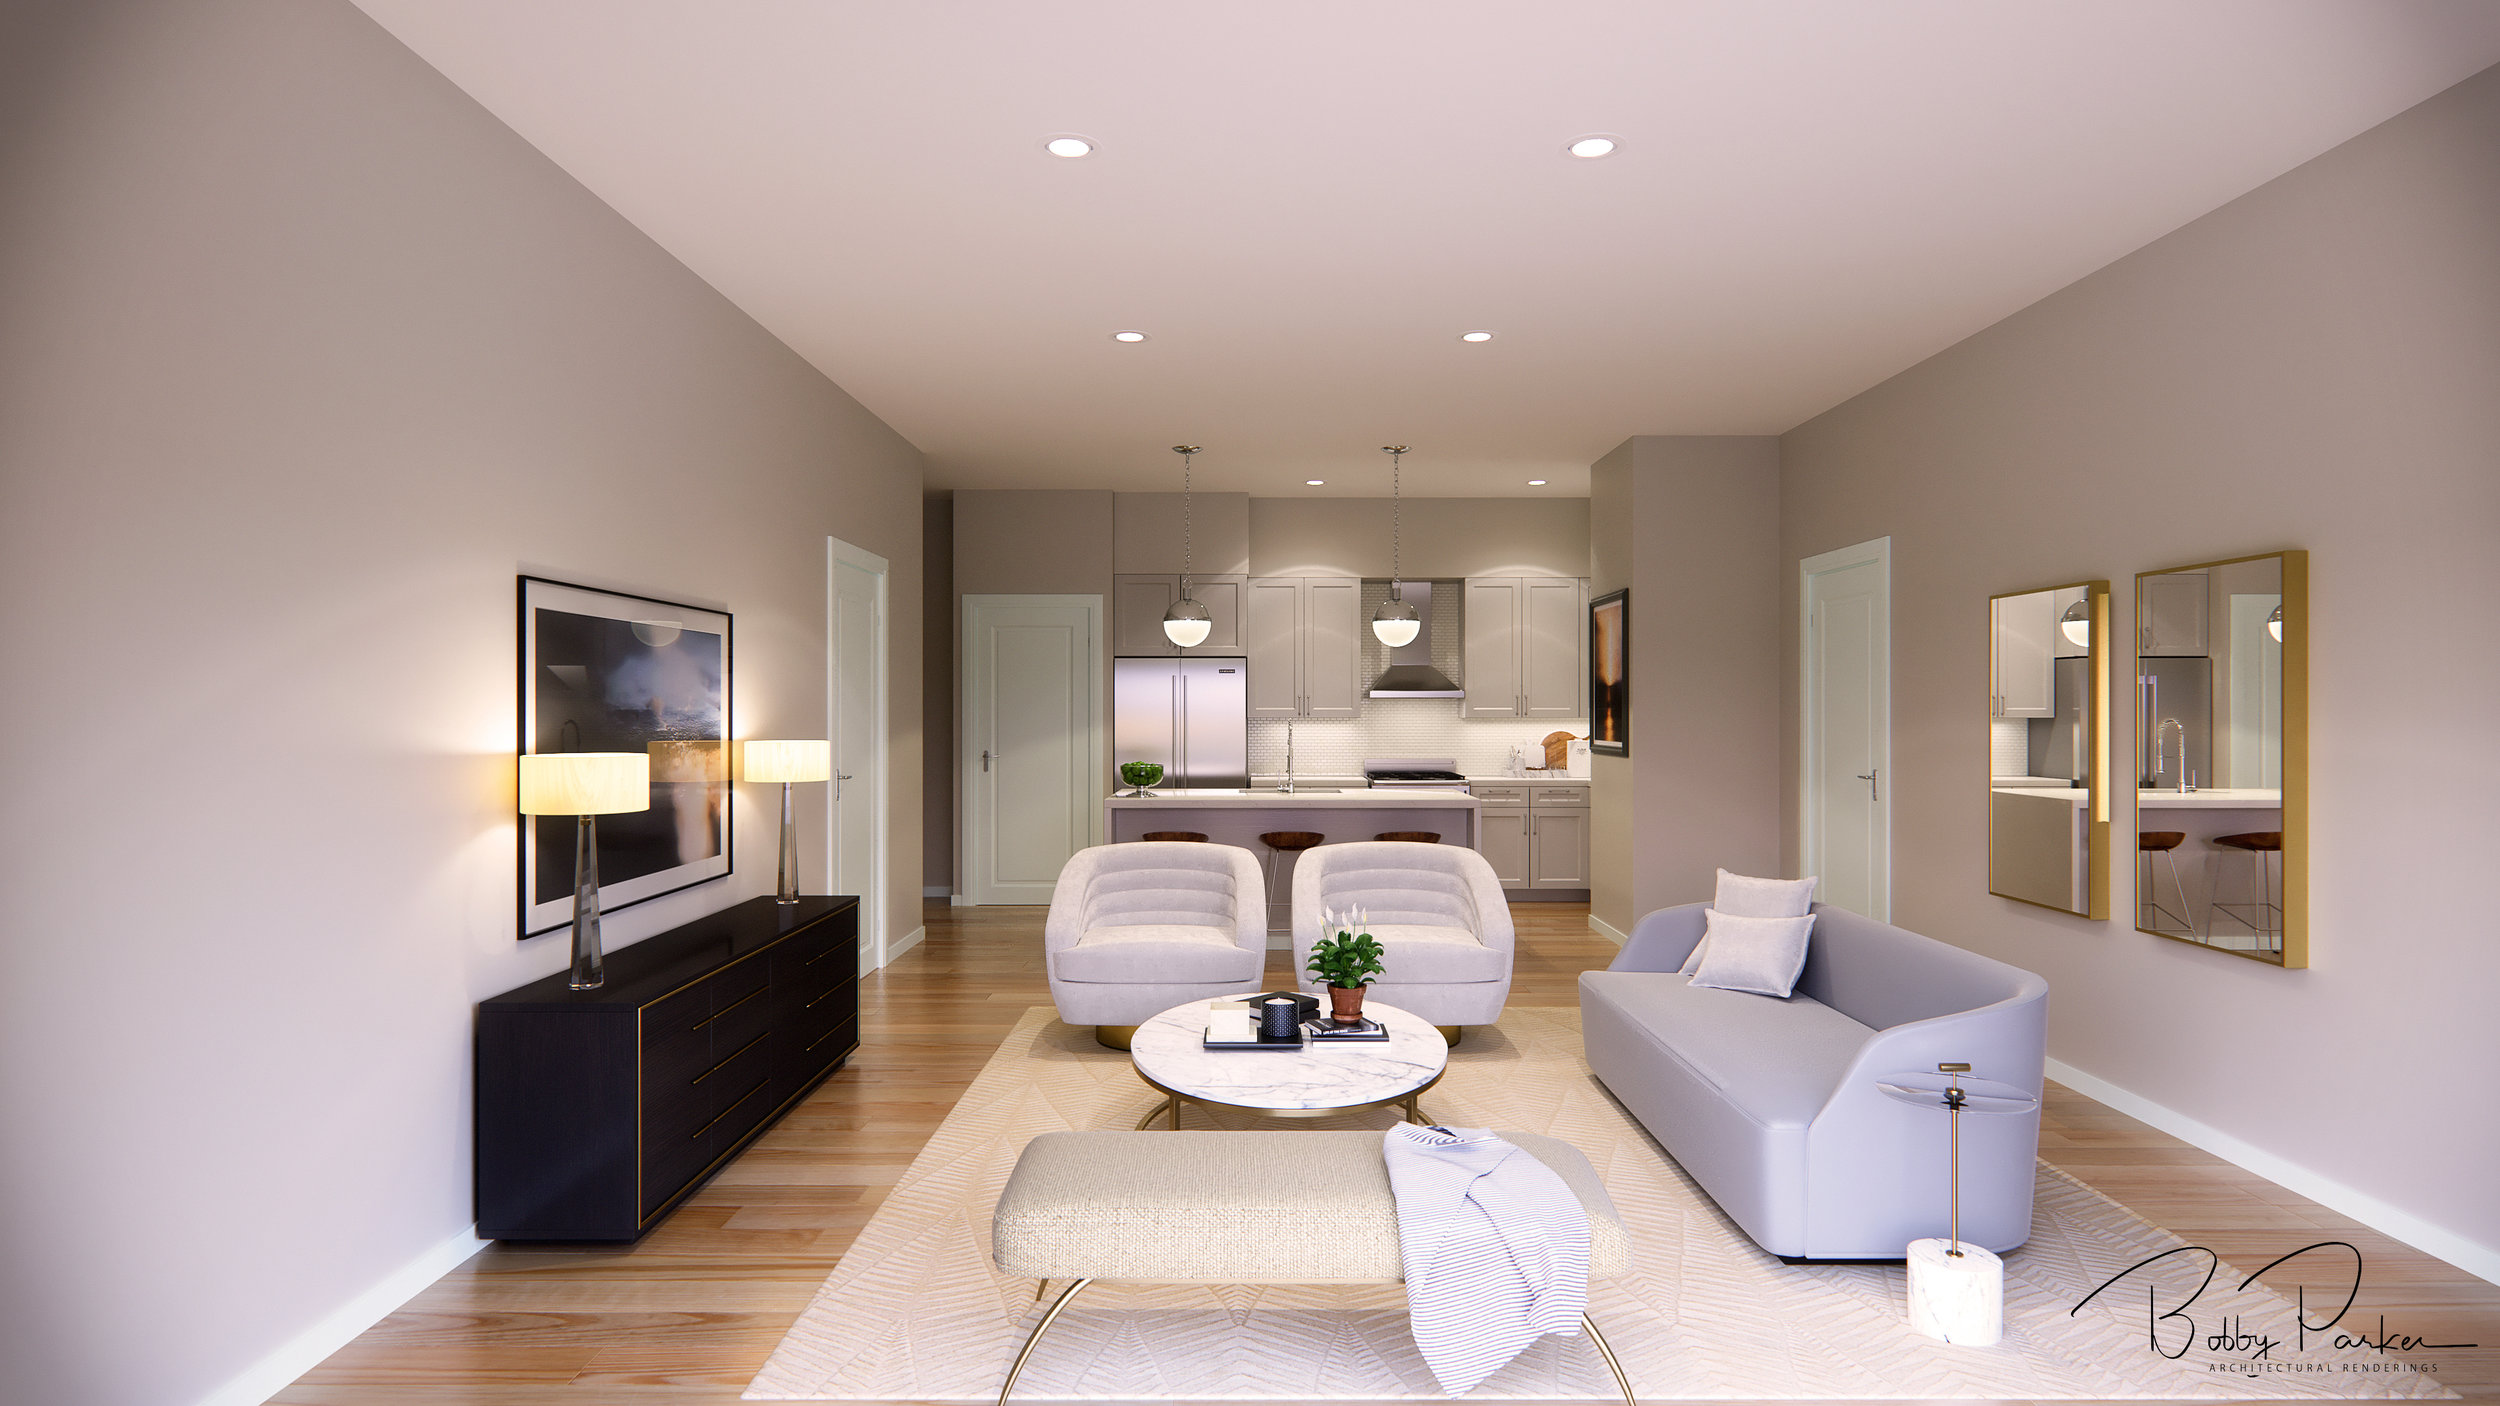
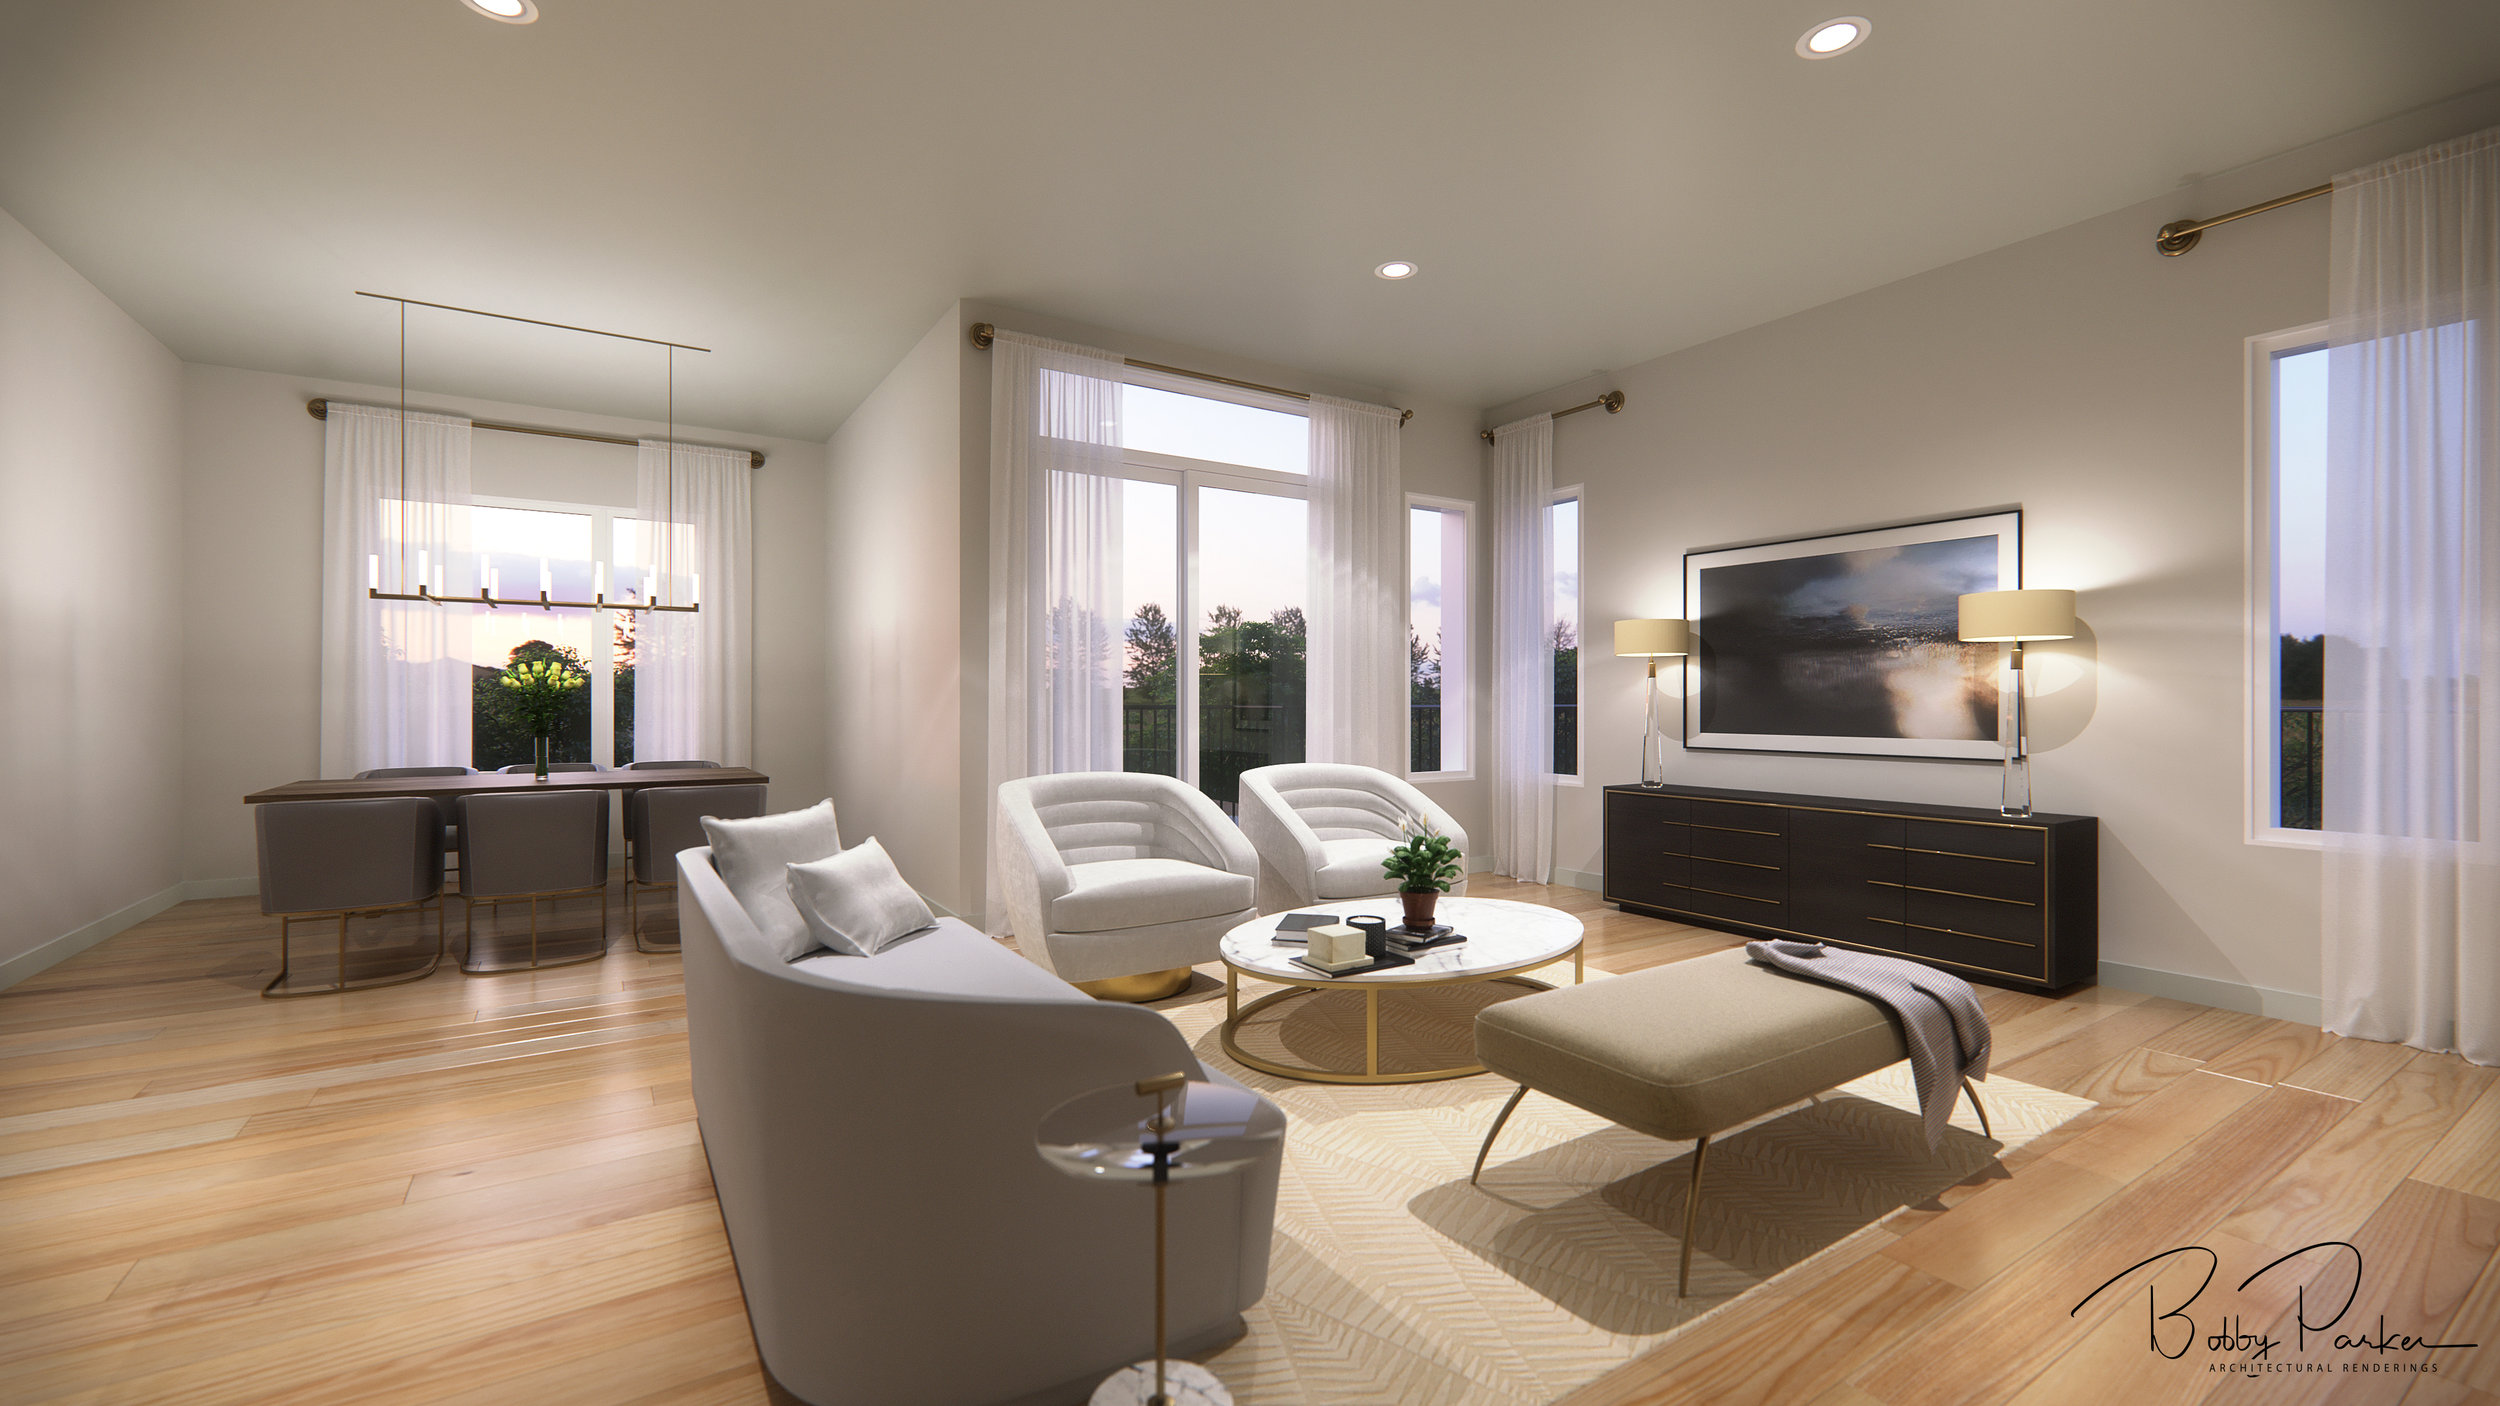
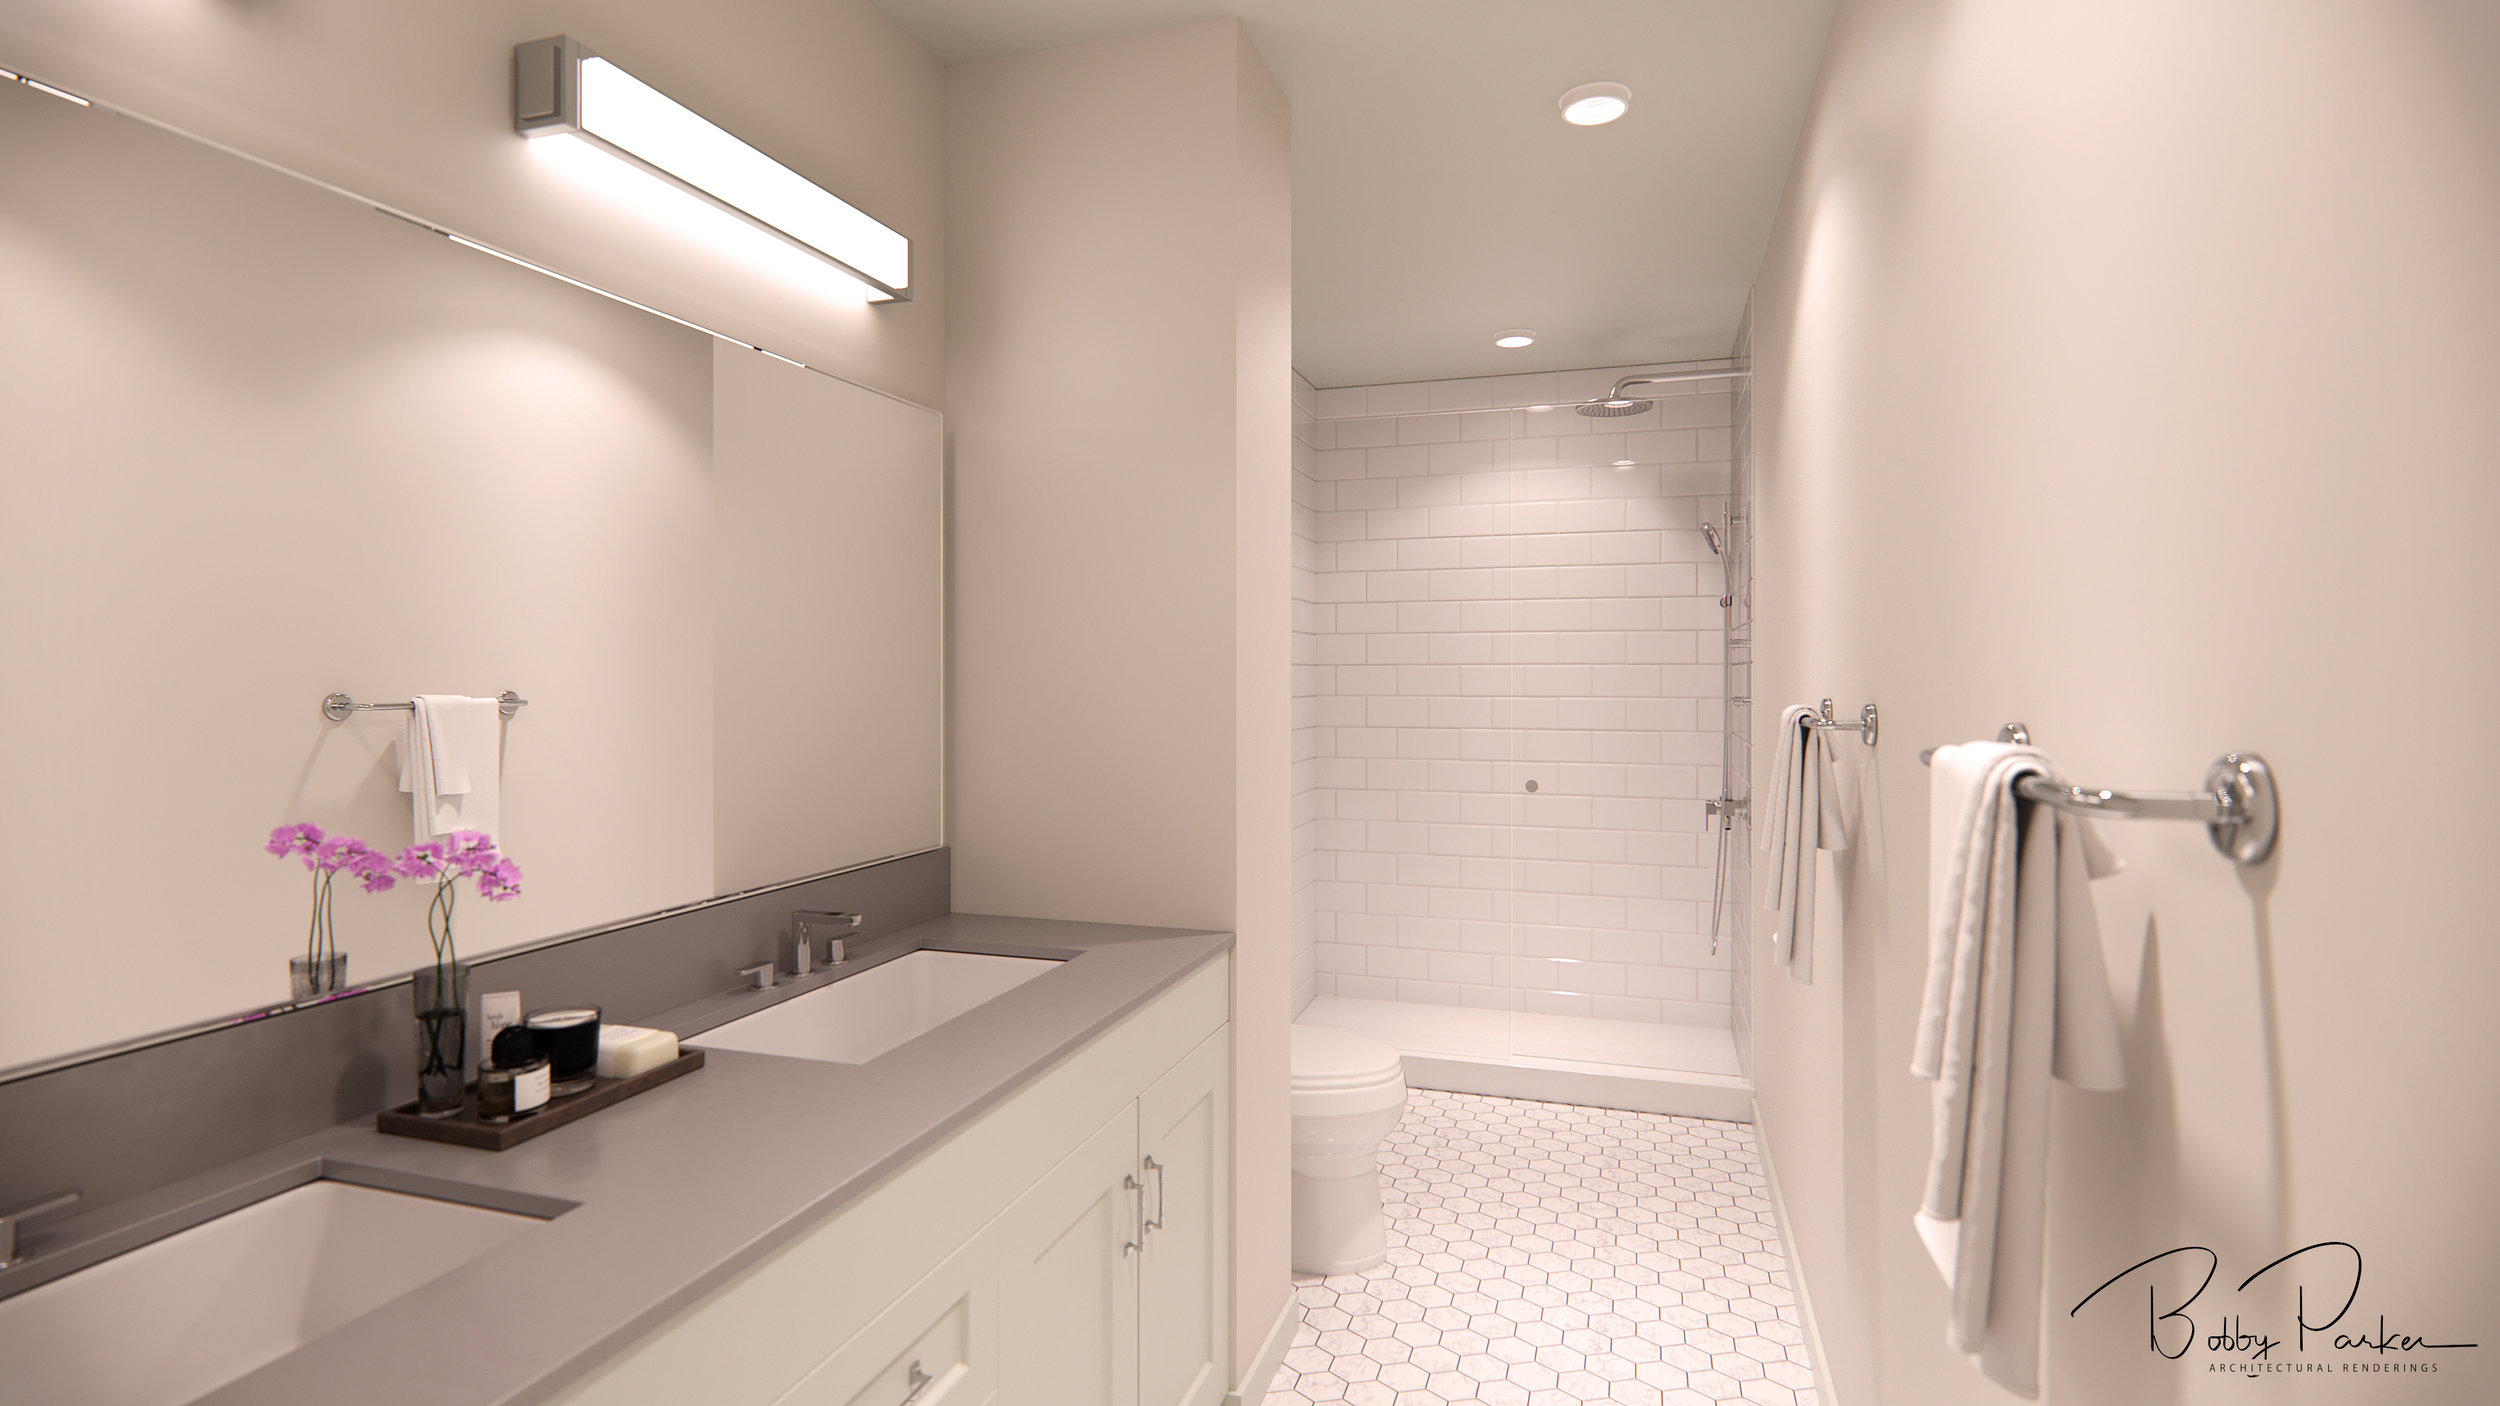
Elizabeth Apartment Unit E
Several months ago I was approached by a lovely lady who was apprehensive in hiring an illustrator to illustrate her apartment spaces. She searched the web for along time, loved my work, so she took the initiative to reach out to me for her interior architectural rendering. I can understand the apprehension of ordering a service online; who knows what you'll get? I remember about 10 years ago I ordered a logo online. The website had some very nice logos, so I dropped my deposit, wrote out my brief, and patiently waited. About two weeks later I got a god awful clip art that sincerely, could have been done by my 6-year-old daughter. Now, this was a $100 proposition, so I wasn't out much, however, I haven't ordered a service online since. The $100 wasn't a waste, it was a learning moment and I am now sympathetic when it comes to peoples online fears.
“WOW. Beautiful. Thanks, Bobby”
This, the Elizabeth Apartment Unit E rendering is the second unit I have illustrated; she loved the first and she loves this one just as much.
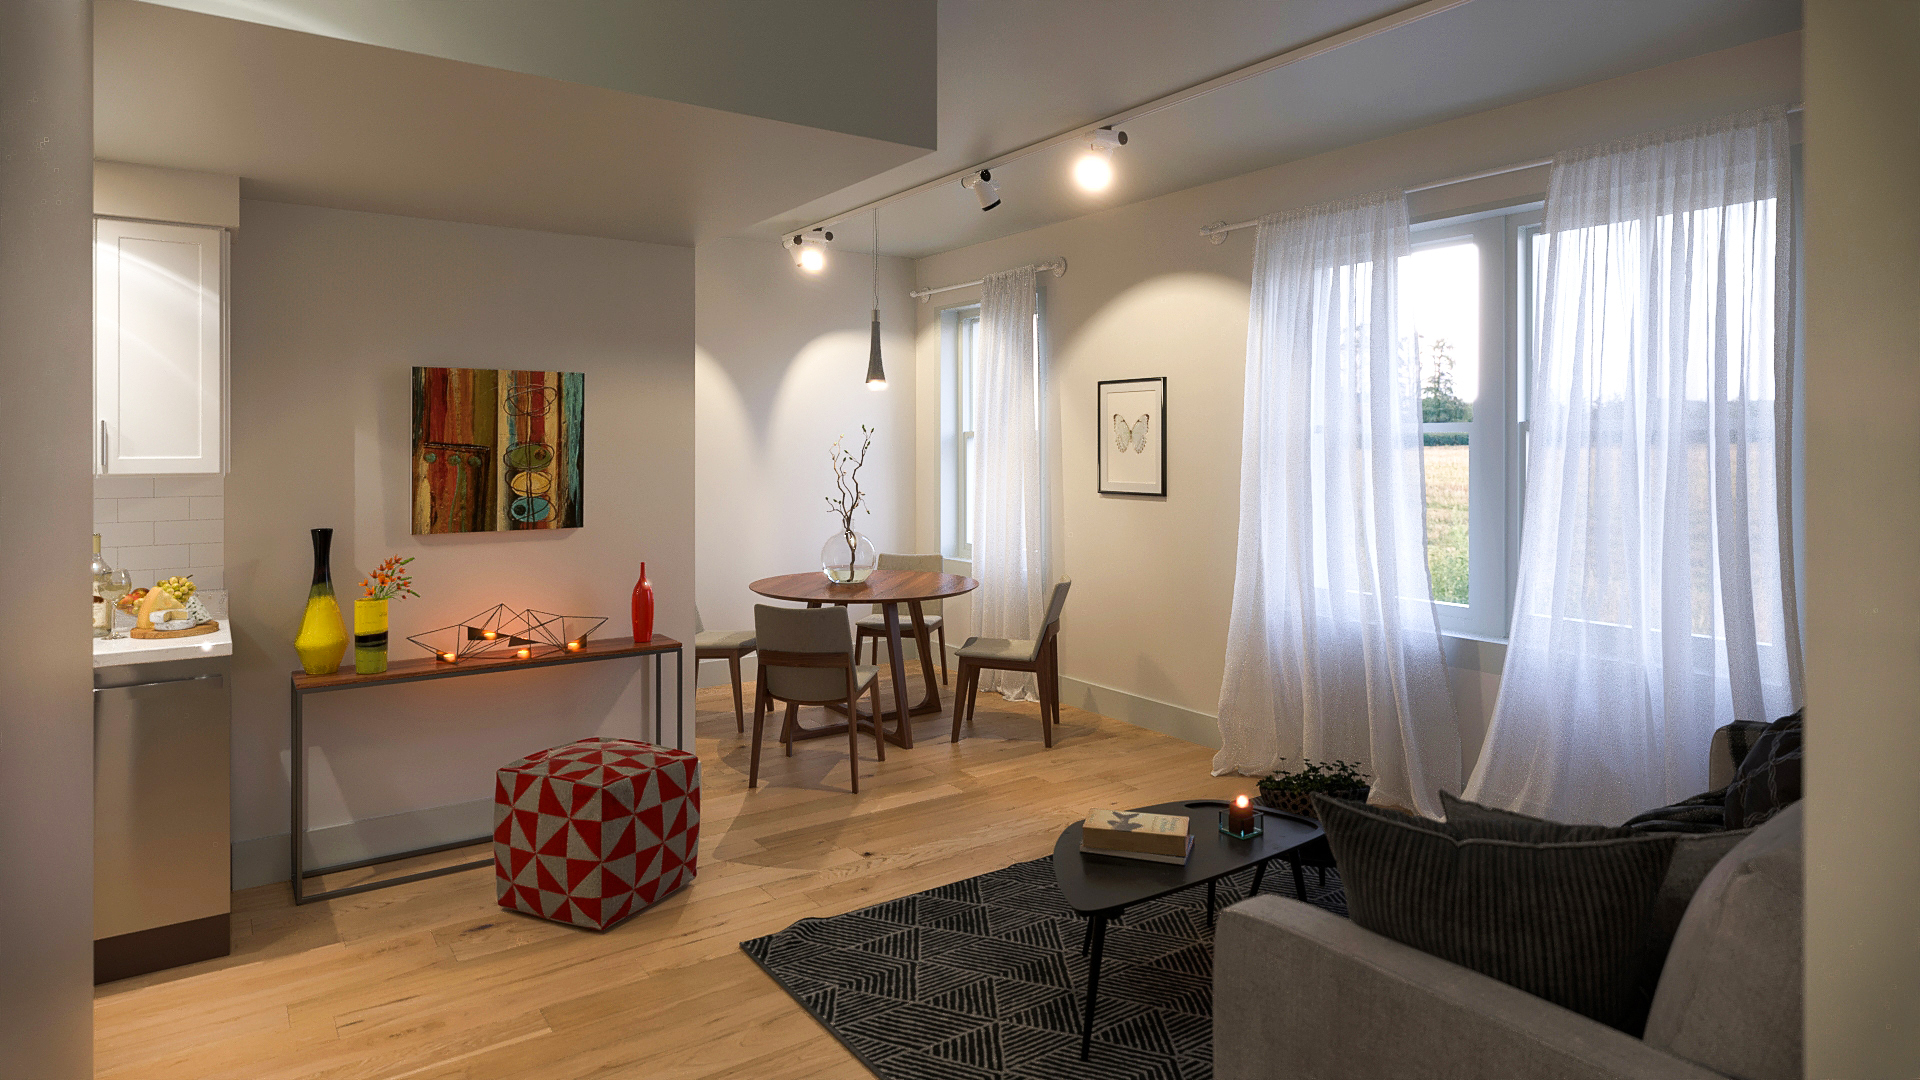
To tell you the truth, over the years interiors have been a challenge for me. The end deliverables have always been received good, however, they were hard to pull off and very time-consuming. Like anything, practice makes perfect. I have done hundreds of interiors over the years and they are now becoming easier and a joy to do.
Did you enjoy this article? I would love to hear your thoughts, so don’t be shy and comment below! Please don’t forget to subscribe to my RSS-feed or follow my feed onTwitter, Google+ andFacebook! If you enjoyed the following article we humbly ask you to comment, and help us spread the word! Or, if you would like, drop me an email.

New Office
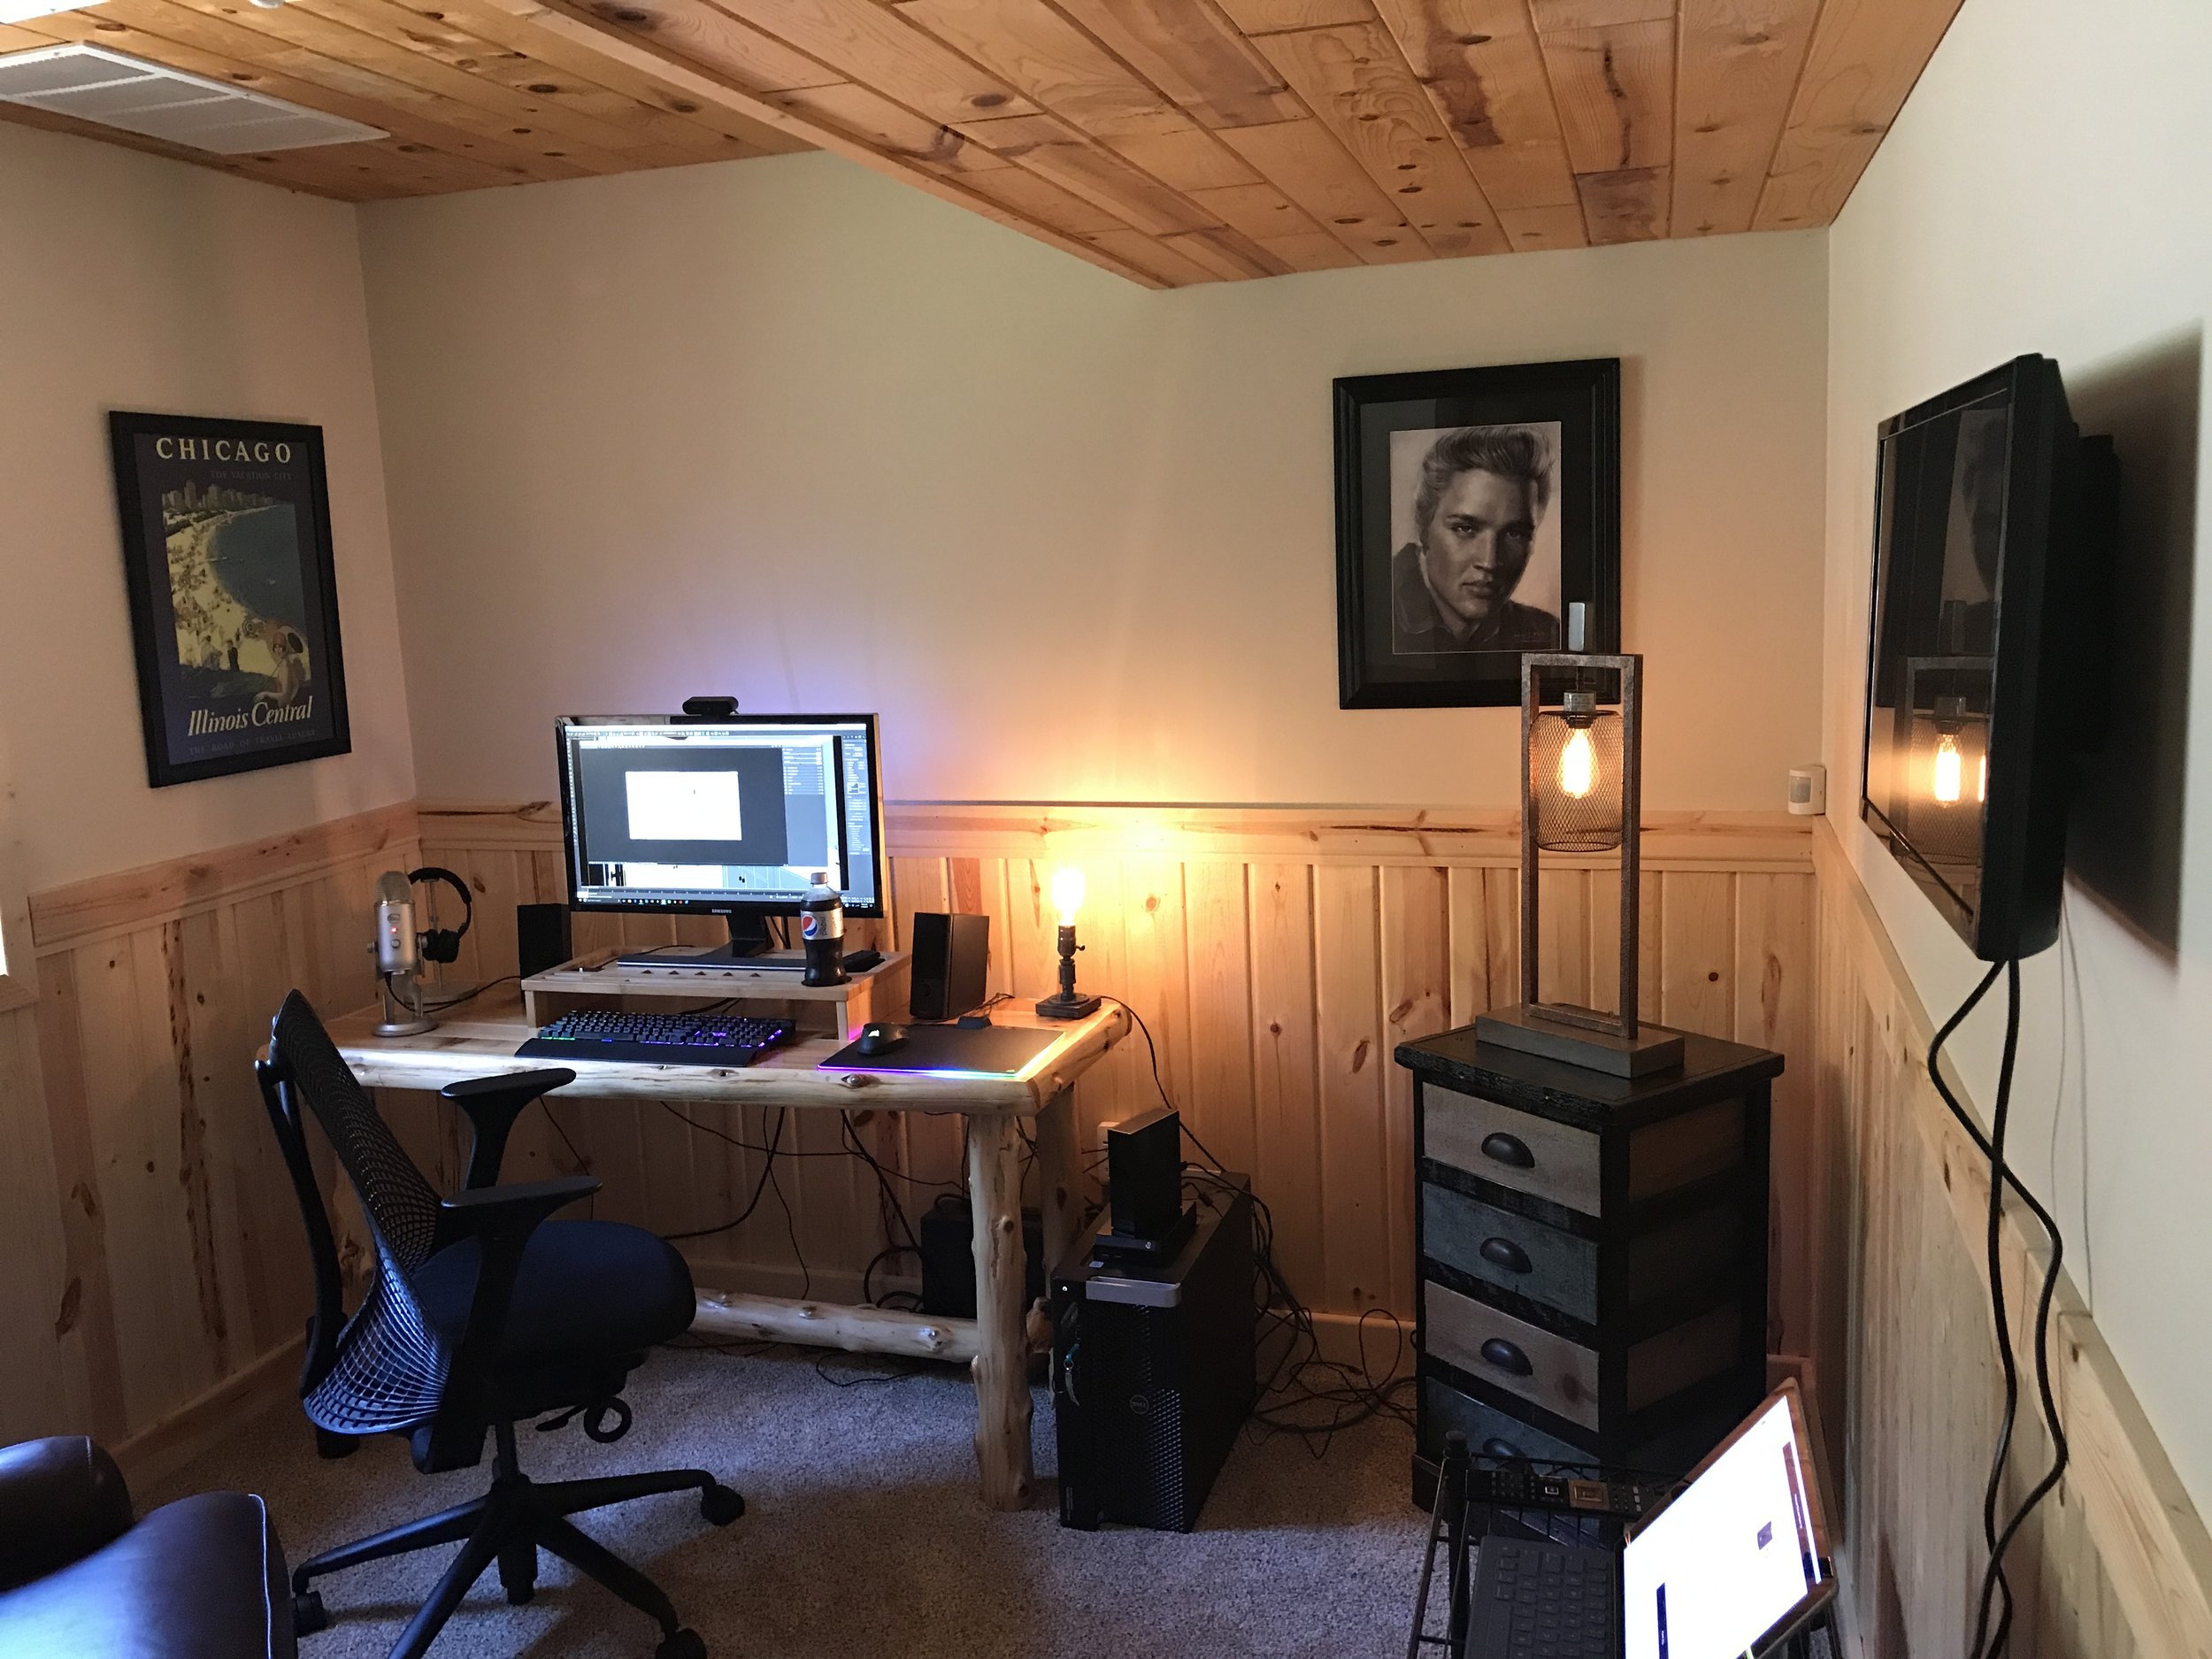
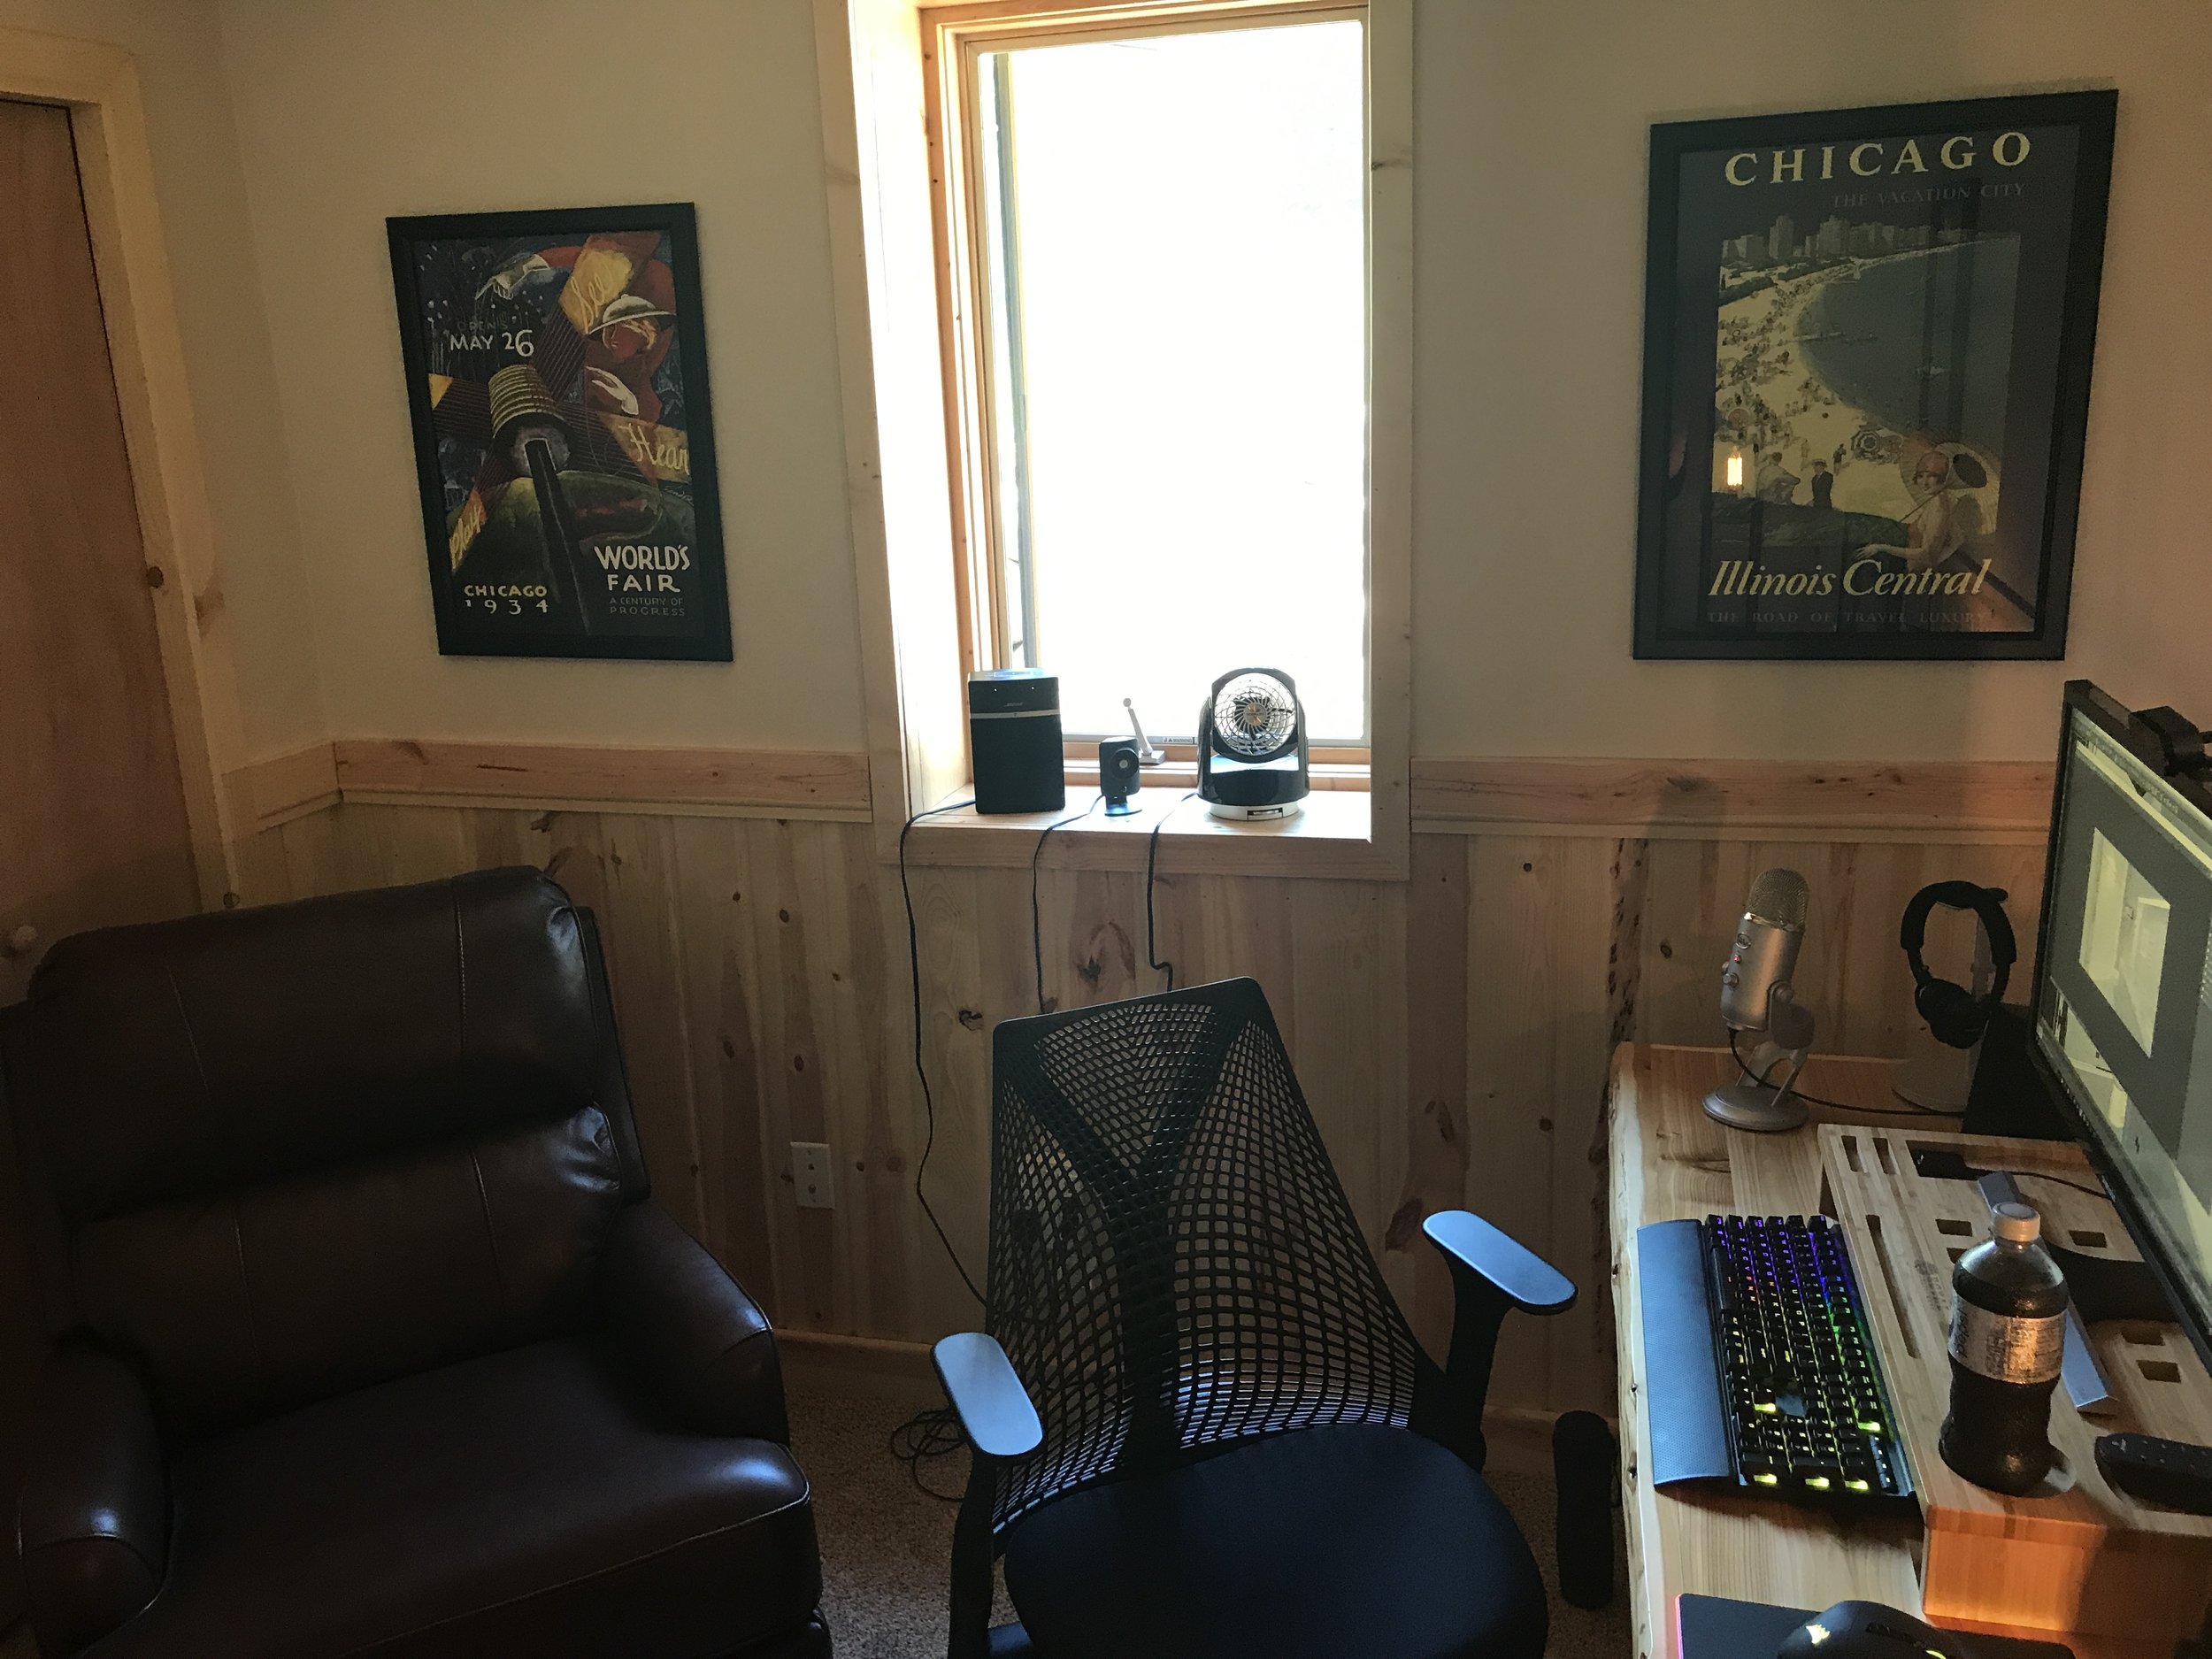
I have moved into my new office!
From a high-rise studio apartment in downtown Chicago to my first house about an hour south of the city to a house in upper Minnesota. The first couple moves were a breeze, because, well, I didn't have much. Boy, did I underestimate this move? Not only was this buying process more time consuming than the first two houses, I had 14 years of family bliss to pack and move.
The good news is, I am settled into my home office and I have taken some photos.
On a whim, my wife wanted to talk to a realtor about selling our house because simply put, we grew out of it. We met the realtor on a Saturday and the house sold the following Tuesday. Now that we have 30 days to vacate, we went house hunting. After an exhaustive few weeks, we found the perfect house, made an offer which was excepted and waited for all the finance stuff to pan out. There were a couple weeks between closings that we hunkered down in a hotel, which worked out okay. Up here, in the Summer, everything is booked solid and booked for top dollar. We were blessed and found a newly remodeled hotel that had a two-week vacancy, so needless to say, I booked it.
It has been a very busy month, but God is good and everything went smoothly, Throughout the move, I literally had no work downtime, which is awesome. Working from the hotel wasn't the ideal setup, but it worked.
If your project was being developed during this process hopefully you didn't even notice the disruption in my workflow. If you did, my apoligize.

Elizabeth Apartment Renderings
I really enjoy creating architectural renderings and I really enjoy that my work helps my clients market their properties. This series of interior renderings are for an apartment complex called Elizabeth.
Did you enjoy this article? I would love to hear your thoughts, so don’t be shy and comment below! Please don’t forget to subscribe to my RSS-feed or follow my feed onTwitter, Google+ andFacebook! If you enjoyed the following article we humbly ask you to comment, and help us spread the word! Or, if you would like, drop me an email.

Best Western Rendering
Flashback! In the 90's I was an architectural illustrator for a hotel and motel design/build company. We have come a long way, baby! Here, is a rendering for a Best Western Hotel, which happens to be one of my favorite hotel brands.

Did you enjoy this article? I would love to hear your thoughts, so don’t be shy and comment below! Please don’t forget to subscribe to my RSS-feed or follow my feed onTwitter, Google+ andFacebook! If you enjoyed the following article we humbly ask you to comment, and help us spread the word! Or, if you would like, drop me an email.

Revit to 3DS MAX Materials to Layer
What was once a tedious and time consuming task is now easy with this little free script by Olaf Finkbeiner for www.mainworks.de. I simply imported a Revit model, ran the script and voila! If you can't find the 3DS MAX script, let me know and I'll email it to you.
Did you enjoy this article? I would love to hear your thoughts, so don’t be shy and comment below! Please don’t forget to subscribe to my RSS-feed or follow my feed onTwitter, Google+ andFacebook! If you enjoyed the following article we humbly ask you to comment, and help us spread the word! Or, if you would like, drop me an email.

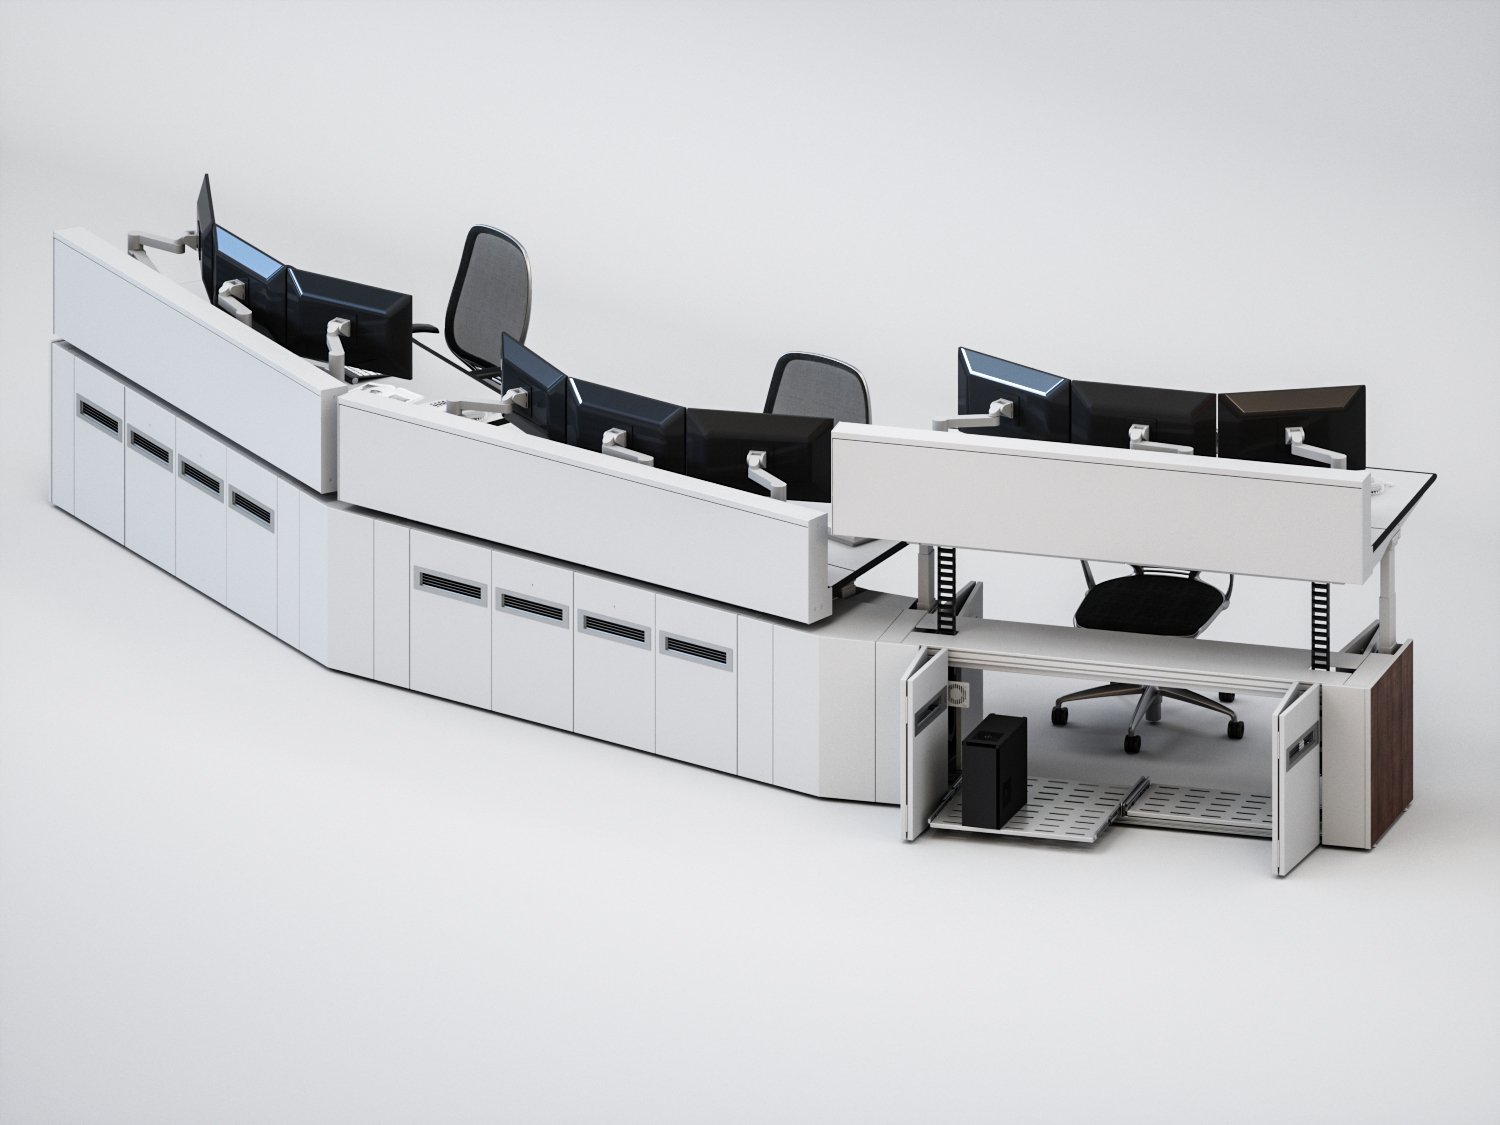
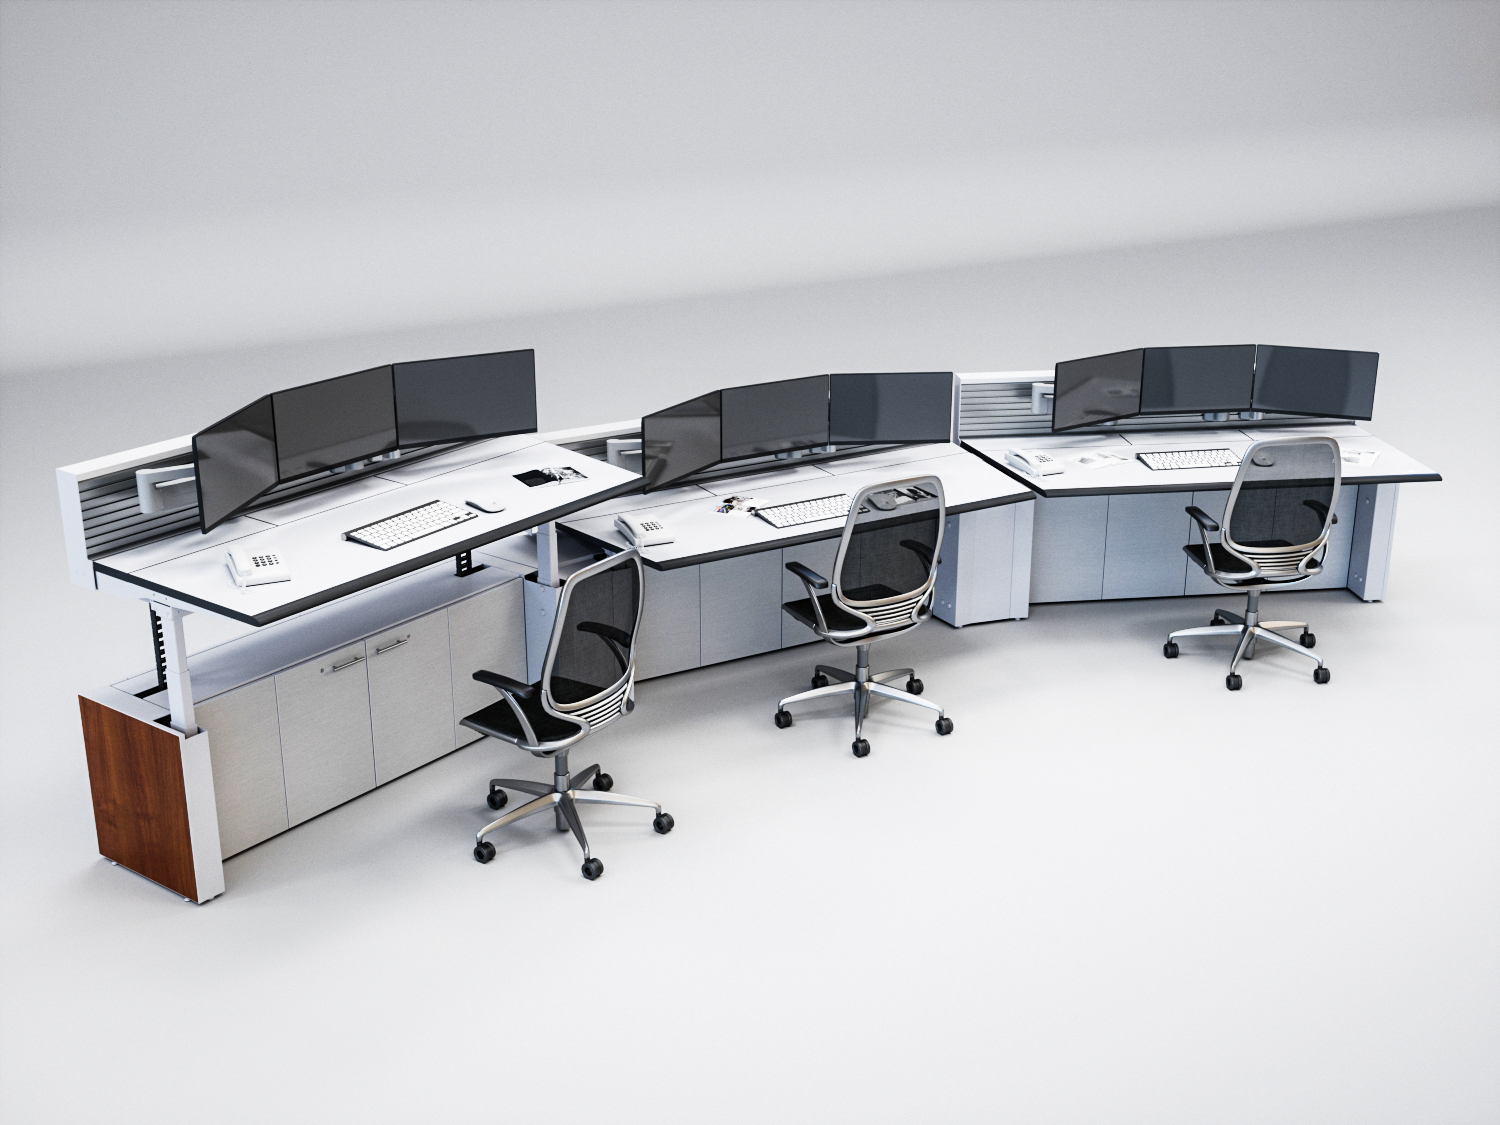
Console Freedom
Another break from the norm, here on the Console Freedom renderings. These will be used by my clients marketing department in print and web.


Did you enjoy this article? I would love to hear your thoughts, so don’t be shy and comment below! Please don’t forget to subscribe to my RSS-feed or follow my feed onTwitter, Google+ andFacebook! If you enjoyed the following article we humbly ask you to comment, and help us spread the word! Or, if you would like, drop me an email.

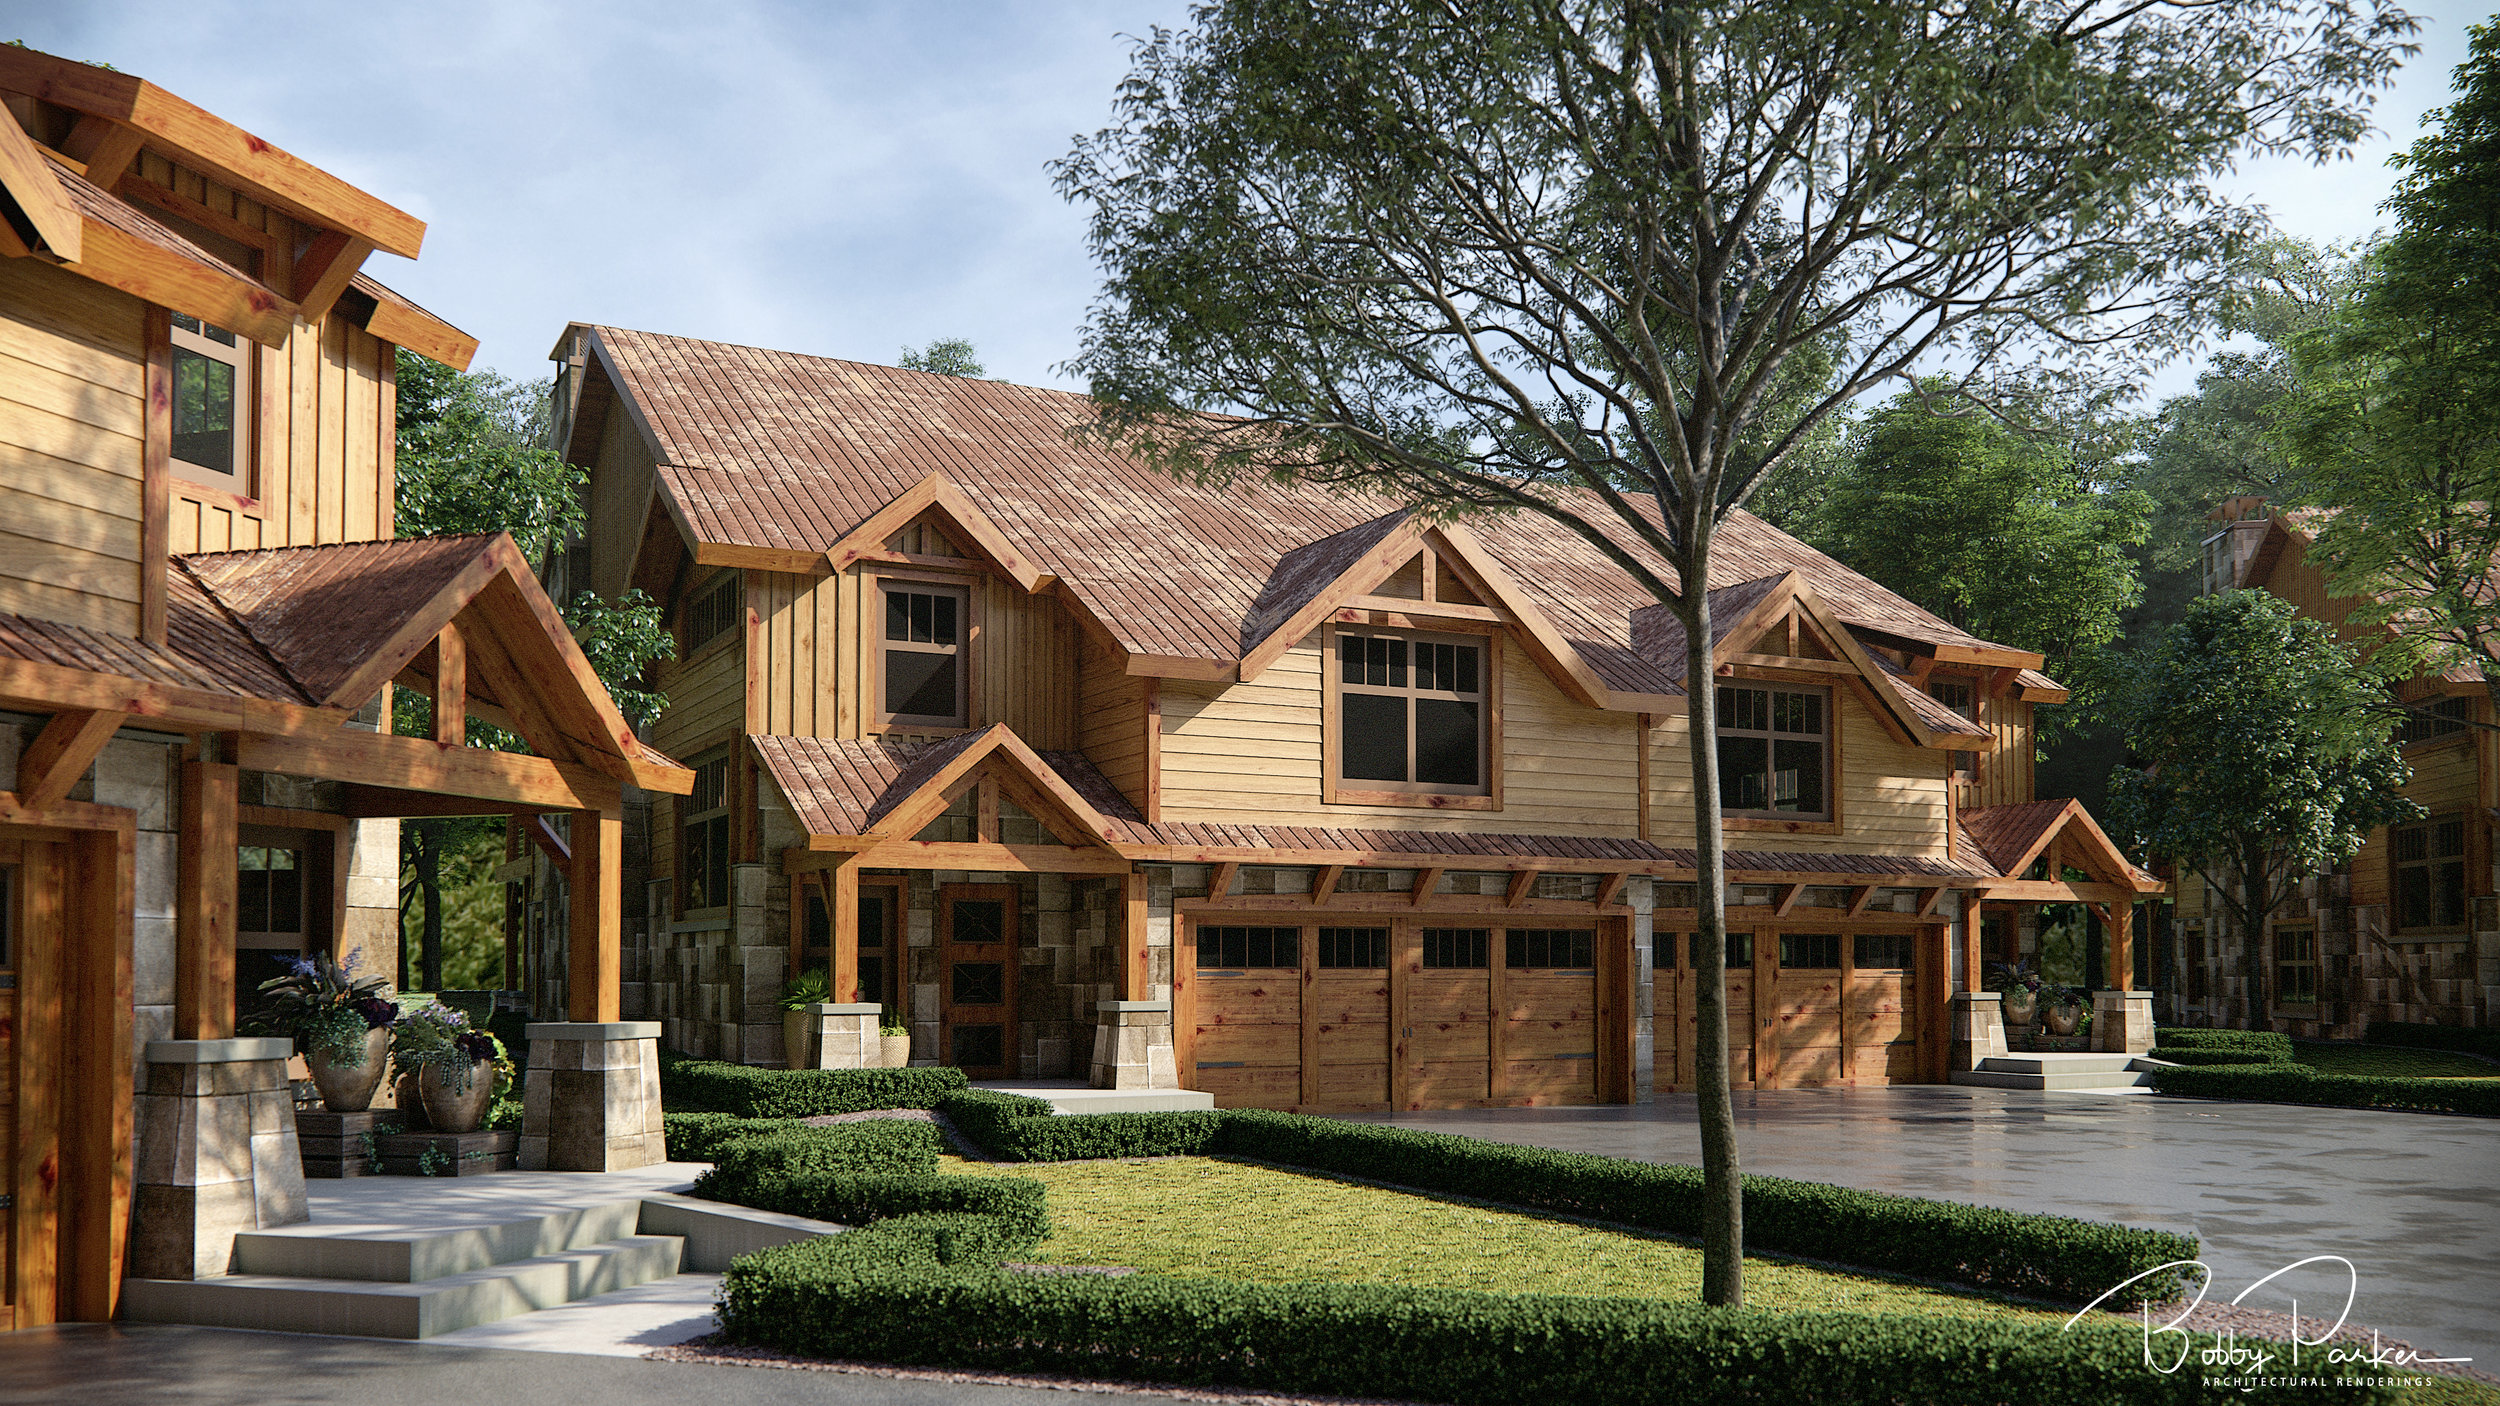
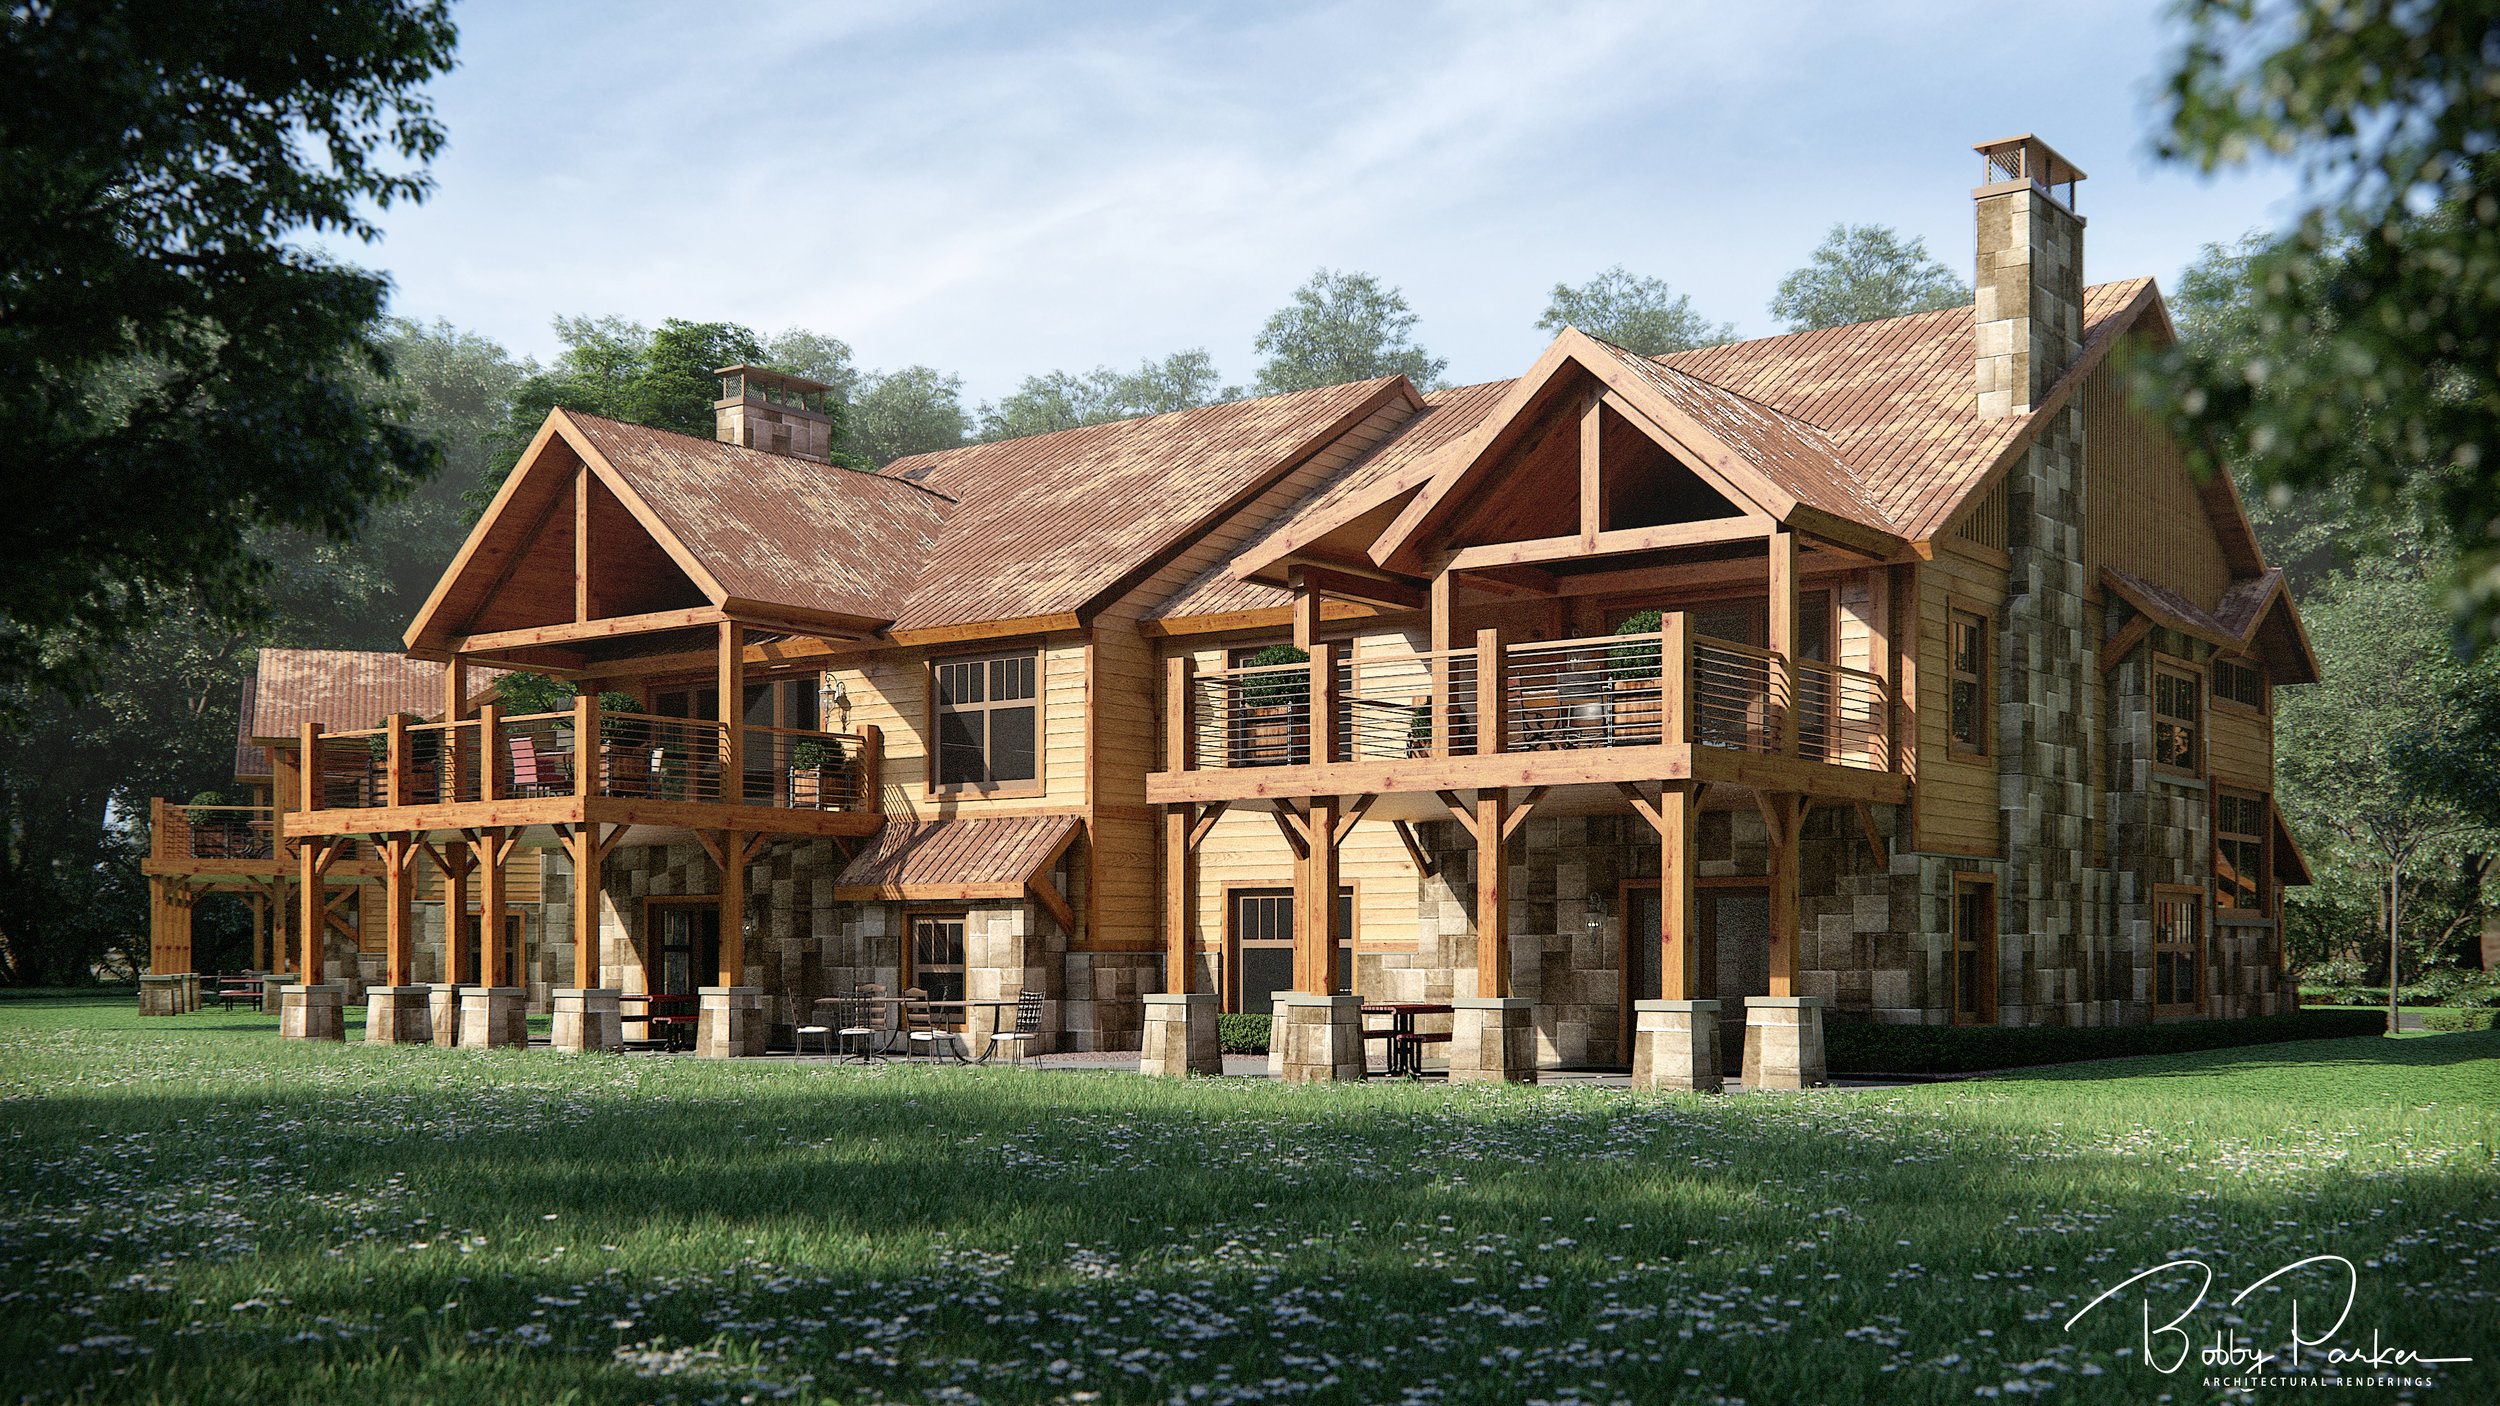
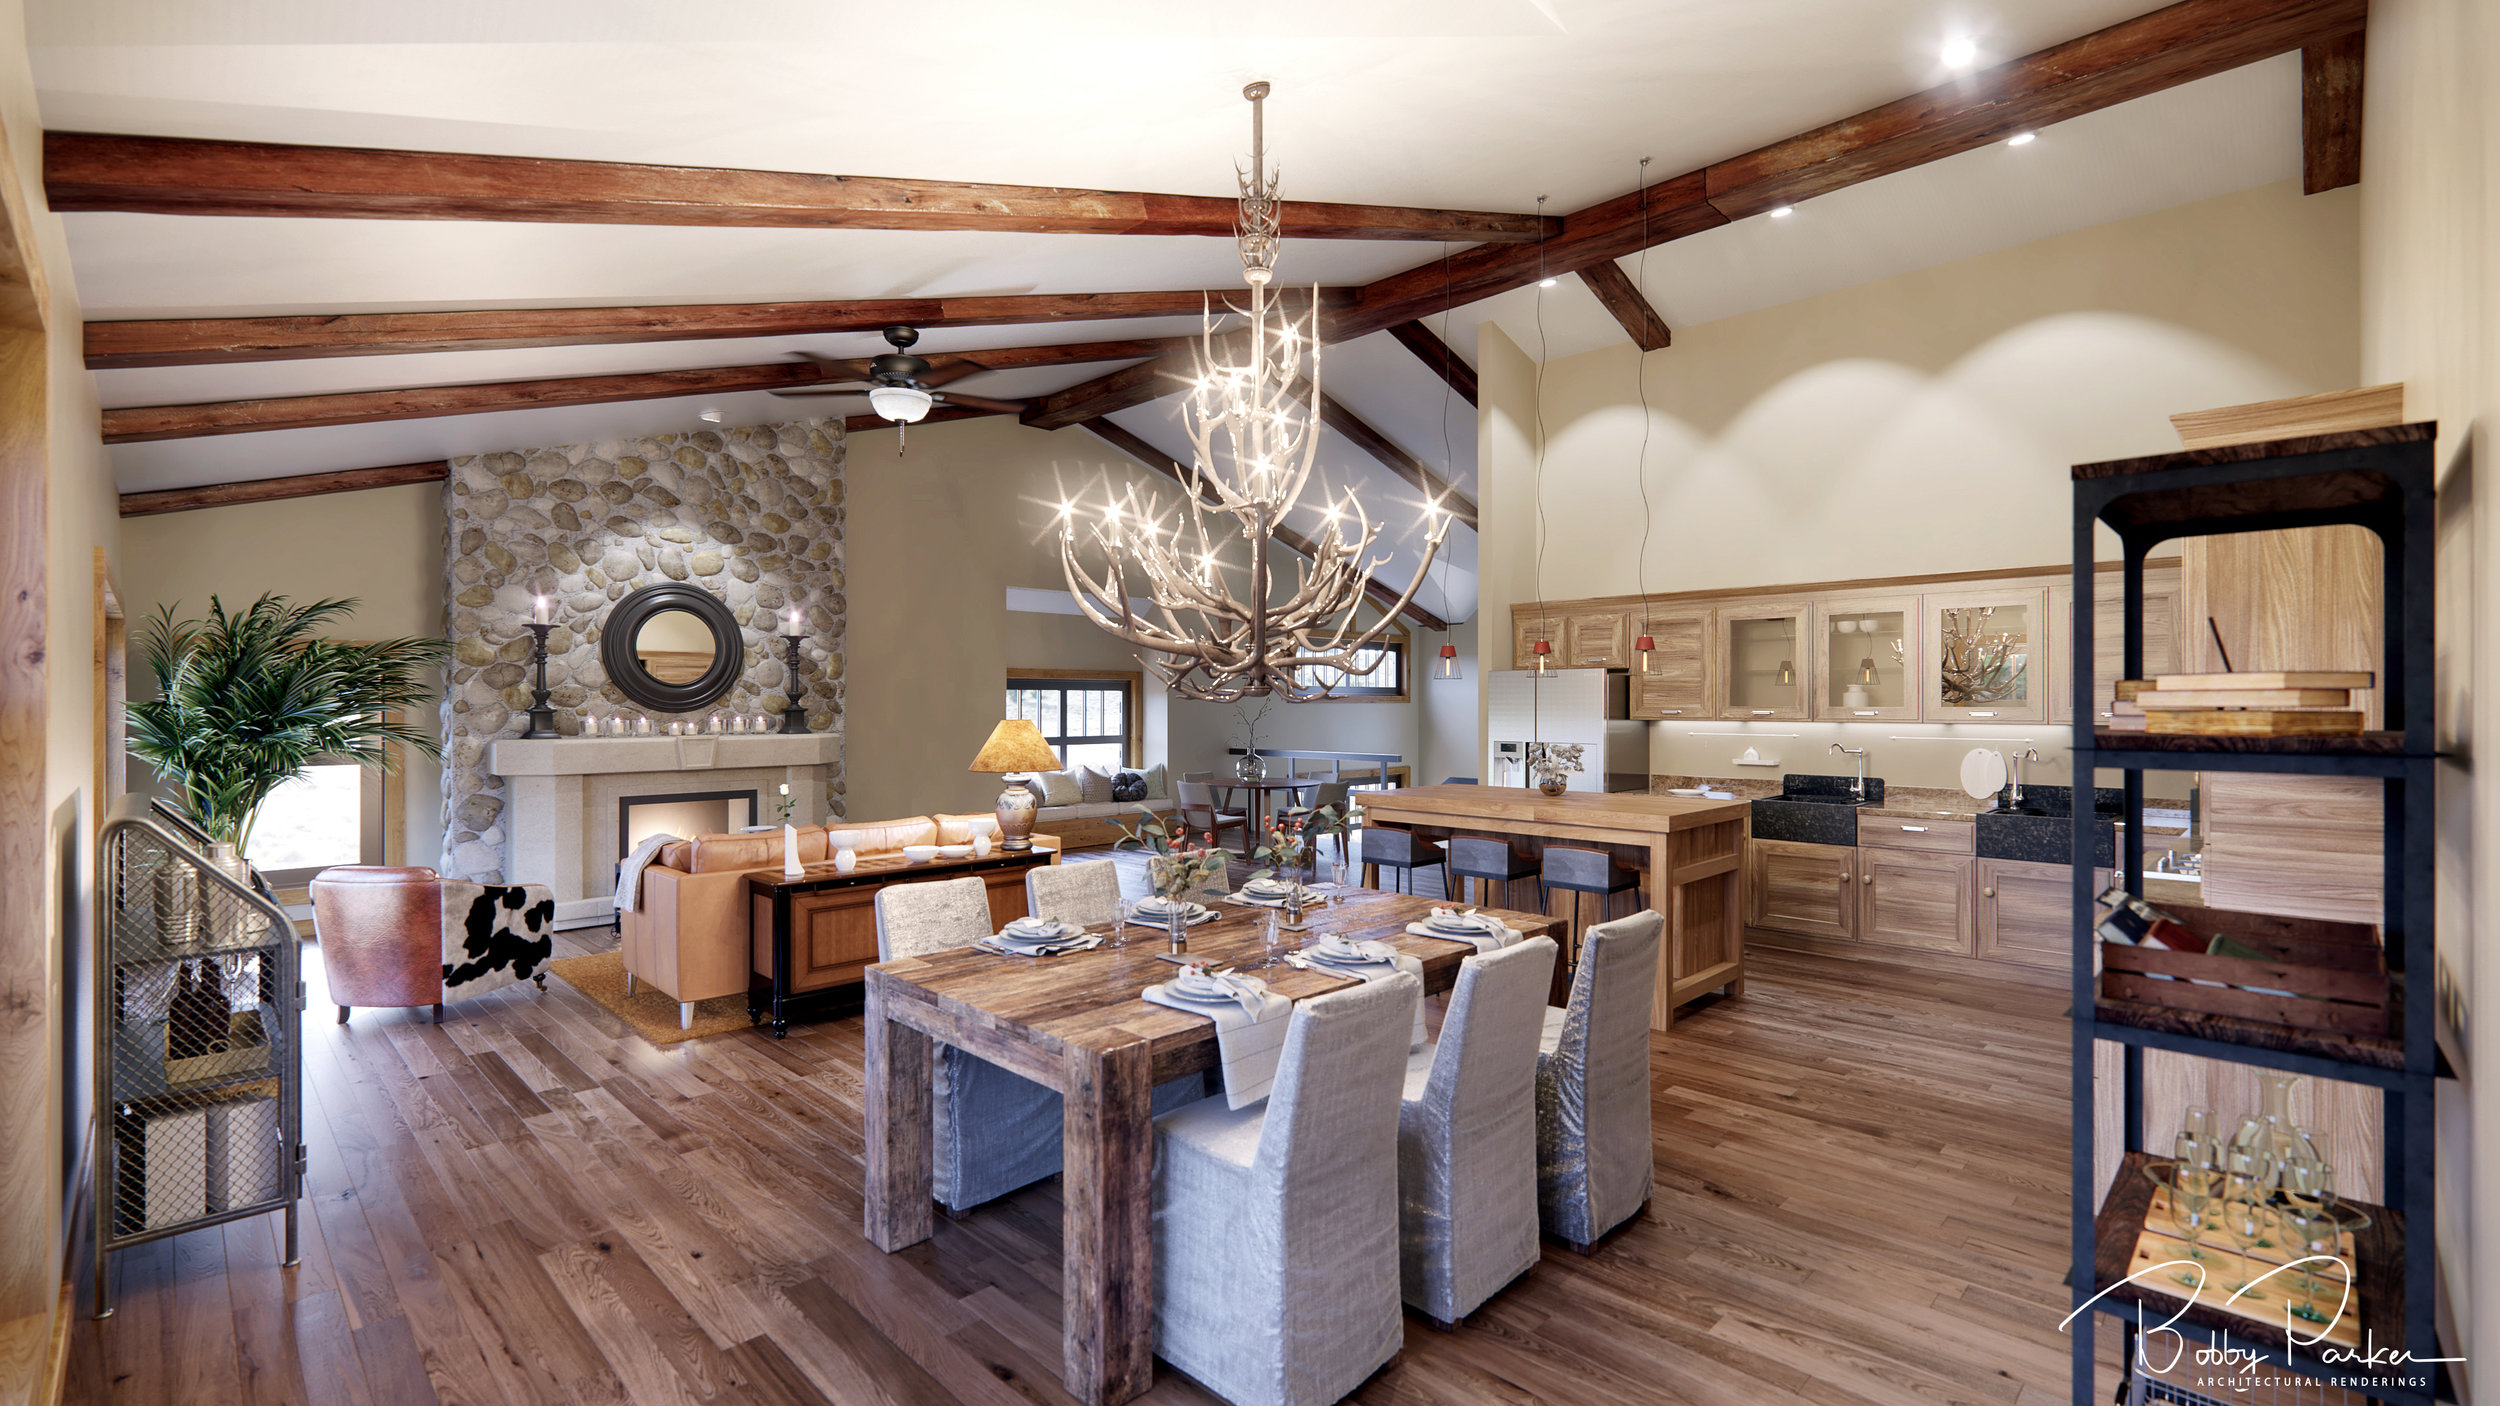
Crested Butte
Okay, to tell you the truth, it took me awhile to warm up to the name. I enjoyed both the exterior and interior of this project. The exterior homes are the same, but each with different colors made for a nice feel. The goal was to create a rustic feel, which hopefully I did. If you have any questions or comments, please let me know with a comment below.
Did you enjoy this article? I would love to hear your thoughts, so don’t be shy and comment below! Please don’t forget to subscribe to my RSS-feed or follow my feed onTwitter, Google+ andFacebook! If you enjoyed the following article we humbly ask you to comment, and help us spread the word! Or, if you would like, drop me an email.

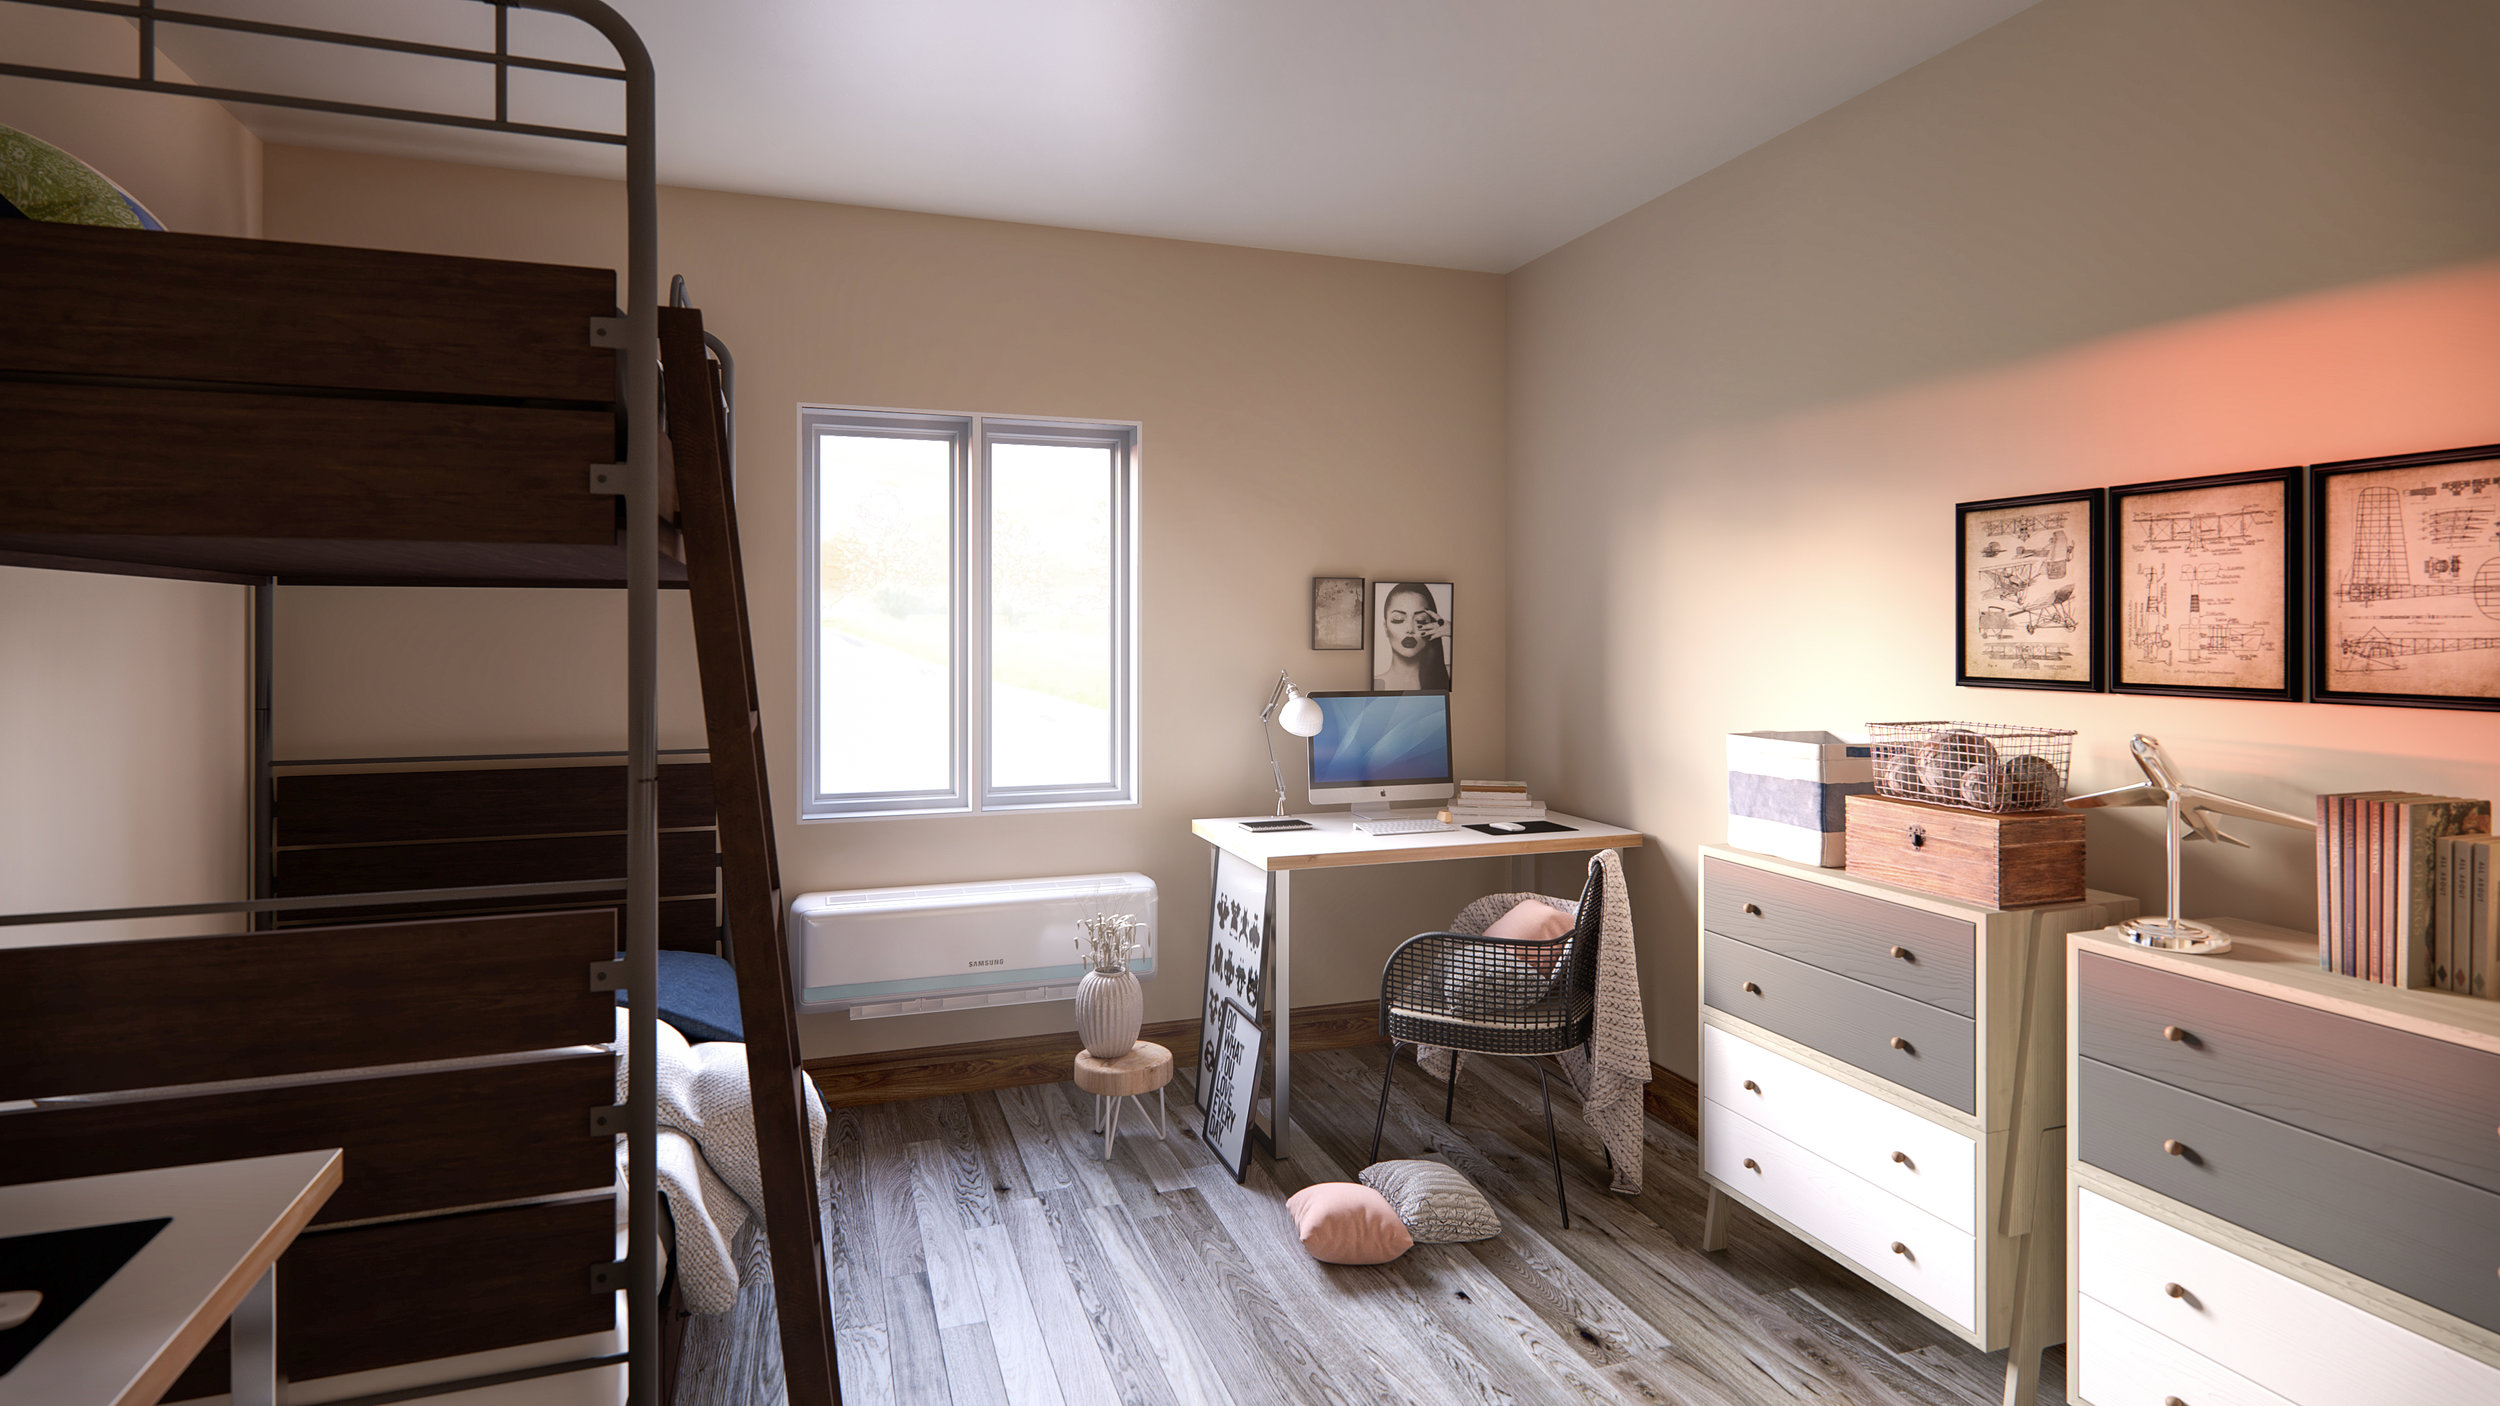
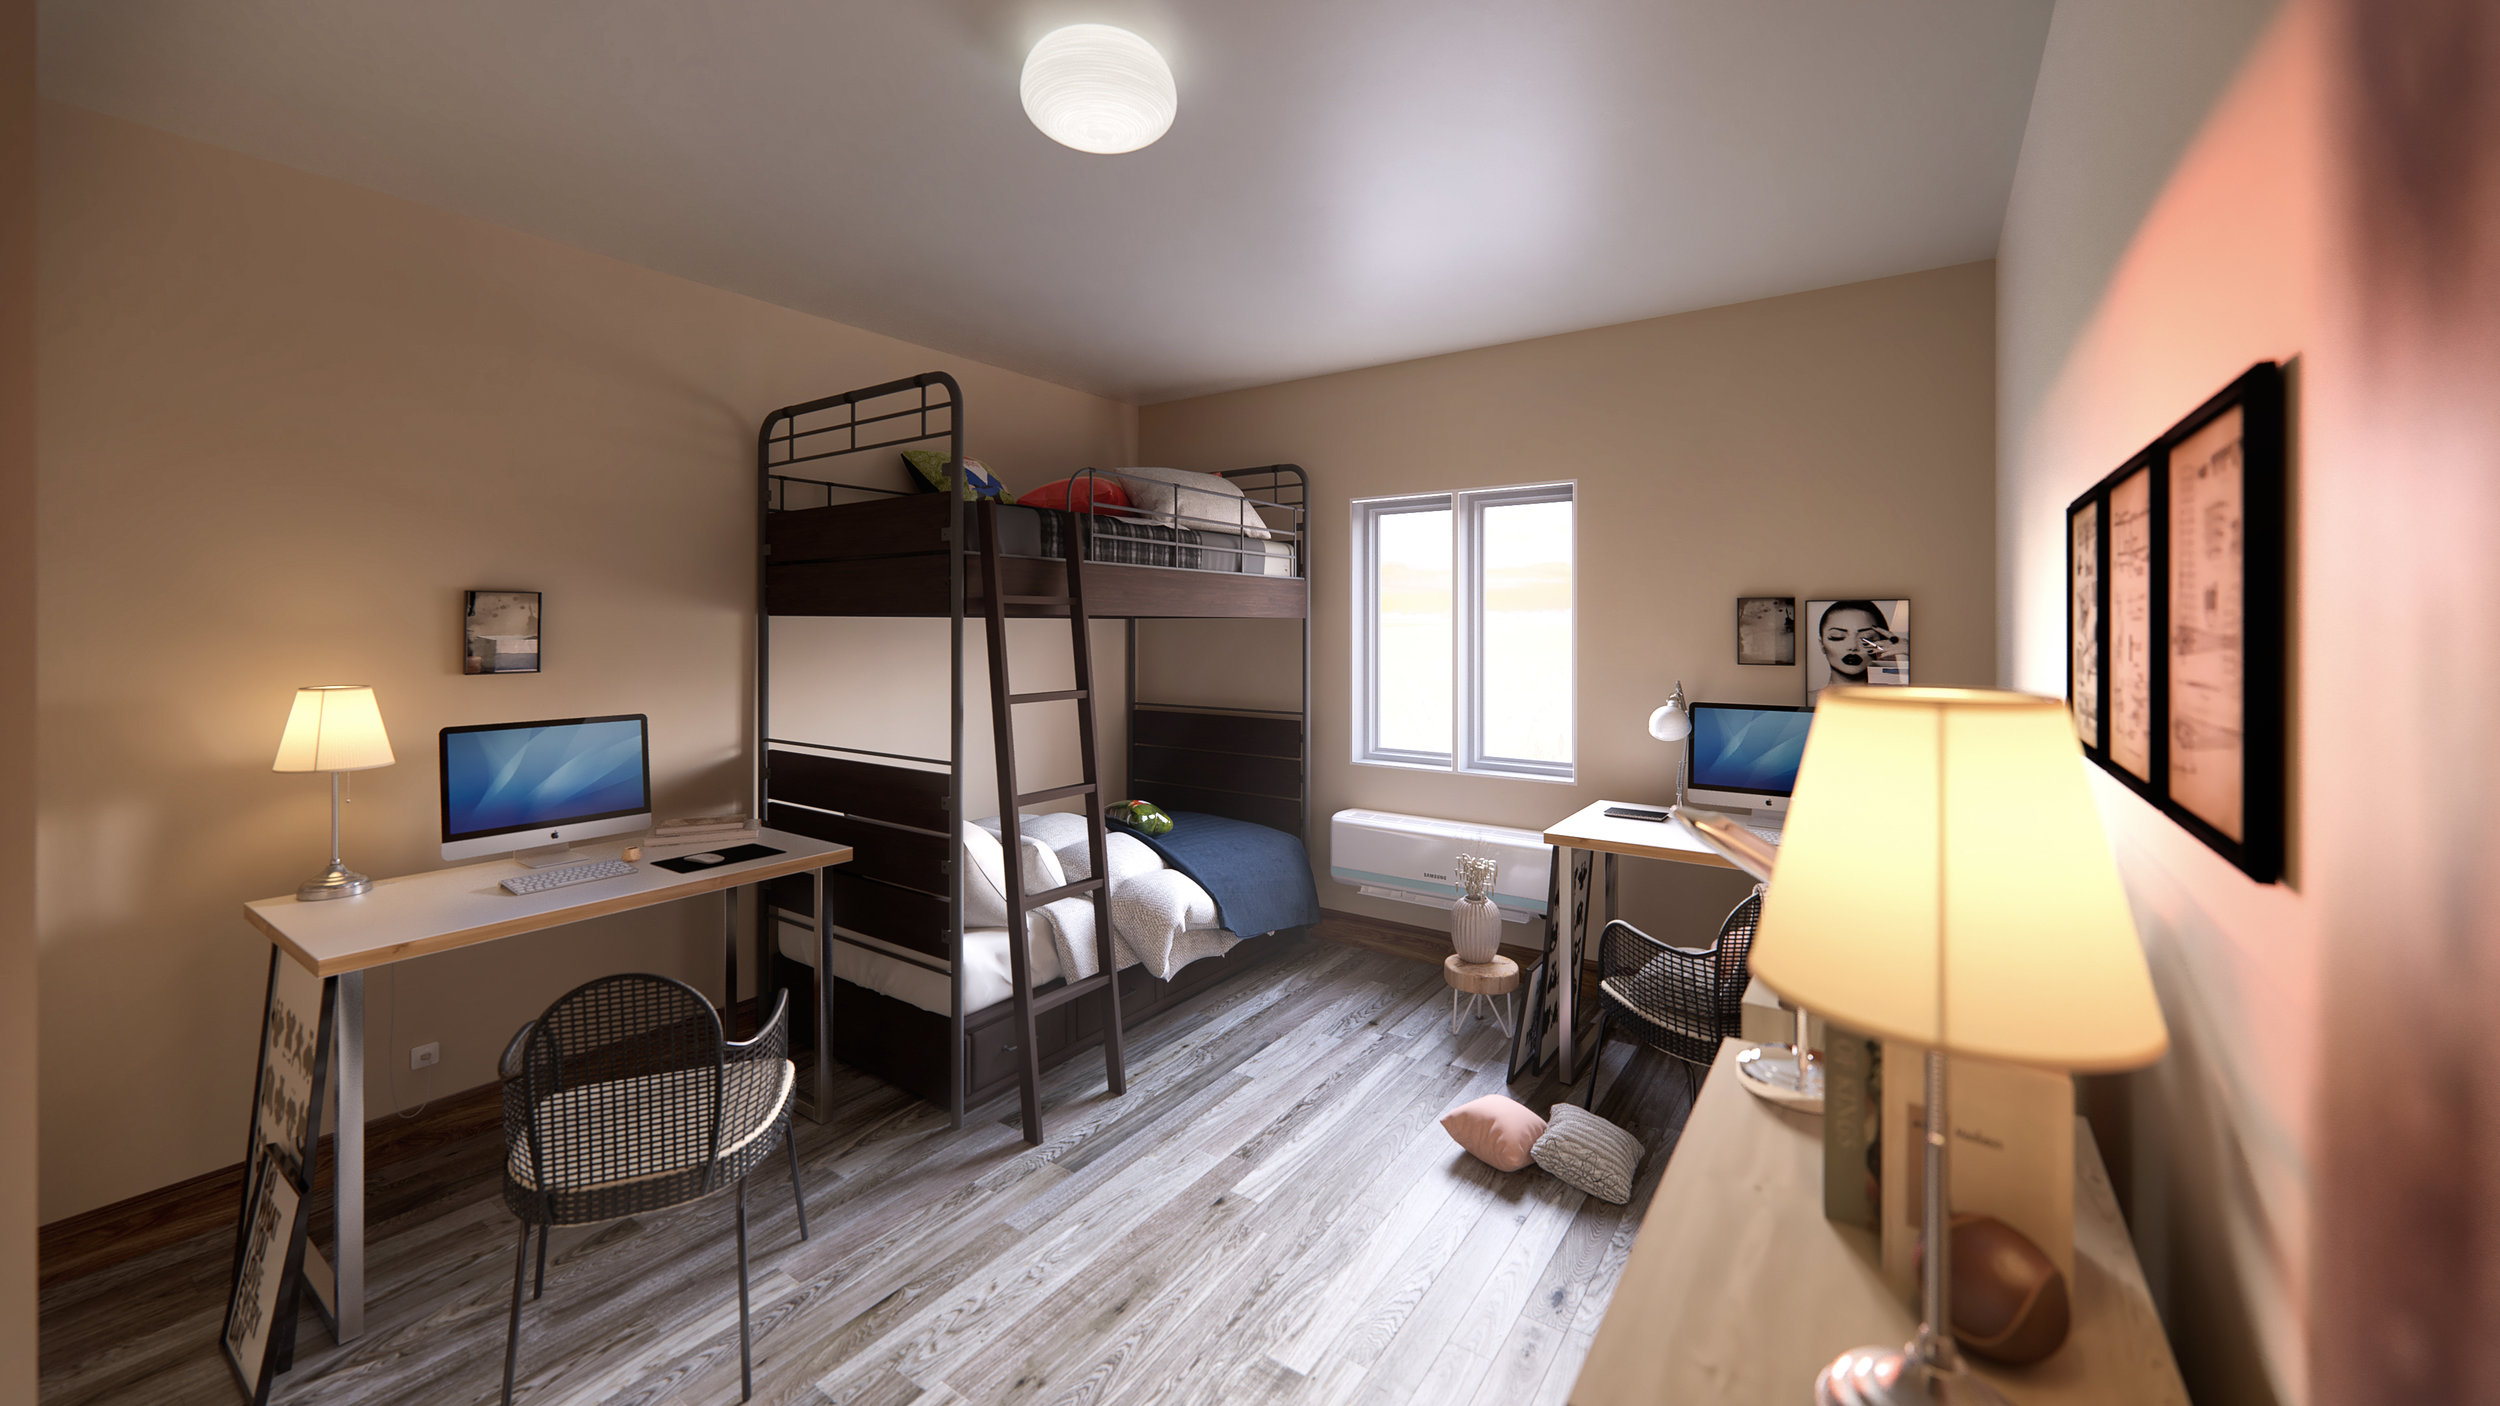
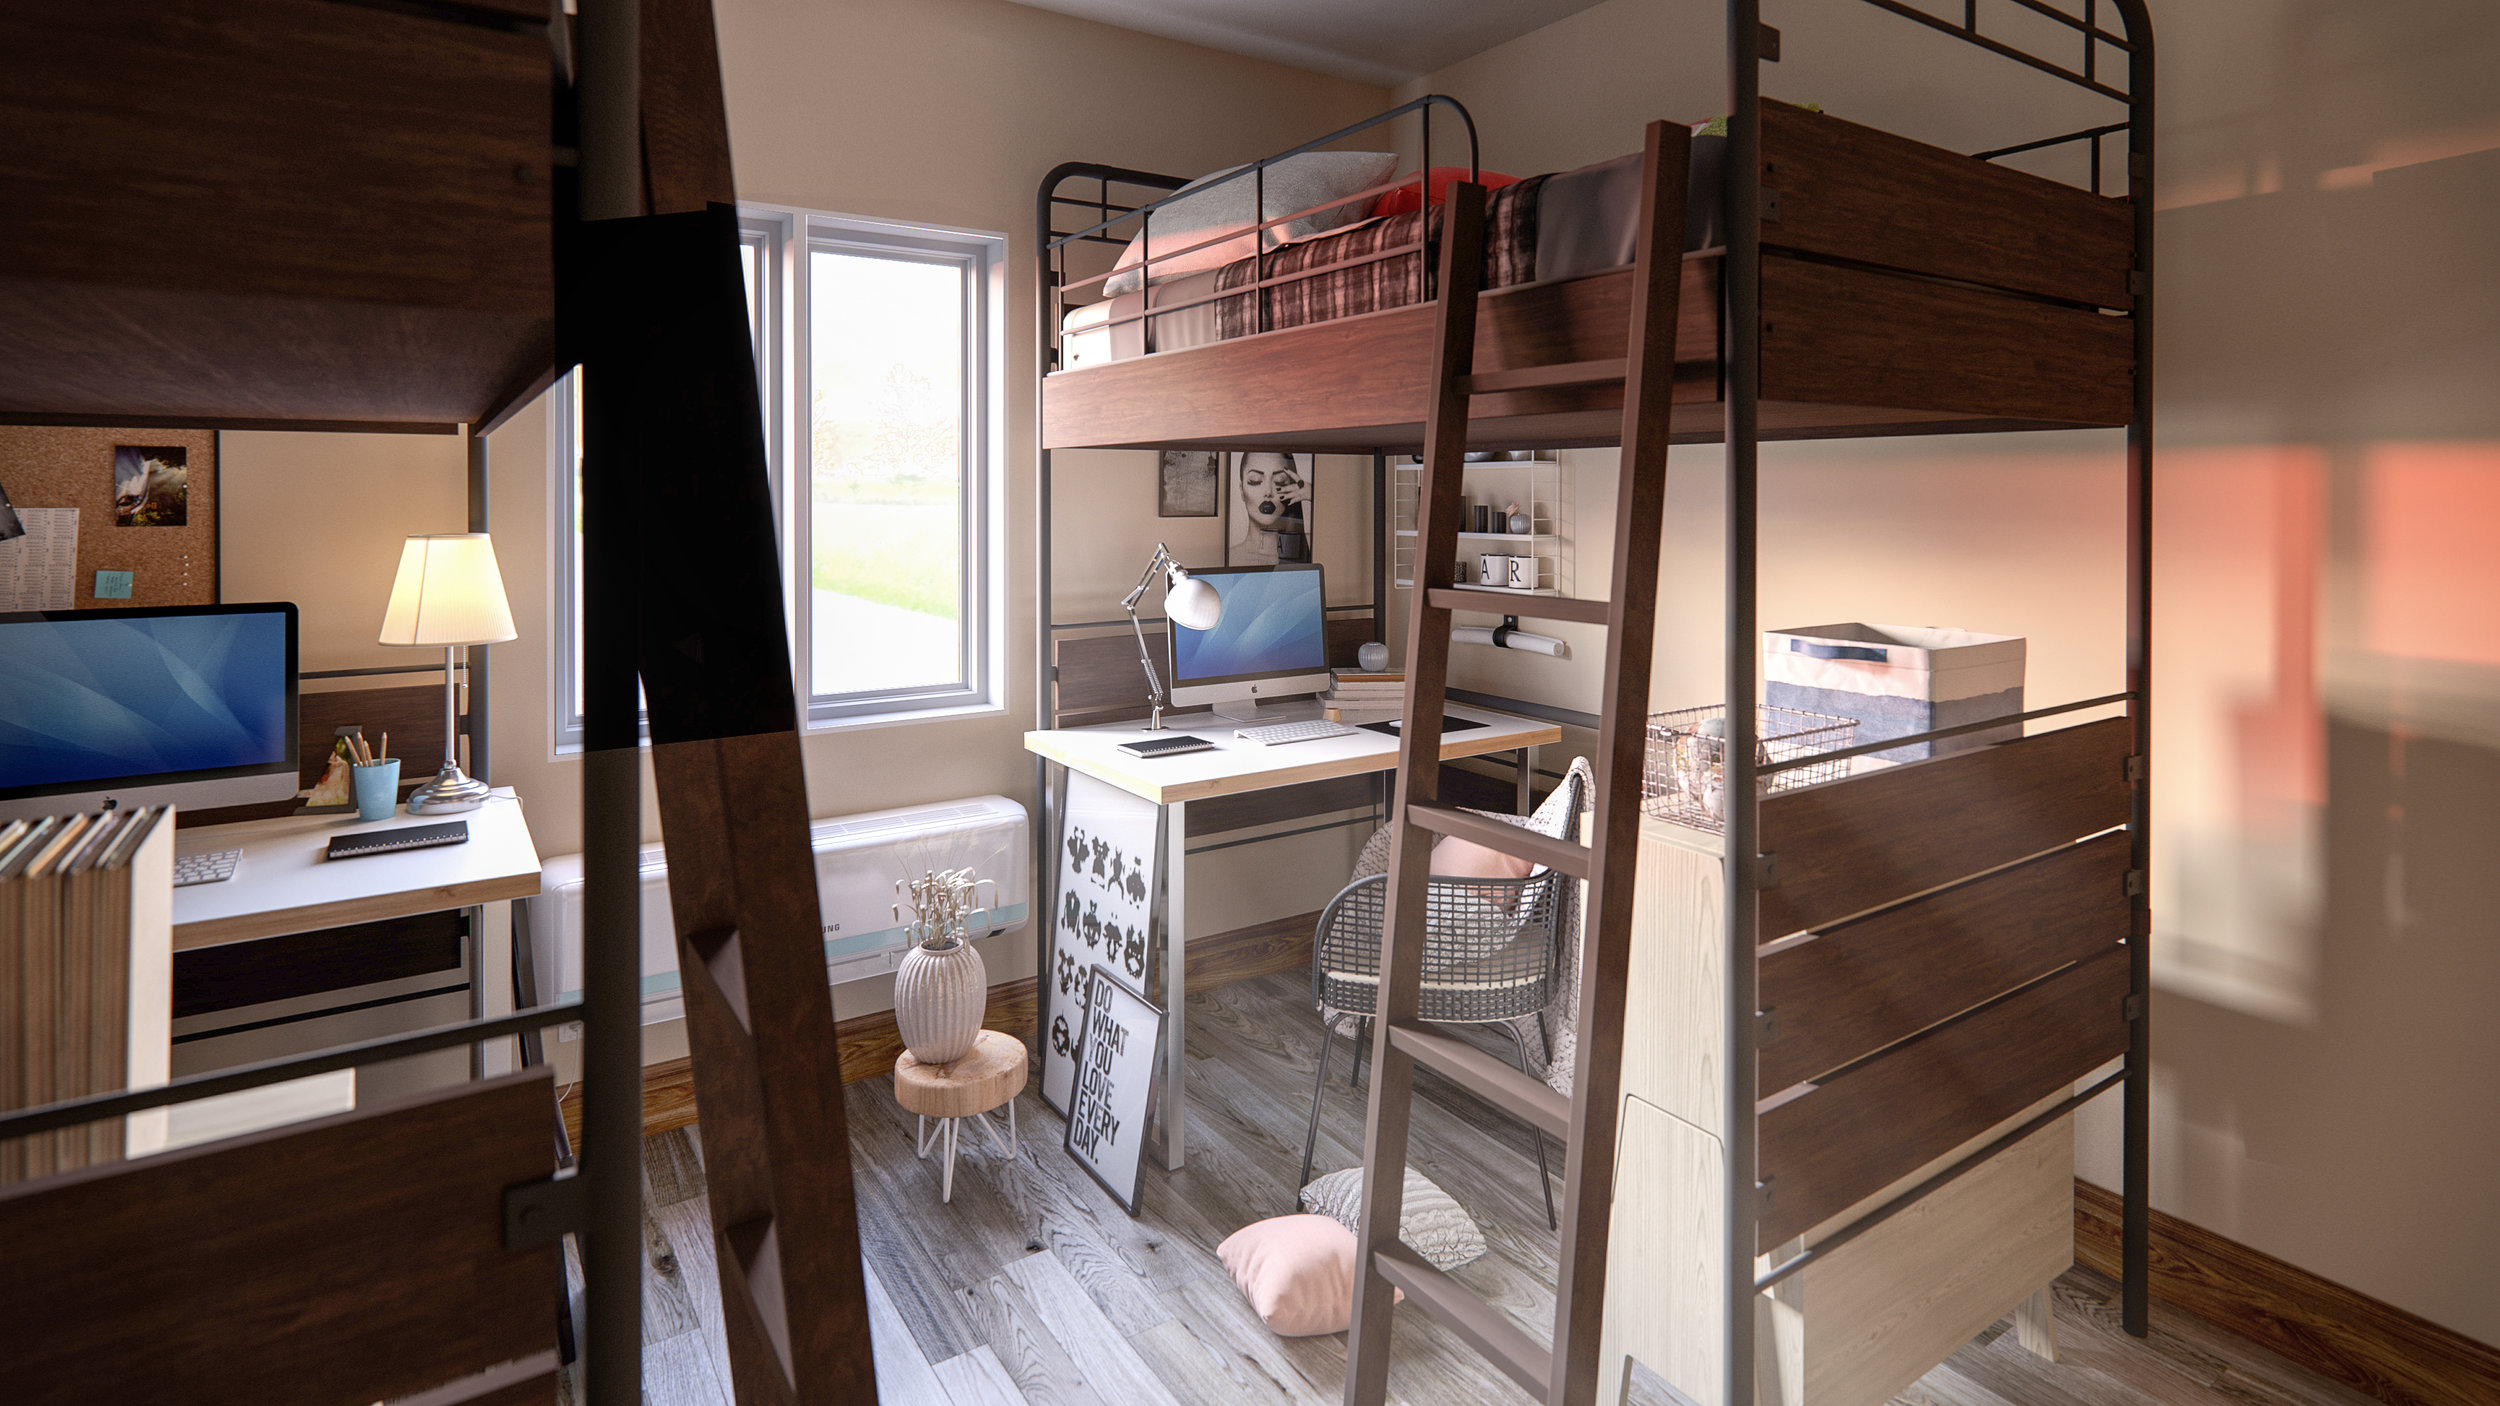
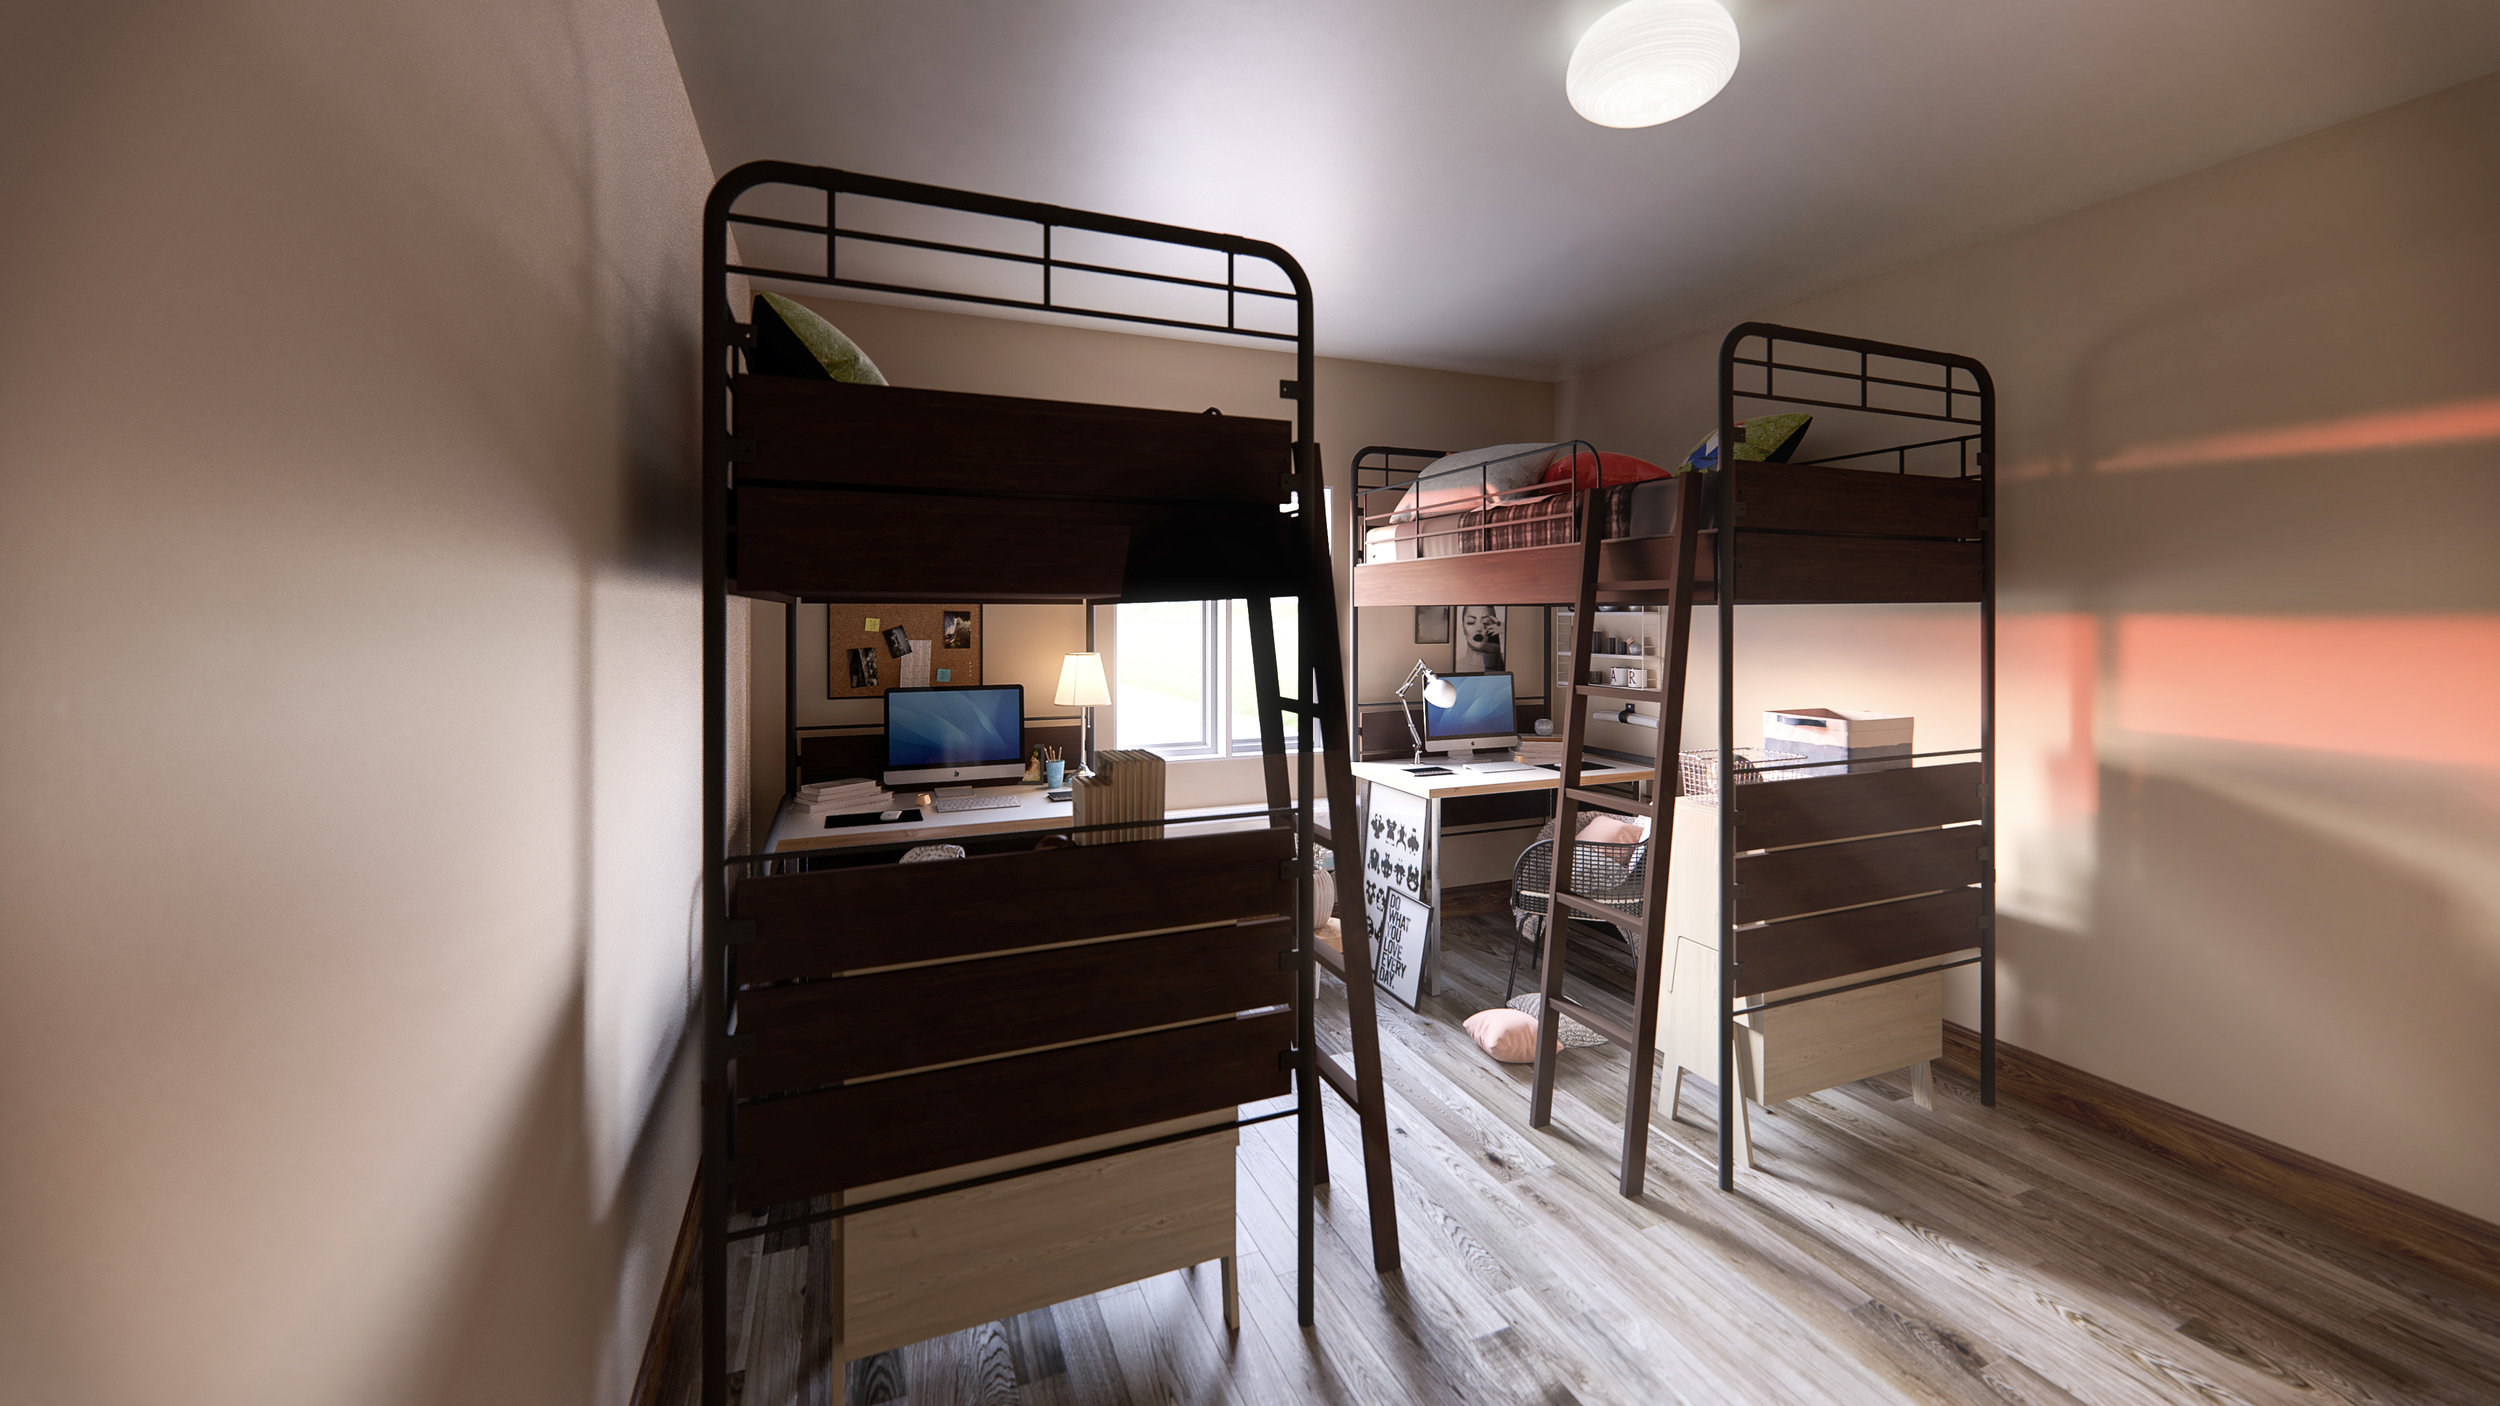
Wisconsin College Dorm Rendering
There were some challenges for this college dorm architectural rendering. A small space, with a small window and shooting towards the window; all problematic for us architectural illustrators, or architectural photographers for that matter. Although there were obstacles, hopefully all turned out good. If you have any comments or questions, please comment below.
Did you enjoy this article? I would love to hear your thoughts, so don’t be shy and comment below! Please don’t forget to subscribe to my RSS-feed or follow my feed onTwitter, Google+ andFacebook! If you enjoyed the following article we humbly ask you to comment, and help us spread the word! Or, if you would like, drop me an email.

3DS MAX Perfect Lighting
Okay, maybe not perfect, but it works for me. I use V-Ray's Sky-Dome with a V-Ray Sun to illuminate my exteriors, and interiors for that matter. Here, is a quick video showing you my workflow.
Several months ago I stumbled across this little script that saves a ton of time and it is called Find and Bind. Basically, it creates the V-Ray Sky-Dome and V-Ray Sun, places an HDRI in both the V-Ray Sky-Dome and MAX's Environment slot; it also makes the HDRI MAX's view-port background. My example HDRI was purchased at HDRI-Locations, which is where I purchase all my HDRI's. Although the HDRI's are pretty expensive, as far as HDRI's go, they are the best ones I have found.
Did you enjoy this article? I would love to hear your thoughts, so don’t be shy and comment below! Please don’t forget to subscribe to my RSS-feed or follow my feed onTwitter, Google+ andFacebook! If you enjoyed the following article we humbly ask you to comment, and help us spread the word! Or, if you would like, drop me an email.

3DS MAX Perfect Grass
If you are like me I try and try again to find the best workflow for each part of my renderings. Here, is my workflow for my grass. I am calling it 'perfect grass' because I have had many people ask how I am creating my grass, "it is perfect!".
We have come a long way! I remember when grass was one of the biggest giveaways that a rendering wasn't real. I tried everything under the sun and scattering seemed to have been the solution, except, it wasn't perfect. Before scattering it was pasting an image, which tiled badly without hours of post production work. Now, it seems like combining the old with the new is the key to the 'perfect grass',
In this video I am using PSD-Manager and Forest Pack Pro, however, you can mask using many free plugins and to get the nice grass edge, you can use Photoshop's clone with a grass brush.
Please, if you have any question, just comment on the post and I will reply as soon as I can.
Did you enjoy this article? I would love to hear your thoughts, so don’t be shy and comment below! Please don’t forget to subscribe to my RSS-feed or follow my feed onTwitter, Google+ andFacebook! If you enjoyed the following article we humbly ask you to comment, and help us spread the word! Or, if you would like, drop me an email.