

BLOG
Exceptions Can Sometimes Be The Rule
You'll rarely go wrong in choosing a renderings composition that follow the rules. However, for stepping up the creativity at times, don't get locked into the Rule of Thirds as a hard-and-fast policy. At times, it can be restrictive for those 3D scenes that just don't fit onto a Thirds settings. While the perfect spot fir the subject may be somewhere off-center, for example, it might not necessarily be in one of the power points.
In fact, there are times when a dead-center composition is dead-on. This can be a subject with strong symmetry, such as a wheel, in which the hub is in the middle while the spokes spread out in all directions. When rendering close up, work, too, as does symmetry in most of my architectural renderings. Likewise, some renderings don't even have a specific subject; rather, the entire rendering is the subject, such as a pattern or repetition scenes.

Did you enjoy this blog post? If so, then why not:
Leave Comment | Subscribe To This Blog | Email Me
I've completed the Twitter for Business course on lynda.com

Join author Anne-Marie Concepción as she shows you how to leverage the power of tweeting for business promotion and customer engagement. This course reviews the basics of tweeting for business and shares smart ways to set up an account that reflects your brand. It explains how to tweet strategically in order to engage customers and attract followers. Anne-Marie also offers suggestions for creating a richer Twitter experience, managing your feed and activity using third-party apps and utilities, and integrating Twitter with other marketing endeavors.
Topics include:
- Understanding the role of social media marketing vs. traditional marketing
- Specifying business goals for Twitter
- Choosing a strong username and creating a strong profile
- Creating a Twitter landing page
- Following the people who matter most
- Using mentions, replies, and conversations
- Finding potential clients
- Providing support to customers and prospects
- Using hashtags for events and promotions
- Sharing photos and video with Flickr and YouTube
- Automating and archiving tweets
- Integrating Twitter with your blog, Facebook, and LinkedIn
Did you enjoy this blog post? If so, then why not:
Leave Comment | Subscribe To This Blog | Email Me
Facing The Right (or Left) Way
Here's another way to expand your portfolio of successful renderings: When a person, animal, or vehicle is positioned fairly small in your rendering, make sure the subject moves into - not out of - the composition. This keeps the viewers attention directed to the main center area, rather than having the eye wander distractedly to the edge of the render and out of the picture.
Of course, as with any rule, there can be artfully stylish exceptions, and when a subject occupies a big part of the render, this guideline may not even apply. But, in general, when a subject moved or faces in one direction, leave room to breathe in front of the subject. Viewers will find this visually pleasing, as opposed to a more unsettling placement of a subject near a rendering border and facing toward that close edge of your rendering.
Your subject doesn't even need to be moving. Plus, this concept applies not only to human subjects but also to animals, cars, boats, and even statues. Other objects may have a front that "points" in a particular direction, such as when rendering a house or vehicle from the side. Likewise, a tree that leans, for instance, should tilt toward the middle of the scene.
Yes, this strategy is yet another thing to worry about when compositing a rendering. But, trust me. You'll soon get the hang of this concept of directing the movement toward the center of your rendering.
![[2008-12-24] New Zealand__MG_6872.jpg](https://images.squarespace-cdn.com/content/v1/50357984e4b09af678ed11bf/1357427231760-95TP3P4WPLJYGAJUGQ39/%5B2008-12-24%5D+New+Zealand__MG_6872.jpg)
Did you enjoy this blog post? If so, then why not:
Leave Comment | Subscribe To This Blog | Email Me

Splitting Your Composition in Half
Occasionally, splitting your composition in half is better. This typically involves water reflection, when the rendering above is just as strong as the reflection below. Giving equal weight to both halves helps capitalize on the eye-catching combination of balance and serenity.
Other times, you may want to leave out the sky entirely. Often, this is on an overcast day rendering since the overexposed brightness can overwhelm everything else in the rendering. In other situations, you may just want the visual competition of the blue sky, concentrating on a non-sky landscape or cityscape rendering or a more intimate view.
And at times, you may not need a sky at all. A bright/white sky can detract from the rest of the rendering. Or, on a sunny day, the contrasting blue could draw the eye away from the other colors in your rendering. In those situations, no sky at all may be the best strategy.

Did you enjoy this blog post? If so, then why not:
Leave Comment | Subscribe To This Blog | Email Me
The Sky: How much or How Little
I often see newbies split exterior architectural renderings into equal halves, with the horizontal line or maybe a distant shoreline extending right across the middle of the render. The viewer, then, is left to decide which half of the architectural renderings is most beneficial, But that's for you - the architectural illustrator - to decide when composing your rendering! Keep this in mind as you compose, instead of cutting the composition in half. This will force you to decide: Which is more important, the land or the sky? Or the water?
An architectural rendering's visual weight (the most appealing things in the rendering) should determine where you place the horizon. With the Rule of Thirds, you can place the horizon line on the lower third diving line or the upper third. And you can adapt the Thirds principle as necessary. If things are exceptionally dull overhead or down below, even a third of the frame devoted to that space could be too much. So you can be more extreme and place the line extremely low or high - say, a thin trip of the sky or landscape.

Rule of Thirds
Did you enjoy this blog post? If so, then why not:
Leave Comment | Subscribe To This Blog | Email Me
The Fine Art of Tilting the Camera
This shooting style - tilting the camera to turn a vertical or horizontal line into a powerful diagonal - has been around for awhile. One term used for it is the "Dutch angle", which is a longtime cinematography; to create visual tension. Still, when I tell clients that it's perfectly acceptable, if not totally desirable, to occasionally slant the camera, they express surprise. After all, your're supposed to keep the camera level at all times, correct? Well, there are exceptions! Used at the right artistic time, a nice tip of the camera can pump up the visual tension by creating exceptional angles and diagonals. Rendering with your camera askew (so as to change naturally appearing vertical or horizontal lines into diagonals) can be done for a variety of small scenes or ambitious views. Like other creative techniques, you won't want to use this method all the time, but when the subject calls for it, angling the camera is one worthy artist weapon.
Did you enjoy this blog post? If so, then why not:
Leave Comment | Subscribe To This Blog | Email Me
The WOW Factor: Point Of View
Too many architectural illustrators are locked into a standard view: pointing the virtual camera straight ahead from a standing height. An eye-level perspective is so easy to fall back on. Sure, the eye-level perspective ultimately may be the best viewpoint, but you honestly won't know unless you explore the scene for other, potentially better, viewpoints. Playing with point of view is a surefire way to put pizzazz in your architectural rendering. Go ahead. You have my permission to unleash your creative side. Whenever and wherever you can, seek out this attention grabbing camera views that most architectural illustrators fail to see. Architectural illustrations are about discovering the best camera angle to capture your building or space. It's about choosing a lower or higher viewpoint - a perspective that most architectural illustrators just don't see.

Did you enjoy this blog post? If so, then why not:
Leave Comment | Subscribe To This Blog | Email Me

Custom Luxury Kitchen
Here is a kitchen render that I have worked hard on, and I am kind of proud of.
Did you enjoy this blog post? If so, then why not:
Leave Comment | Subscribe To This Blog | Email Me
How to Become a Professional Artist – Advice from the Pros
Ever Wondered How to Become a Professional Artist?
Pencil Kings recently spoke with Art Directors, Animation Supervisors, Layout Designers, etc. from the most notable studios in the world. Pixar, Walt Disney, Sony Imageworks and Blue Sky Studios were all represented and some of their top artists provide insight and share their story on what it took to reach the top of their profession.
This is a “must watch” video for anyone who wishes to someday reach the top of their craft. These artists generously share tips from their own personal experience about how to become a professional artist that you will not find anywhere else.

Did you enjoy this blog post? If so, then why not:
Leave Comment | Subscribe To This Blog | Email Me
Expositor is a Handy slide-Rule Based Exposure Calculator
Expositor is a handy slide-rule based exposure calculator for photography. Pick the scene you're shooting, then slide the roller until your camera's ISO is lined up beside it, and every combination of F-Stop and shutter speed on the right will get you close to a perfect exposure.
For a more creative example, let's calculate shooting sports on an overcast day with a shallow depth of field (F4) to isolate the subject, and a fast shutter speed (1/500s) to stop motion. Match the F-stop and speed, then check the ISO value next to 'Heavy overcast day' to see how sensitive your camera needs to be. In this case, it's ISO 200!
Use Expositor in the field if you don't have a light meter handy, or use it to train your brain to be its own exposure calculator. Expositor is here to help you shoot great pictures!
More instructions and detailed usage examples can be found at http://expositor.wunderkemmer.com/Instructions.html.

Did you enjoy this blog post? If so, then why not:
Leave Comment | Subscribe To This Blog | Email Me

EVERMOTION Cover "White Kitchen"
The 'White Kitchen" made the EVERMOTION Cover.
EVERMOTION Cover
Did you enjoy this blog post? If so, then why not:
Leave Comment | Subscribe To This Blog | Email Me
Creative Leaders

John Maeda, President of the Rhode Island School of Design, delivers a funny and charming talk that spans a lifetime of work in art, design and technology, concluding with a picture of creative leadership in the future. Watch for demos of Maeda’s earliest work -- and even a computer made of people.
John Maeda is the president of the Rhode Island School of Design, where he is dedicated to linking design and technology. Through the software tools, web pages and books he creates, he spreads his philosophy of elegant simplicity.
Did you enjoy this blog post? If so, then why not:
Leave Comment | Subscribe To This Blog | Email Me
Overcast Front Light
Of all the different lighting conditions that I can use, overcast front lighting is the one that I consider being the safest. This is because overcast front light illuminates most everything evenly. Overcasting front light is good for white balancing since overall illumination is balanced. The softness of this light results in more natural-looking renderings and it also eliminates the contrast problems that a sunny day creates.
Some of my clients have a preconceived notion of how a color should look. Holding the color swatch up to the print will usually not produce the expected result; "the colors don't match!", is a typical response I get. I can go into color theory, monitor calibration, gamma, but it's typically received with the deer in the headlight gaze. Instead of pulling out the before and after images as to proof, I am usually spot-on, I chose to go with a nice, and very safe, overcast lighting setup.
As for me, I prefer the high contrast, and more dramatic scenes. I understand basic color theory and how light and color react to each other. The work that I am most proud of, and has been recognized by my peers, has not been by playing it safe. I can guarantee that the color swatch will change colors with every light source you view it under. That color, on that color swatch, will not look that way on your building.
So, if you want to play it safe, I can recommend Peter Guthrie's 0902 Overcast HDRI.

Overcast HDRI by Peter Guthrie
Did you enjoy this blog post? If so, then why not:
Leave Comment | Subscribe To This Blog | Email Me
The Human Shape
The human shape is perhaps the most unmistakable shape in all the world. As a result, when you include its shape in any rendering, an obvious sense of scope and scale result. This happens regardless of whether that rendering is a nature scene, or something urban or industrial.
One of my favorite resources for people cutouts is, by far, VizPeople. I have many of their libraries and they have created a great video on how to composite people in your rendering.

Did you enjoy this blog post? If so, then why not:
Leave Comment | Subscribe To This Blog | Email Me
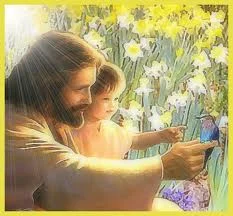
Sandy Hook Elementary School Poem
“Twas’ 11 days before Christmas, around 9:38
when 20 beautiful children stormed through heaven’s gate.
their smiles were contagious, their laughter filled the air.
they could hardly believe all the beauty they saw there.
they were filled with such joy, they didn’t know what to say.
they remembered nothing of what had happened earlier that day.
”where are we?” asked a little girl, as quiet as a mouse.
”this is heaven.” declared a small boy. “we’re spending Christmas at
God’s house.”
when what to their wondering eyes did appear,
but Jesus, their savior, the children gathered near.
He looked at them and smiled, and they smiled just the same.
then He opened His arms and He called them by name.
and in that moment was joy, that only heaven can bring
those children all flew into the arms of their King
and as they lingered in the warmth of His embrace,
one small girl turned and looked at Jesus’ face.
and as if He could read all the questions she had
He gently whispered to her, “I’ll take care of mom and dad.”
then He looked down on earth, the world far below
He saw all of the hurt, the sorrow, and woe
then He closed His eyes and He outstretched His hand,
”Let My power and presence re-enter this land!”
”may this country be delivered from the hands of fools”
”I’m taking back my nation. I’m taking back my schools!”
then He and the children stood up without a sound.
”come now my children, let me show you around.”
excitement filled the space, some skipped and some ran.
all displaying enthusiasm that only a small child can.
and i heard Him proclaim as He walked out of sight,
”in the midst of this darkness, I AM STILL THE LIGHT.””
Did you enjoy this blog post? If so, then why not:
Leave Comment | Subscribe To This Blog | Email Me

CGRAMP Image of the Week
CGRAMP has announced Image of the Week
CGRAMP Image Of the Week, 12/16/2012

You can view the announcement here
Did you enjoy this blog post? If so, then why not:
Leave Comment | Subscribe To This Blog | Email Me
Correcting Keystoning
Keystoning is the term used to describe the "Leaning Tower of Pisa" effect of converging lines in architectural renderings. it's a very common result when rendering with a wide-angle lens. Photoshop can oftentimes straighten those buildings for you, correcting this perspective problem in a matter of seconds
Open your rendering in Photoshop, select the Crop tool from the toolbox, and drag the cursor from the top left corner to the bottom right corner and release. You will see the "marching ants" around your entire rendering. Go to the lower menu bar at the top of the screen and check the small box next to Perspective. Now, using the cursor, drag the top left corner of the marching ant border into the rendering so that the border is parallel to the tilting structure in the rendering. Do the same thing on the right side of the rendering. Then, double click in the rendering just to the right or left of the small center circle that appears on the rendering. Photoshop adjusts the image so that any tilting lines appear truly vertical, as they do when the human eye views the actual scene.

Did you enjoy this blog post? If so, then why not:
Leave Comment | Subscribe To This Blog | Email Me
Filters in Photoshop CS
Photoshop has made it easy to get those warm colors I love. Adobe added a whole set of adjustments that resemble the filters you'd use on your lenses. And, the best part is that they are available as adjustment layers, so you can apply them to your image and then mask out areas you don't want to be effected by the filter.
So, want to add warmth to an image you rendered? On your Photoshop menu bar, click image, then adjustment, and then Photo Filters. You'll get a choice of eighteen filters to use on your image, including several that warm things up. You can vary the intensity of these filters; and if you use Adjustment Layers to add the filter effect, you can apply those filter effects to selected parts of your image by using layer masks. To do this, select any of a number of tools from the toolbox, and using the mouse, select an area where you would like to apply filter effects. The area will be indicated by a dotted line. Then choose Layer on the pull down menu bar, then New Adjustment Layer, and then Photo Filter. Once the filter list comes up, you can choose your filter for that selected area.

Did you enjoy this blog post? If so, then why not:
Leave Comment | Subscribe To This Blog | Email Me