Rendering Fundamentals with Rhino and V-Ray with Dave Schultze
Before you can showcase your 3D designs, you need renders of your work that really pop. Learn how to render with Rhino and V-Ray in this course, which includes three fun sample projects: a penguin with glasses, a retro TV frame, and a funky birdhouse. First, author Dave Schultze shows how to install V-Ray and demystifies 3D concepts such as global illumination and raytrace rendering. He demonstrates techniques for rendering quickly with both Rhino's built-in rendering and V-Ray, and explains how to customize materials, enhance them with texture mapping, and add realistic surface textures using bump and displacement maps. Along the way, Dave shares insider tips and tricks on rendering, while showing how to get the right lighting for your scene, use color correction tools, and render with the V-Ray frame buffer.
Topics include:
- Why use V-Ray?
- Installing DR Spawner
- Understanding 3D terminology
- Activating V-Ray
- Adjusting quality settings
- Get quick previews with the material override
- Understanding lighting types
- Exploring materials in the Material Editor
- Creating your own materials
- Texture mapping materials with bitmaps and procedurals
- Saving time with V-Ray presets
- Getting the right size for your render with output settings
- Working with environment lighting
- Strategies for working with cameras and camera settings
- Ensuring accurate color for your scene with color correction
- Rendering tips and tricks
Did you enjoy this article? I would love to hear your thoughts, so don’t be shy and comment below! Please don’t forget to subscribe to my RSS-feed or follow my feed on Twitter, Google+ and Facebook! If you enjoyed the following article we humbly ask you to comment, and help us spread the word! Or, if you would like, drop me an email.
Breaking Out of a Rut with Stefan Mumaw
Ever feel like you're in a rut? Most people in creative fields have experienced a rut, whether it manifests as a lack of ideas, follow-through, or enthusiasm. Sometimes it's just boredom that comes with routine. Stefan Mumaw designed this course to help you identify the type of rut you're in and its cause, and then break out of it with a series of short-, mid-, and long-term creative nudges. From techniques to get you thinking alternatively to life-changing educational opportunities, the course serves to bust every level of creative rut with actionable ideas and encouragement that's designed to get you back on the path to creative success.
The course is more resource than classroom, designed to be something you can return to each and every time you feel stuck on a project or stalled in your career. Come back anytime you need help taking a creative leap forward.
Did you enjoy this article? I would love to hear your thoughts, so don’t be shy and comment below! Please don’t forget to subscribe to my RSS-feed or follow my feed on Twitter, Google+ and Facebook! If you enjoyed the following article we humbly ask you to comment, and help us spread the word! Or, if you would like, drop me an email.
Foundations of Drawing with Will Kemp
Anyone can learn how to draw. Success comes down to three things:
Shape: By focusing on the shapes of the objects (and more importantly the shapes betweenthe objects) you can view subjects with a whole new outlook and focus.
Simplicity: You'll get better results by concentrating on simple subjects and drawing techniques that will still prove powerful when used together.
Structure: A structured approach makes drawing easier to master.
Each chapter in this course is built on these three principles, combining drawing theory and practical examples with worksheets and drawing assignments. Will Kemp brings his passion for teaching and infectious love of drawing together in these lessons. You'll learn about line, value, tone, negative space, and perspective, and come away with the confidence to start making drawing a daily practice.
This course was created and produced by Will Kemp. We're honored to host this training in our library.
Topics include:
- Materials you need to draw
- Drawing theory
- Framing your composition
- Using the picture plane
- Creating contrast
- Using negative space to create more powerful compositions
- Creating form from shadows and light
Did you enjoy this article? I would love to hear your thoughts, so don’t be shy and comment below! Please don’t forget to subscribe to my RSS-feed or follow my feed on Twitter, Google+ and Facebook! If you enjoyed the following article we humbly ask you to comment, and help us spread the word! Or, if you would like, drop me an email.
If you want to learn about lighting, start with a camera.
If you want to learn about lighting, start with a camera.
What I learned most from was a tiny manual camera. I learned so much from adjusting the f-stop, changing to different lenses. I have a digital camera now, but I use manual settings. I think it’s really, really important. Changing one setting can screw up an entire photo. If you’re always using auto settings, it’s hard to learn.
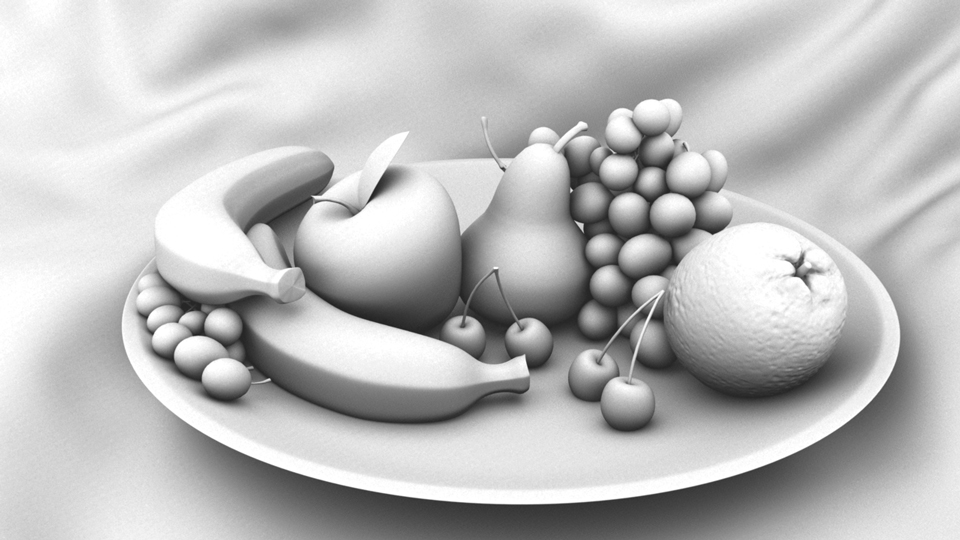
All you need to know about Ambient Occlusion
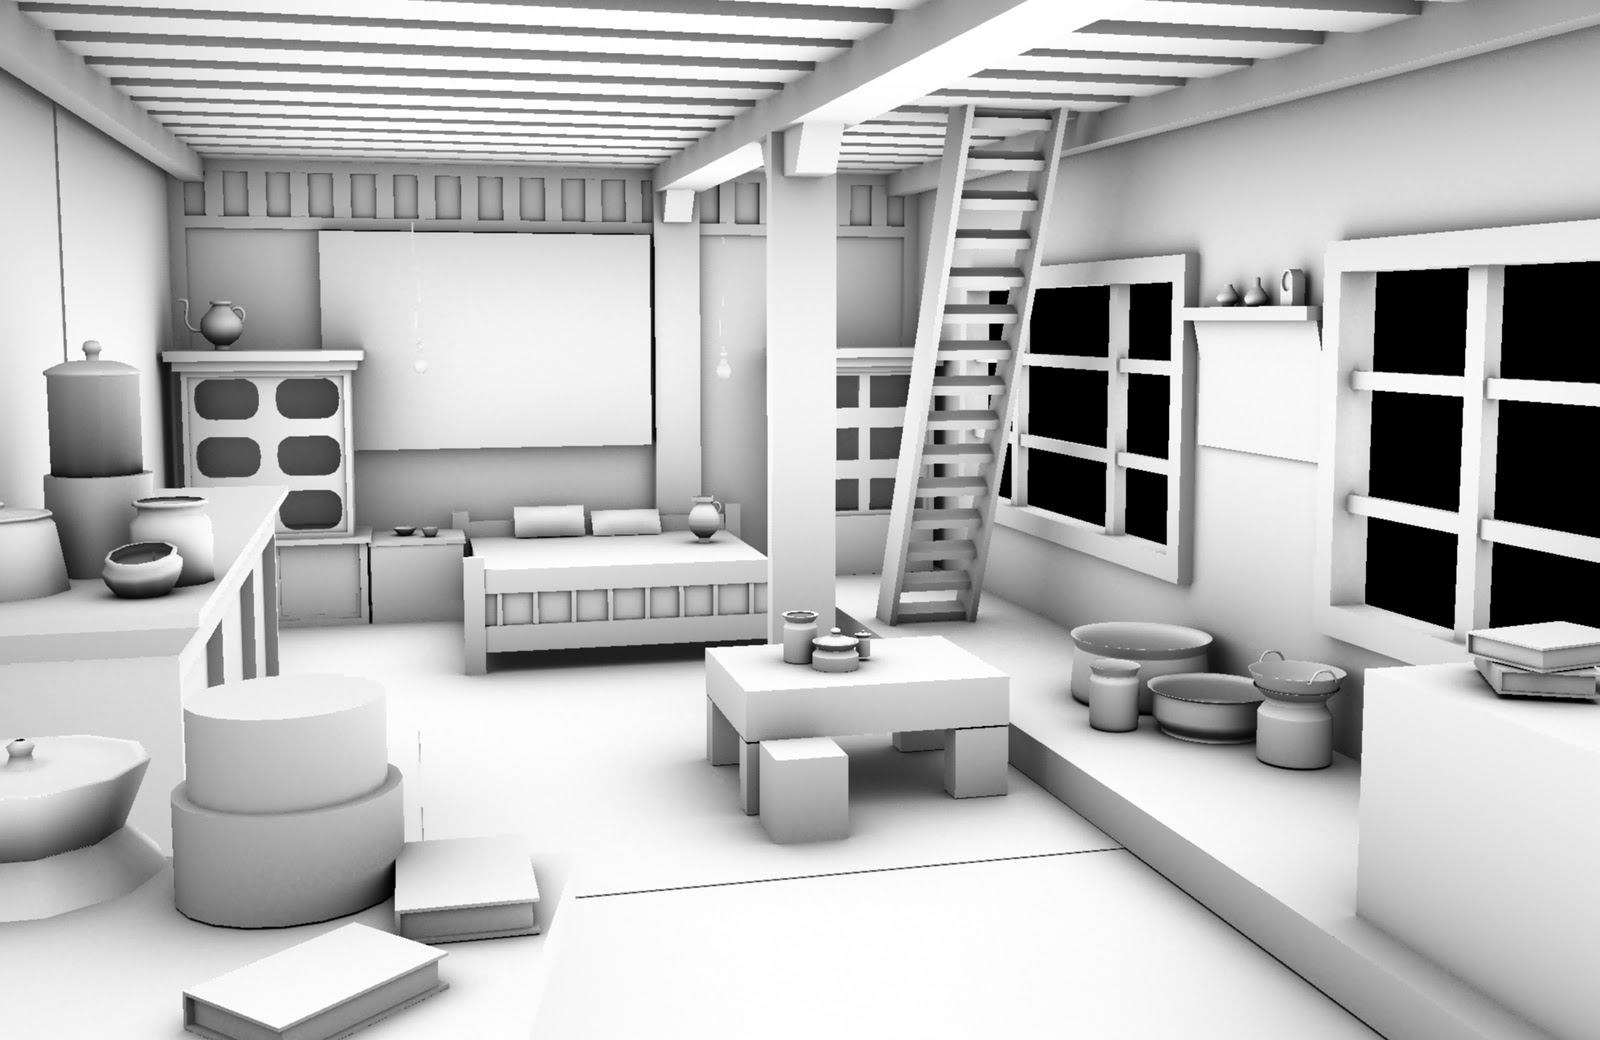
If you have come across a term called as Ambient Occlusion and wonder what it is, then let me tell you in brief about it. Ambient Occlusion is a term which is used in computer graphics. It is used to represent how much each point that is present in a scene is being exposed to ambient lighting. Hence, we can say that the inner side of a tube which is enclosed is darker i.e. it is more occluded than the other surface which is on the outer side. And when it comes to even deeper inner side of the tube, it becomes even more occluded.
Ambient Occlusion
It is a highly sophisticated calculation that includes simulating the darkness on the corners, cracks, creases and intersections of objects. It is an effective method to approximately simulate the radiation and deflection of light in the real world, through the computer graphics. It tries to give a darkening effect to the areas of an object that would not receive enough light and thus makes the object appear more realistic. Ambient occlusion completely depends on the theory of illumination. So it needs a good understanding of light and its properties to give a real time effect to the objects in graphics. However, there is no ambient occlusion in the real world. It is a rendering technique in the world of graphics that can duplicate the shading of light on an object in the real world. This method is implemented in real-time games, animation fields etc.
The visual effect ambient occlusion was first developed by ILM i.e. Industrial Light and Magic and was used for the first time in the film Pearl Harbor in 2001. With NVIDIA’s GeForce FX, the hardware support for this effect is available since 2003.
Ambient Occlusion
When it comes to the games, it was first used in a game developed by Crytek called as Crysis which was out in 2007. And in 2009 ambient occlusion was added in the drivers of v185 as a control panel feature, by NVIDIA. Use of this technique in games has become enormously popular for its 3D effect which gives a real time effect to the user. It is capable of creating a duplicate graphical model for any real world object which would seem as real as the actual object.
In case of all modern games, the ambient occlusion is present in the graphics menu as HBAO i.e. Horizon Based Ambient Occlusion and SSAO i.e. Screen Space Ambient Occlusion. Both of these refer to Ambient Occlusion only. If you want to know how to activate Ambient Occlusion in a game that by default doesn’t support it, then you can do it easily by following the steps mentioned here one by one.
Ambient Occlusion
At first you have to right click on the desktop and right click on the NVIDIA control panel option. Then, right click on the “Manage 3D option” after which you have to highlight “Ambient Occlusion”. Then choose the other options as per your need and desire and enable the AO feature to experience better gaming experience.
White Color Balance in PhotoShop
This tutorial is for those “special times” when you either forgot to set the white balance setting on your V-Ray virtual camera, or you like the control you get in post.
Dodge and Burn
Dodge and Burn refer to a darkroom technique when printing analog photographs in a dark room.
When you are dodging a print, you take a wand with a shape on the end of it that would block out some of the light from the enlarger from reaching the paper. Conversely, you could burn a print, or make it darker, by taking a card with a hole in it and only adding light to the print through that hole.
Working Non-Destructively
I want to talk a bit about working non-destructively. Some rendering artists prefer to work completely non-destructively or never apply color correction directly to a layer. I began my career painting traditionally, with physical paint, markers, and color pencils. Where, every stroke the artist added to a matte was for real and couldn't be taken back unless you painted over it. In some ways, I think artists have lost something. Especially in spontaneity and directness, when you never have to make a final decision on any element.
Working entirely non destructively also results in huge file sizes. And projects with so many layers it gets nearly impossible to tell what layer is doing what, or find any element. This is counter to where the industry is moving, but I will often work directly on simple layers for the sake of keeping my project more manageable. Like I said, this is a matter of workflow, and you may want to work completely non-destructively in your rendering.
Color Correcting Individual RGB Channels
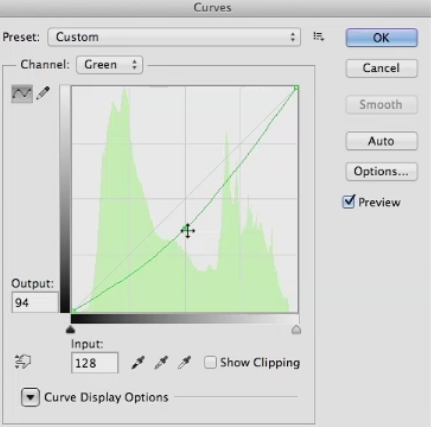
Lets talk about the really super charged part of color correcting, and that's working with the individual RGB channels and curves. I'm just going to show you how to do this in curves from here on out, but you can do all of this in levels just not as well. First lets look at the red channel, so choose it from the drop down menu If you pull up on the mid tone you'll add red to the image and lighten it. If you pull down on the curve you darken the image since you are removing red, and add blue green to the image.
RGB color correcting can be a little confusing since the next choice in the menu is green. You may think, won't that do kind of the same thing, when I pulled down on red, I added green, so won't this just be the reverse of the red channel? The answer is no, the two channels give you very different results, since if you pull down on the green channel, you add a magenta-red. Well the red channel added an orange-red when you pulled up on it. If you pull up on the green curve, it adds a yellow-green to the image, quite different from the blue-green the red channel added.
So, the two channels aren't just mirror images of each other. They yield very different color results when you modify them. The last channel is blue, and it's obvious that if you pull up on the curve it adds blue to the image, and lightens it. But, if you pull down on he curve it adds yellow.Maybe not the color you would have immediately thought of as the opposite of blue. So the color you get, especially from pulling down on curves may not initially be what you expect. The only way to internalize what these channels do is to work with them a lot and over time, you'll see what moves give you the results you want.
I'm primarily showing moving the mid-tones of the color channels, but you can also pull down on the white point in blue to flood the image with yellow. Or pull up on the black point to reduce contrast, and add blue all over the image. Same with the red channel. Pull up to flood the image with red, or pull down to remove red. And the green channel. So you'll just need to experiment with these, until you really get the hang of what each channel does. Before we leave this topic, I want to mention what I think is the best book on color correction ever written, called Professional Photoshop: The Classic Guide to Color Correction by Dan Margulis.
Dan is a prepress master, and a lot of the book involves color correcting in CMYK color space, the space where all printed materials live. However, all of the color correcting concepts are valid in other color spaces, and in later editions he has gone more into RGB color correction. I learned more about color correction from this book than from anything else I've ever read, and I would highly recommend it to any aspiring matt artist.
Global illumination (GI) explained
V-Ray comes equipped with a number of extremely powerful Global Illumination, or GI, engines that can help us recreate pretty much any natural lighting scenario-- and a good number of unnatural ones--should we have a mind to. If we just come into the 3ds Max User Interface, if we come up to the Render Setup dialog, we can just show you where V-Ray's Indirect Illumination Tools are found. And we just want to come along in our tabs to the Indirect Illumination tab, and here you can see with the systems turned on, we have access to a whole array of Global Illumination Tools.
We have access to a number of different Global Illumination engines. The feature sets of these tools are robust, they are powerful, they give us the ability to easily switch between physically-correct and artistically-correct approaches to our lighting setups. They can be tuned to be fast enough for even the most demanding of production schedules and yet at the same time still output high-quality images for us. Ultimately, these systems can remove an awful lot of the guesswork that would otherwise be involved in trying to manually recreate a realistic lighting solution.
Really all we need to do is evaluate the lighting needs of our current project, choose the tools we want or need to use--of course we need to run through our lighting setup--and then we can have V-Ray's GI engines assist us in achieving our artistic goals. Now, for the benefit of those somewhat newer to 3D rendering, we are going to start this chapter making the assumption that you may be somewhat unfamiliar with just what Global Illumination is and so would benefit from just a quick breakdown of its definition and workings. An understanding of just what Global, or Indirect Illumination, is can probably best be gained by contrasting it to its lighting opposite, which is Local or Direct Illumination, as we see here.
By default adding CG lights into a 3D scene and rendering without any GI systems enabled will give us only this type of Local Illumination. This computer graphics illumination is not, of course, how light behaves in the real world. This is why we need GI systems in our renderers. They allow us to simulate the physical reality of light, which of course in the real world, spends a lot of time, a lot of energy bouncing around our environments.
Even the V-Ray Dome Light, although it does give 180 degrees of light, is still a direct only light source. Let's have a look at the basic GI process. It goes a little bit like this. As direct light is emitted from a source, such as our light here, it will travel until it strikes the surface of an object in our scene. At this point, a lighting phenomenon known as inter-surface reflection occurs. All this phrase really means is that a portion of our life energy will reflect, or bounce, and create a Global or Indirect Illumination effect in the scene.
Dependent upon the amount of energy coming from our light source, we should actually see that our light is able to bounce from a number of surfaces. With each bounce, it will lose a bit of energy, and with each bounce it will pick up a little bit of coloration inherited from the diffuse properties of surfaces it has interacted with so far. The result of all of this bouncing is that our surroundings become lit, and even the dark nooks and crannies of an environment will end up receiving at least some level of lighting, even though they may be far away from direct light sources.
This complex process is what really gives us the ability to create lighting scenarios that have a very high degree of accuracy and realism to them. We can even conduct lighting analysis test that will give architects, engineers the ability to measure just how much illumination a given environment and a given set of light sources will produce. And now with that primary explanation of Global Illumination, we are ready to move on to examining a very particular aspect of V-Ray's GI implementation, and that is its use of primary and secondary bounce engines.


