

Color Correcting Individual RGB Channels
Lets talk about the really super charged part of color correcting, and that's working with the individual RGB channels and curves. I'm just going to show you how to do this in curves from here on out, but you can do all of this in levels just not as well. First lets look at the red channel, so choose it from the drop down menu If you pull up on the mid tone you'll add red to the image and lighten it. If you pull down on the curve you darken the image since you are removing red, and add blue green to the image.


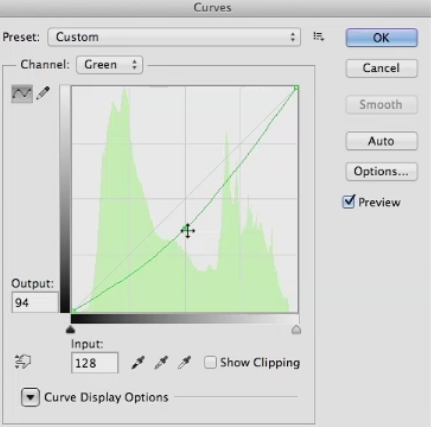
RGB color correcting can be a little confusing since the next choice in the menu is green. You may think, won't that do kind of the same thing, when I pulled down on red, I added green, so won't this just be the reverse of the red channel? The answer is no, the two channels give you very different results, since if you pull down on the green channel, you add a magenta-red. Well the red channel added an orange-red when you pulled up on it. If you pull up on the green curve, it adds a yellow-green to the image, quite different from the blue-green the red channel added.

So, the two channels aren't just mirror images of each other. They yield very different color results when you modify them. The last channel is blue, and it's obvious that if you pull up on the curve it adds blue to the image, and lightens it. But, if you pull down on he curve it adds yellow.Maybe not the color you would have immediately thought of as the opposite of blue. So the color you get, especially from pulling down on curves may not initially be what you expect. The only way to internalize what these channels do is to work with them a lot and over time, you'll see what moves give you the results you want.
I'm primarily showing moving the mid-tones of the color channels, but you can also pull down on the white point in blue to flood the image with yellow. Or pull up on the black point to reduce contrast, and add blue all over the image. Same with the red channel. Pull up to flood the image with red, or pull down to remove red. And the green channel. So you'll just need to experiment with these, until you really get the hang of what each channel does. Before we leave this topic, I want to mention what I think is the best book on color correction ever written, called Professional Photoshop: The Classic Guide to Color Correction by Dan Margulis.

Books by Dan Margulis
Dan is a prepress master, and a lot of the book involves color correcting in CMYK color space, the space where all printed materials live. However, all of the color correcting concepts are valid in other color spaces, and in later editions he has gone more into RGB color correction. I learned more about color correction from this book than from anything else I've ever read, and I would highly recommend it to any aspiring matt artist.